The blog provides step-by-step instructions on how to add a ‘print shipping label’ button to the emails sent out from your WooCommerce store. The tutorial covers setting up the shipment details, configuring the shipping label settings, and printing the label.
A WooCommerce shipping label contains information regarding the origin and the destination of the shipping package for every node in the supply chain to understand.
Printing these labels is of critical importance to reduce friction during product shipment. The WooCommerce Shipping Labels, Dispatch Labels, and Delivery Notes plugin by WebToffee delivers such functionality to us as easily as possible.
Print WooCommerce Shipping Labels – Step-by-Step Guide
Install and activate the Print WooCommerce shipping label plugin to generate and print shipping labels for your WooCommerce store. However, to activate this plugin, the free version of the WooCommerce invoice, packing slip and shipping label plugin has to be installed and activated on your store.
Let’s take a look at the steps involved in printing shipping labels in WooCommerce using the shipping label plugin for WooCommerce.
- Set up the shipping label settings in WooCommerce
- Customize the shipping label as per your business requirements
Let’s look at these two steps in detail.
Setting Up WooCommerce Shipping Label
From the WordPress dashboard, Select Invoice/Packing > Shipping Label.
A Shipping Label can be set up in two easy steps:
Step 1: General Settings
You can configure the general settings required for the shipping label.
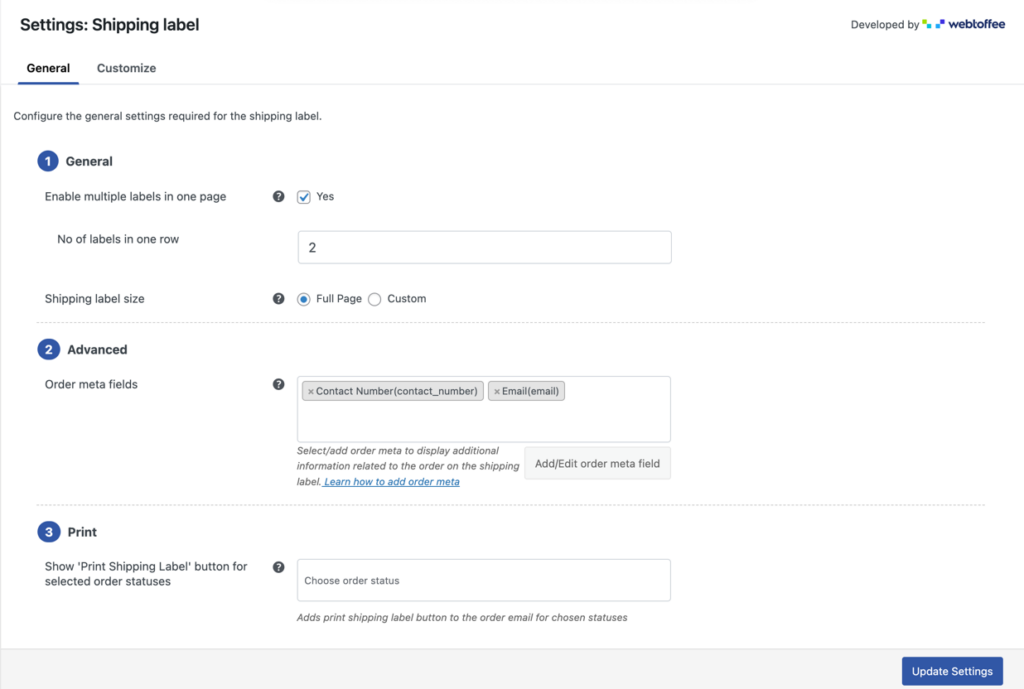
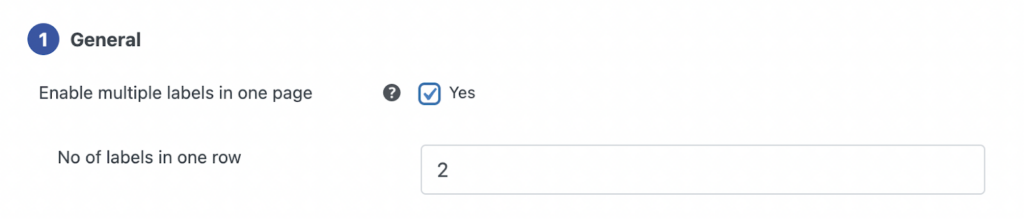
- Enable multiple labels in one page – Choose yes to generate multiple labels on one page itself. When enabled, you will get an option to input the number of labels in a row.
- Full Page: This option allows you to print the label which will be spread over the full page. The printing depends on the browser printing option.
- Custom: This option allows you to print the label in the desired size. You can configure custom shipping label size of your own by entering size values in terms of width and height (inches).

After the changes you made, press the Update Settings button.
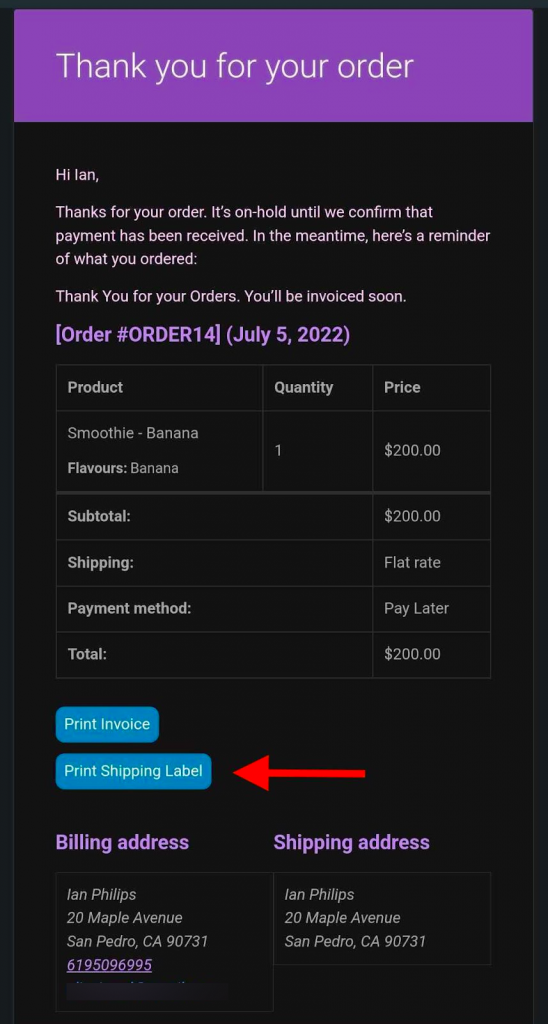
A sample order email with the ‘print shipping label’ button is given below.
Step 2: Customize the label template
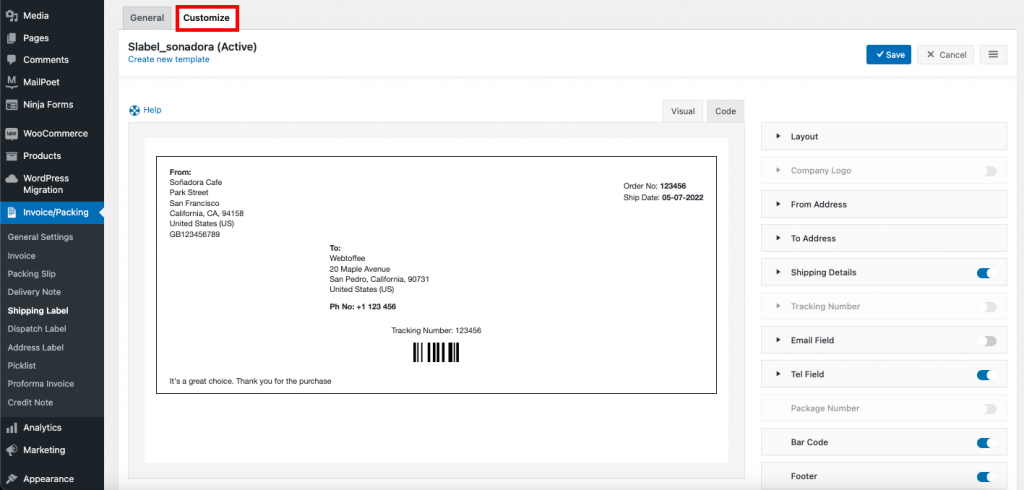
- In the Customize tab, select create a new template, can choose any templates from the pop-up menu.
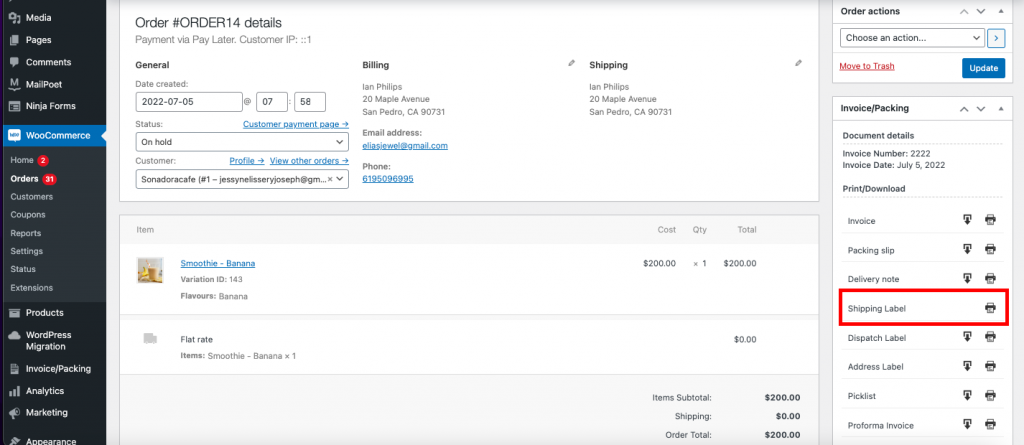
You can directly print the shipping label by navigating to WooCommerce > Orders > the specific order > Invoice/Packing.
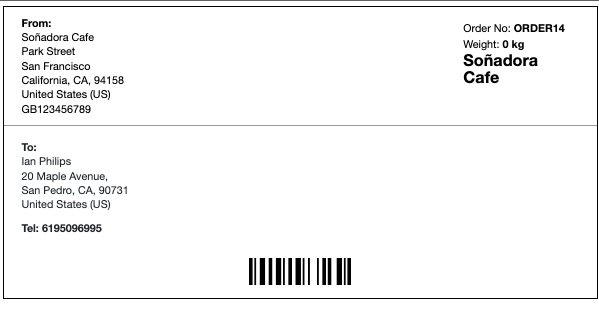
The Printed Shipping Label is shown below:
Conclusion
Shipping labels are an important document to ensure the smooth delivery of your products thus the credibility of your store.
The WooCommerce PDF invoice, Packing slips, Delivery notes, and Shipping label plugin offer an easy way to auto-generate these documents for free and with little or no effort. The premium WooCommerce print shipping label plugin offers much more customization than free variations.
Learn more about setting up and customizing WooCommerce shipping labels via the article How to customize WooCommerce shipping labels.


Comments (14)
Wan
June 9, 2023
Hi,
this shipping label setting directly intergrated to shipping provider ?…for example i use abc express, can i set abc as a shipping provider and bar code printed on awb generate from abc express?
Hema
June 12, 2023
Hello Wan,
Thanks for reaching out.
The shipping label generated is generic based on the WooCommerce orders. Presently the plugin doesn’t offer any such integrations.
Matt
June 9, 2022
Can this plugin automatically print the shipping labels to a thermal printer once an order has been received/completed?
Mike
July 18, 2022
Hello Matt,
Our plugin is designed to generate documents and labels based on the WooCommerce order statuses and attaches the PDF copy of the documents along with the WooCommerce order status email for the selected order statuses. We understand your requirement. However, our plugin currently doesn’t offer any options to automatically send shipping label print instructions to the printer. Thanks for understanding.
Roy
January 20, 2022
Hi, I was wondering if we have drop shipping vendors and our own products too and we only want to print our own shipping labels for certain products and or certain categories of products… does this work. Also, they have shipping tracking numbers we put in for their products. So your software does not interfere with the products we don’t want your product for… ?
Mark
March 23, 2022
Hi Roy,
Greetings from Webtoffee!
Our plugin is capable of printing generic shipping labels with the option to add order meta details. However, the requested level of customization isn’t supported. Sorry that we are unable to help.
AO
October 29, 2021
Hi, can the “print shipping label” button be enabled to be added on the admin receipt email? For example;; we want the admin who receives the receipt confirmation email of the sale to have the “print shipping label” button within the email… not to the customer invoice email …
Mike
October 31, 2021
Hi there,
Thanks for reaching out to us. Currently, our plugin offers the print button for the selected order statuses. You can add the print button to your receipt confirmation email if you choose the order status at which the admin receives the receipt confirmation mail.
Diane Jentilet
January 27, 2021
Hi – i just installed this plugin and its not giving me an option to print multiple labels per page, as described above. The only option is full page.
Mark
January 29, 2021
Hi Diane,
Kindly ensure that you are using the paid/premium version of the plugin. Free version does not support it.
Leon
October 19, 2020
Hello. When looking at Orders list, is there a way to differentiate between which order has been printed the Shipping Label and which have not yet ? Thank you.
Mark
October 19, 2020
Currently, there is no option to differentiate it.
Bryan Assata
February 25, 2019
Is there a way to include custom profile fields in the “To” address?
Mark
February 26, 2019
Hi,
There is no direct option to do so. We may be able to help you with some custom code snippet. Please submit a support ticket here with full details of the requirement.