Overview
DHL Express is a division of the German logistic company Deutsche Post DHL providing domestic and international express mail services. Deutsche post is the world’s largest logistics company operating around the world, particularly in sea and air mail. With the plugin, you get the real time rate using DHL API. Rate depends on box dimension, weight and address of shipper and receiver. You can print the labels with shipment tracking information.
This tutorial will give you an excellent launch pad to kick start the usage of DHL Express shipping plugin. It will give you all the essential knowledge and step-by-step instructions.
Setting Up DHL extension
You can configure DHL Shipping method as per your requirement. You can navigate to settings as:
- Navigate to Admin Dashboard > Stores > Configuration > Sales > Shipping Methods > DHL.
General Settings
The general setting fields are as shown below:

- Enabled for Checkout: Select Yes from the drop-down list to enable the DHL shipping method.
- Title: Method Title is visible in Cart page. Specify Title as required(defined by you).
API settings
API settings are used to get real rates, labels and tracking information from DHL.
How to get Credentials?
Getting SiteID and password for countries other than United States (UK and Rest of the world)
The customer should contact DHL account manager.
The account manager must request integration via DHL Presales department.
Presales will then provide the customer with live credentials.
Getting SiteID and Password for United States
You need to write to xmlrequests@dhl.com along with your full Account details like account number, region, address, etc. to get API Access.
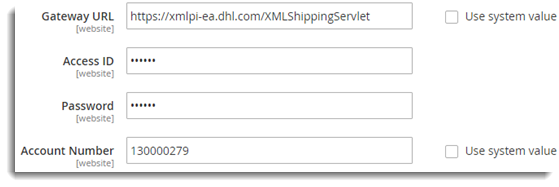
The DHL API Setting fields are as shown below:

- Gateway URL: Enter Gateway URL provided by DHL.
- Access ID: Enter your Access ID which you can obtain from DHL.
- Password: Enter the password for Site which you can obtain from DHL.
- Account Number: Enter your DHL online account number which you can obtain from DHL.
Content Type Setting
This setting is used to specify the type of the content of parcel. The setting is as shown below:

The available options are as given below:
- Document: If you want to send the parcel which contains documents only, then select this content type.
- Non Document: If you want to send the parcel which contains items other than a document, then select this content type.
Handling Fee Settings
You can add the extra shipping price to actual shipping cost either for entire order or per package. You can mention the fixed amount or the percentage of the total order. The settings are as shown below:

Weight and Size Setting
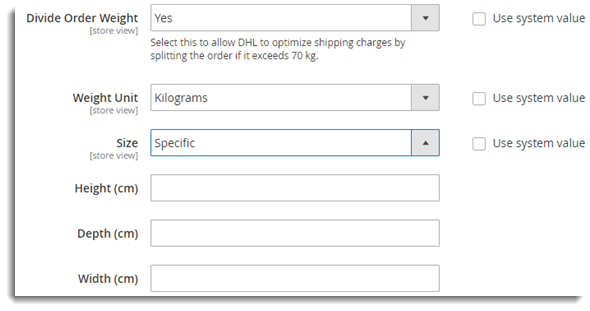
These fields enable you to set weight unit or divide the order if the order is more than 70 kg. You can also set the size of a parcel as per requirement by specifying the dimension. The settings are as shown below:

- Divide Order weight: Select Yes from the drop-down list to allow DHL to optimize shipping charges by splitting the order if it exceeds 70 kg.
- Weight Unit: Extension converts product weight to the selected unit. Weight in selected unit gets passed to DHL. The available options are as given below:
- Pounds: Product weight gets converted to the pound before sending it to DHL API.
- Kilograms: Product weight gets converted to Kilograms before sending it to DHL API.
- Size: Specify the size of the parcel. The available options are as given below:
- Regular: Order is packed in regular size packages which are provided by DHL.
- Specific: Specify the dimensions of the packages in which you wish to pack the order.
Allowed Methods
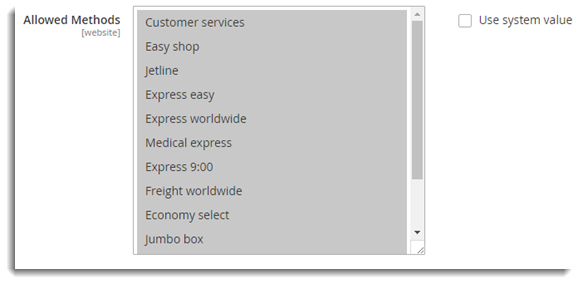
You can select the methods which you want to be available for the customers. The settings are as given below:

Allowed Methods:Select the methods which you want to be available for the customers from the drop-down list.
Ready Time Setting
It is a time for making the package ready to ship after the order submission. The Setting is as shown below:

Enter the ready Time in hours.
Display Error Message
In case, the customer does not get any shipping method, this specified message is displayed to the customer. The setting is as shown below:

Free Shipping
You can specify free shipping methods, or you can specify the threshold amount for free shipping. The settings are as given below:

- Free Methods: Select the methods which you want to be available free of cost for the customers from the drop-down list.
- Free Shipping Amount Threshold: Select Enable option from the drop-down list if you want to specify the threshold amount for free shipping.
- Free Shipping Amount Threshold: If the order amount is more than the specified amount, then you need to provide free shipping for the customer. Enter the amount according to your requirement.
Country Settings
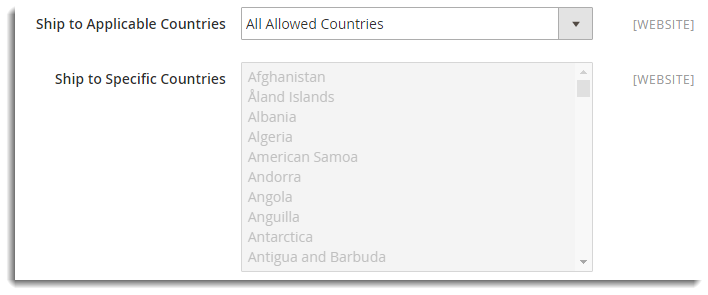
The Country settings are as shown below:

Ship to Applicable Countries: This field allows you to select countries for shipping. The available options are as given below:
- All allowed Countries: This option provides availability of the extension to the customers in all countries which are set in General Settings. It is set as a default option.
- Specific Countries: This option allows you to add the list of countries. Shipping Method gets available only in the listed countries.
Show Method if Not Applicable
This field allows you to show the shipping method even if the shipping method is not available for the order. The setting is as shown below:

Select Yes from the drop-down list if you want to show method even if not applicable.
Debug
If you are not getting proper rates( lesser or higher than expected), not getting all the available shipping options, or not getting rates at all, then you enableDebug option to find error(s). By enabling debug mode, you can trace issue using log. The Setting is as shown below:

Select Yes option from the drop-down list to enable debug mode.
Sort Order
If more than one shipping methods are enabled, then this option allows you to position the shipping method among all the available that will be displayed on the checkout page. The setting is as shown below:

Specify the number to show this shipping method on the checkout page.
For Example: Sort order for FedEx is 1, UPS is 2 and Stamps – USPS is 3, then the shipping services for Stamps – USPS will be displayed after FedEx and UPS.
Checkout
After setting up DHL Configuration Settings, your customers can see all available services list on the checkout page. The Customer can select the items with the required shipping method and place the order.
Create Shipment Label
- To create the shipment and print the label, Navigate to Dashboard > Sales > Orders.
- Click View to see the order and click on Ship to ship the order.
- To Create the shipment, select checkbox Create Shipping Label and click Submit Shipment.
- Select Create Shipment Label checkbox and click Submit Shipment. Click Add Products to Package. Add selected products to package. Click Save.
- The Created shipment with Message appears.
Label Printing
- To print a label, Navigate to Order View > Shipments.
- Click View the shipment.
- Click Print Shipping Label to print the label.
It may be because your site id is for Live account and you may be using it in Test mode.
I am using DHL default Shipping method in magento. but getting error “Site Id is wrong”. and i am testing at development server not at live domain. and one think what is the deference DHL and DHL(deprecated).