With Stripe Payment Gateway Plugin for WooCommerce, you can effortlessly accept major credit cards for payments on your WooCommerce store. Some of the allowed cards are the following:
- MasterCard
- Visa
- American Express
- Discover
- JCB
- Diners Club
Customers can also save credit card information for future use. The complete payment transaction occurs on a Stripe iframe loaded on your store. Hence, your customers do not have to leave your site for payment, making an effortless checkout process.
All right, now let’s get down to configure the plugin.
Getting started
- Install and activate the Stripe payment gateway for the WooCommerce plugin.
- From the WordPress dashboard, go to WebToffee Stripe > General Settings.
- Head on to the Credit/Debit Cards tab.
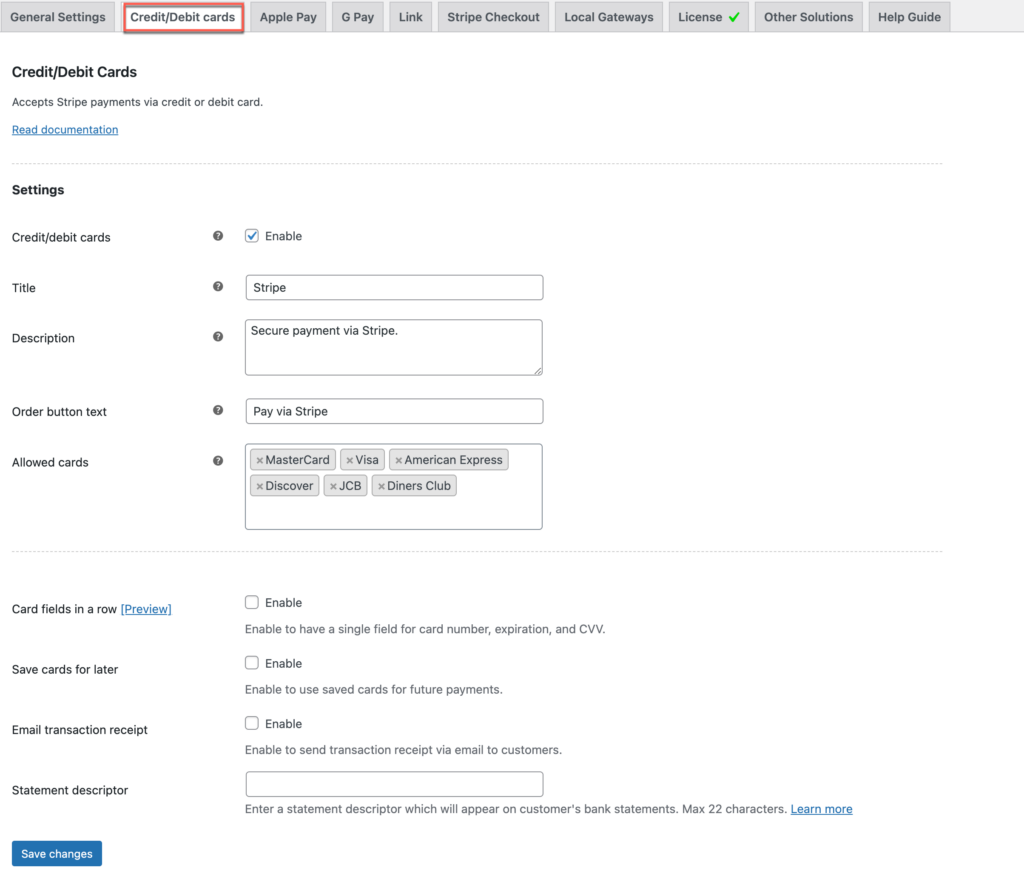
Settings: Credit/Debit Card Pay
Stripe settings come with the following options:
- Credit/Debit cards: Enable to accept credit/debit card payments through Stripe.
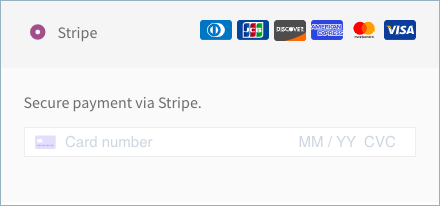
- Title: Input title for the payment gateway displayed at the checkout.
- Description: Input texts for the payment gateway displayed at the checkout.
- Order button text: Input a text that will appear on the order button to place an order at the checkout.
- Allowed Cards: Accepts payments using selected cards. Displays the Icons of chosen cards at the checkout. Cards supported by the plugin are the following:
- MasterCard
- Visa
- American Express
- Discover
- JCB
- Diners Club
- Card fields in a row: Choose the style in which you want to show your credit card form. When checked, the credit card form will display the credit card number field, expiry date, CVV, and postal code in a single field.
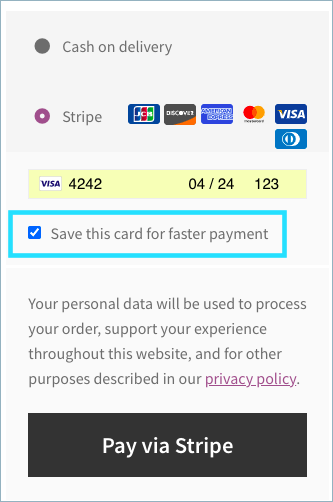
- Save cards for later: Enable to save credit or debit cards information to make your customer’s next purchase quick and easy.
- Email Transaction Receipt: Enable this option to send transaction receipts via email to customers. Works in live mode only.
- Statement Descriptor: You can enter a statement descriptor that will appear on customers’ bank statements when they make or receive payments. A complete statement descriptor – either a single static descriptor or the combination of a prefix and suffix – must meet the following requirements:
- Contains between 5 and 22 characters, inclusive.
- Contains at least one letter.
- Does not contain any of the special characters < > \ ‘ ” *.
- Reflects your doing business as (DBA) name.
- Contains more than a single common term or common website URL. A website URL only is acceptable if it provides a clear and accurate description of a transaction on a customer’s statement.
Finally, click Save changes to save/update the plugin settings.
Credit/Debit card checkout using Stripe
After you configure all the settings, move to the checkout page to view the credit/debit card checkout process.
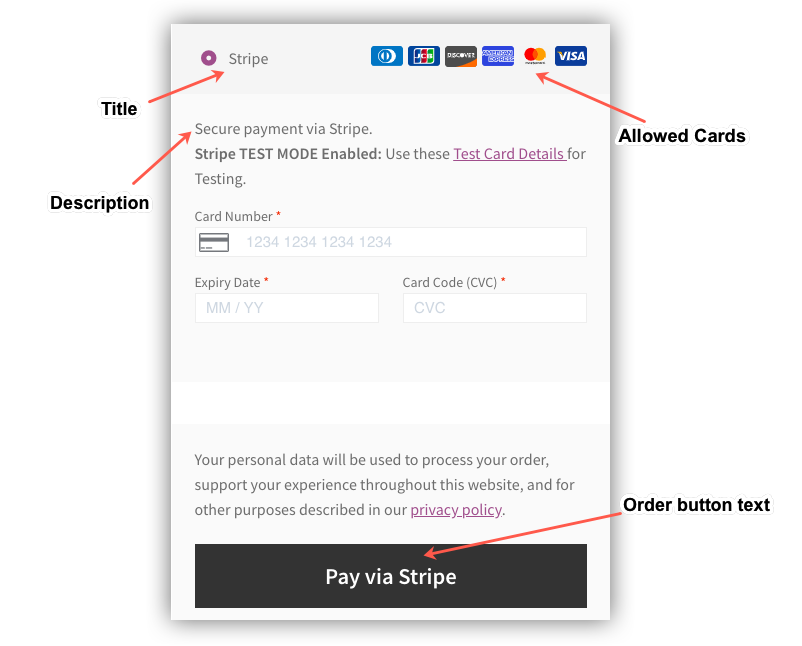
Specify the card details like the Card Number, Expiry Date, CVV, and then click on the Pay via Stripe button to continue the payment process.
That’s it! with these simple steps, you can accept credit card payments with Stripe Payment Plugin for WooCommerce.
Manage saved card from ‘My Account’
To add or delete saved card details from your account, head on to My Account > Payment methods.
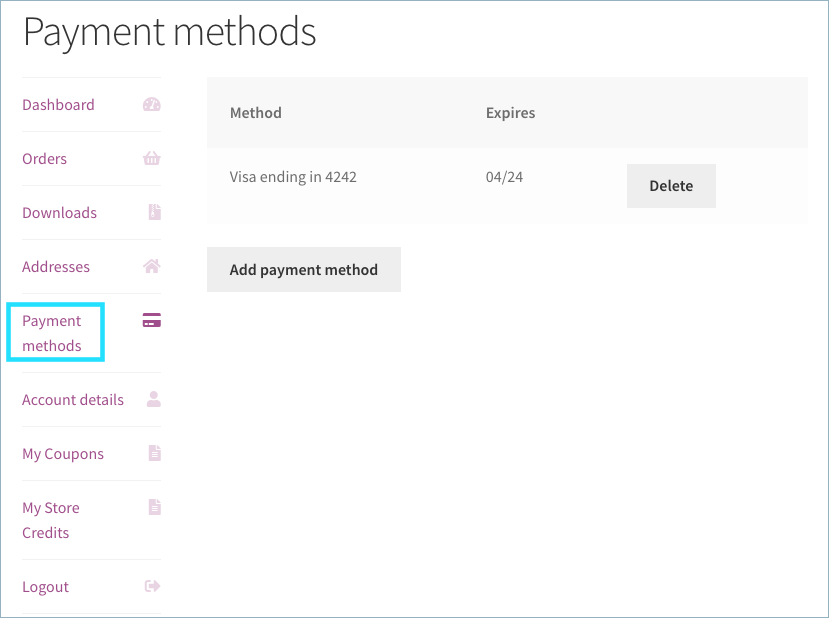
You can add a new payment card or delete the existing one from My account.
For a better understanding of each feature of the plugin, visit our documentation page.
Cody Mitchell
January 24, 2022
Can some contact me urgently as your plugin is acting as a card skimmer on on website. Stripe checkout is on the checkout pages asking for details and going to the payment gateway. This is also triggering avast pop-up warning for infected js:cardstealer
Alan
February 2, 2022
Hi,
Sorry, we didn’t understand the issue you are facing. Can you please reach us via support and brief us on the issue you are facing with the help of screenshots?
Nicoleta
May 18, 2021
Where I can find the webhook link in order to add an endpoint in the stripe account? There is it still necessary to add the endpoint in the stripe account? Please advise!
Mark
May 21, 2021
Hi Nicoleta,
Currently, our plugin does not support webhooks and it is not necessary for the functionality of the plugin. We are considering adding it in future releases.
Terrence Connelly
October 16, 2020
Is it necessary to enable the Stripe-Checkout option. Is there a downside if I only offer Stripe via Credit/Debit card payments, Apple Pay and Alipay?
Mark
October 17, 2020
You can disable the Stripe checkout feature if you don’t want it. The other options will work perfectly fine.