Apple Pay is one of the popular mobile payment solutions in the world today. This payment gateway is provided by Apple Inc., and is basically used for your payments involving iOS apps, watchOS apps and websites on Safari.
Stripe Payment Gateway Plugin for WooCommerce provides hassle-free process to United States Dollar (USD).
If you wish docs/apple-pay/web#going-live” target=”_blank” rel=”noopener noreferrer”>this article, and follow the given procedure.
This article intends to know more about other various features of the plugin.
Let’s break down these settings in five simple steps.
1. Generic settings for Apple Pay payments
Following are the settings to be configured.

- Stripe Payment: Tick this checkbox to enable Stripe payment.
- Stripe Overview Page: Tick this checkbox to enable Stripe Overview Page.
- Title: Enter a custom title for Stripe payment. This title will be visible on checkout page.
- Description: Enter a custom description for Stripe payment. This description will be visible on checkout page.
- Order Button.
- Preferred Locale: You can select a custom language for Stripe checkout.
2. Enter Stripe Credentials
To use Stripe payment for your WooCommerce sto register in Stripe, and receive your test and live credentials.
Once you receive your credentials, enter them in the following fields:

- Transaction Mode: With this option, you can set required API mode for Stripe payment gateway.
Available options are:- Test Mode: This mode is used do some test purchasing by using Stripe.com API. There is no real money transaction involved. This mode is used only for development purpose, and requires the Stripe test credentials.
- Live Mode: This mode is used for actual payment transaction, and requires live credentials.
- Test/Live Secret Key: Enter the test (or Live) Secret Key provided by Stripe here.
- Test/Live Publishable Key: Enter the respective test (or Live) Publishable Key.
3. Define Stripe Actions
The settings are as shown below.
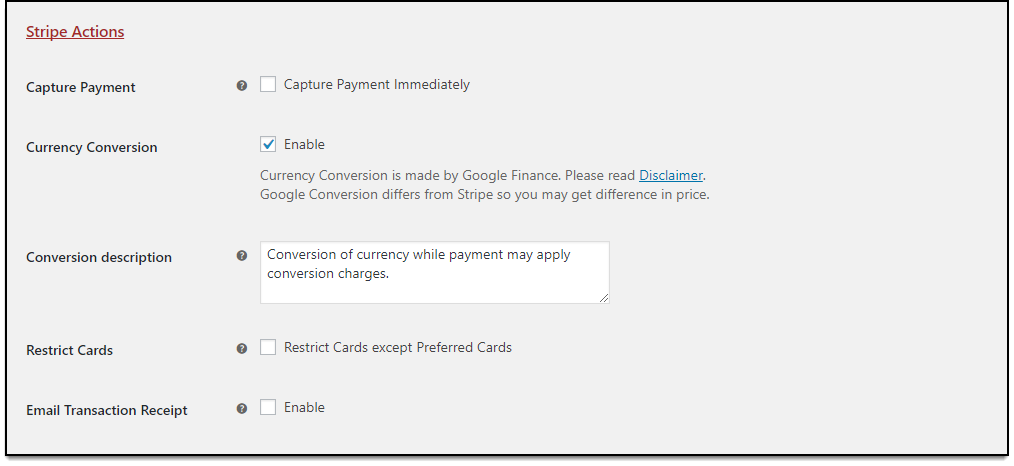
- Capture Payment: Tick this checkbox to capture the payment as soon as an order is placed. Else, you can capture payments manually in Stripe Overview Page.
- Currency Conversion: Enable this checkbox to any desired currency.
The conversion is made using Google Finance. Google conversion differs from Stripe, hence you may get a little difference in price. Read disclaimer for more information. - Conversion description: Enter a customers on checkout page.
- Email Transaction Receipt: Tick this checkbox tomers. This email is sent by Stripe itself, and is applicable only in live mode.
3. Configuring Apple Pay Settings
In this section, we configure all the vital settings for Apple Pay payments.
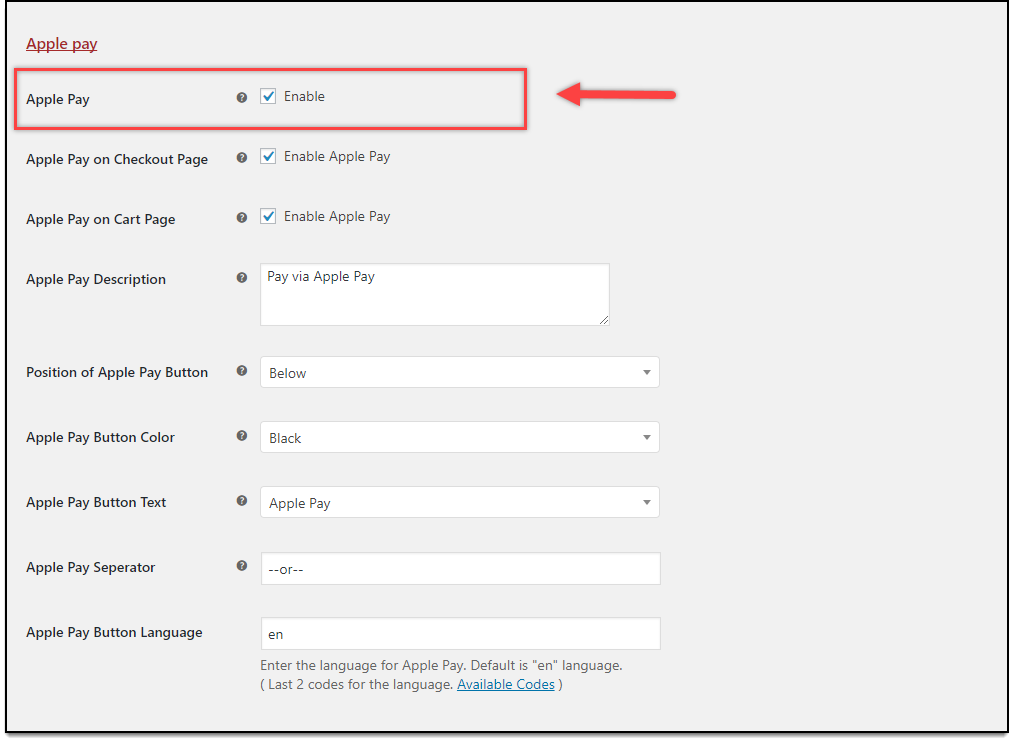
- Apple Pay: Tick this checkbox to enable Apple Pay.
- Apple Pay on Checkout Page: Tick this checkbox to enable Apple Pay checkout on your checkout page.
- Apple Pay on Cart Page: Tick this checkbox to enable Apple Pay checkout on your cart page.
- Apple Pay Description: Enter a custom description for Apple Pay payment. This description will be visible on Apple Pay checkout.
- Position of Apple Pay Button.
- Apple Pay Button text from the following options:
- Apple Pay
- Buy with Apple Pay
- Set up Apple Pay
- Apple Pay Separatons.
- Apple Pay Buttools/languagecode.html” target=”_blank” rel=”noopener noreferrer”>this table for language codes.
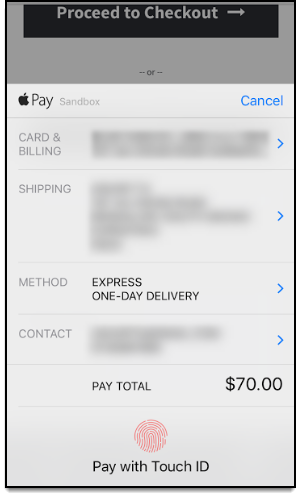
5. Apple Pay Checkout Page
The Apple Pay checkout button will be available on cart and checkout page, as configured in the plugin settings.
- Apple Pay checkout on Cart page:
 Apple Pay Checkout on Checkout Page

After you click on Apple Pay checkout button, the Apple Pay checkout form appears. A sample checkout form is as shown below.
In this way, we can integrate Apple Pay payments with Stripe Payment Gateway Plugin for WooCommerce.
Easy, isn’t it?
To know more about the product, checkout Stripe Payment Gateway Plugin for WooCommerce.
For understanding each feature of the plugin , refer the product setting up article.
Or checkout Post navigation