This is a detailed guide on how to customize packing slips in WooCommerce with the WebToffee WooCommerce packing slips plugin. It covers various aspects of packing slip customization, including modifying the layout, adding custom fields, and customizing the design. The blog also offers useful tips and tricks to help WooCommerce store owners create unique and professional-looking packing slips that align with their brand image.
Cross-verifying the products that you ordered and the products that you received is one of the key activities everybody performs without fail. A packing slip is one such document that makes this process easy.
A WooCommerce packing slip contains data regarding the ordered items which will help you identify missing or misplaced products.
What is a Packing Slip in WooCommerce?
A packing list serves the important purpose of intimating customers regarding the content of the package ie; content type, quantity, etc. It is a must to send it along with the shipment. It allows customers to crosscheck the actual order to the items they have received. Which in turn helps avoid any confusion related to the shipment. Therefore getting a packing list in your WooCommerce store is a necessary task.
A WooCommerce packing slip would only contain the items of one single order.
The packing slips include product details such as SSN numbers, SKU labels, weights, measurements, order numbers, and more.
Benefits of WooCommerce Packing Slips
- By categorizing the products, you may make packing easier.
- Include product variations, extra orders, product meta information, etc. in the packing slip.
- Use the built-in templates to alter and personalize the packing slip according to your requirements.
Packing slips are not the same as PDF invoices, it is vital to remember this. Invoices serve as the order’s financial documentation, but packing slips show the items being shipped.
WooCommerce PDF Invoices/Packing Slips plugin facilitates creating WooCommerce packing slip documents. However, the customization features in the free variant of this plugin are severely limited and the premium version will have to be activated to avail of the more sophisticated customizations.
Let’s examine how simple it is to design a packing slip for your WooCommerce-powered store.
Setting up the automatic generation of WooCommerce packing slips with the free plugin
Step 1: Install the WooCommerce packing slip plugin
Install and activate the WooCommerce PDF Invoices, packing slips & credit notes plugin in your store.
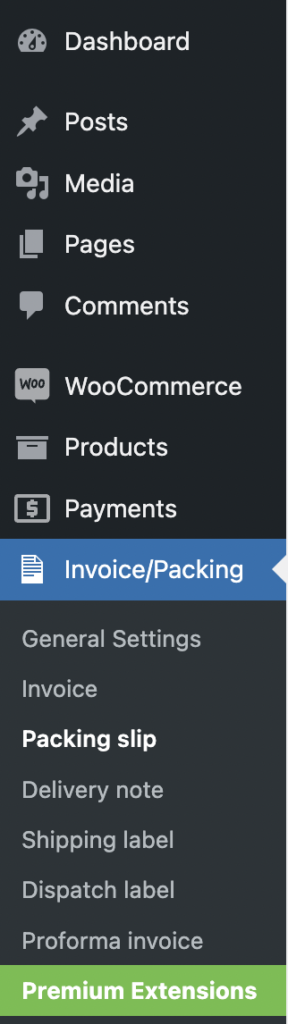
A new tab named Invoice/Packing will be automatically added to your WordPress navigation bar upon activation.
Step 2: Set up the general document settings
Go to the General Settings tab under Invoice/Packing and click on General.
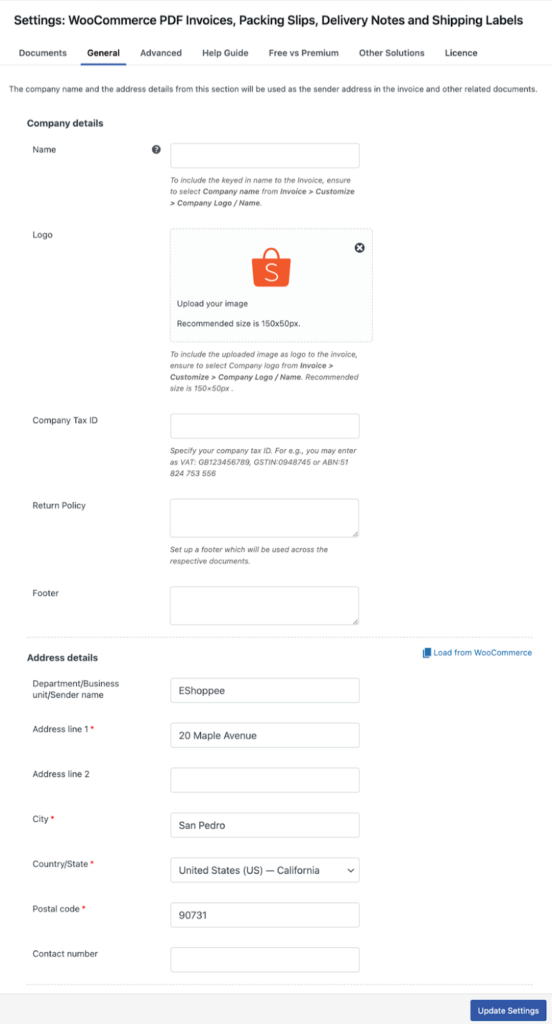
Here you can add the basic company and address details of your business.
Step 3: Customizing the WooCommerce packing slips
Tap on the Packing slip sub-tab to get landed on the General page of the document.
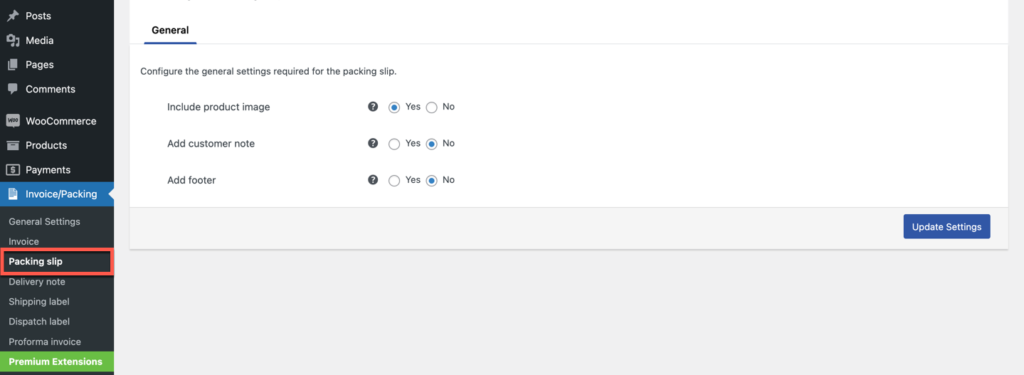
Here you will have options to,
- Include or exclude product images in the WooCommerce packing slip
- Add a customer note to the WooCommerce packing slip
- Adds a footer to the document
Once you make the changes, click the Update Settings button.
Now let’s see how you can use the WebToffee WooCommerce packing slip premium extension to set up the document.
Set up WooCommerce packing slips with the premium plugin
Step 1: Installing the premium plugin
For the premium plugin to get activated, the free version of the same plugin has to be activated on your store. So make sure to install and activate the free version of PDF invoices and packing slips for WooCommerce prior to this.
Follow the instruction provided in this installation guide to activate the premium WooCommerce packing slip plugin in your store.
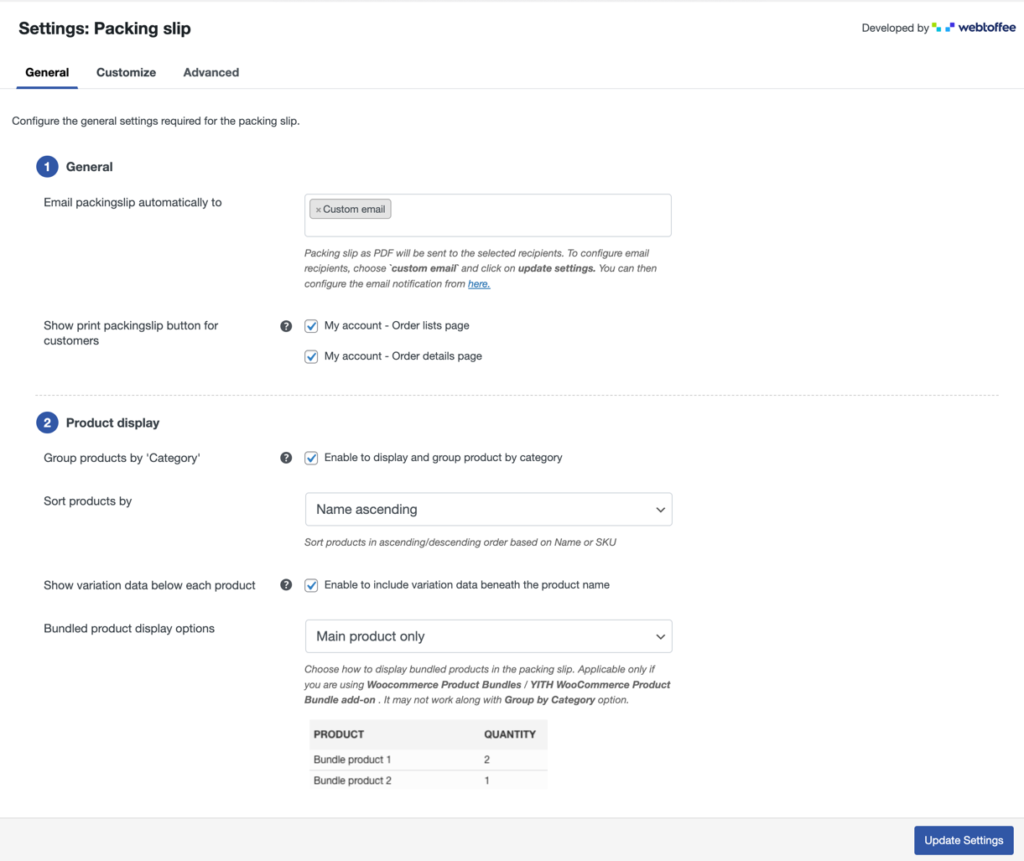
Step 2: Configure packing slip settings
Go to the General tab under Packing slip and set up the WooCommerce packing slip configurations.
The available configurations are
- Email packing slip automatically to – Choose the WooCommerce emails to which packing slips have to be attached. For example, you can add it to the ‘Order processing’ email or ‘On hold emails’. If you want to create a custom packing slip email and specify the recipients, choose the Custom email option and click on the Update Settings button. Then click on the hyperlink provided in the description below the option to land on the packing slip configuration page. Update any data there if required and save the changes.
- Show print packing slip button for customers – Choose to add a print button for printing packing slips in the order lists page or the order details page in My account.
- Group products by ‘Category’ – Enable this option to group and display products by category in the packing slip.
- Sort products by – Select a suitable format to sort the products in the packing slip.
- Show variation data below each product – Display the product variation data below each product in the product table.
- Bundle product display options – Select how you want to display bundled products in the packing slip.
Step 3: Customize the packing slips
Go to the Customize tab to select the packing slip template by clicking on the Create new template layout.
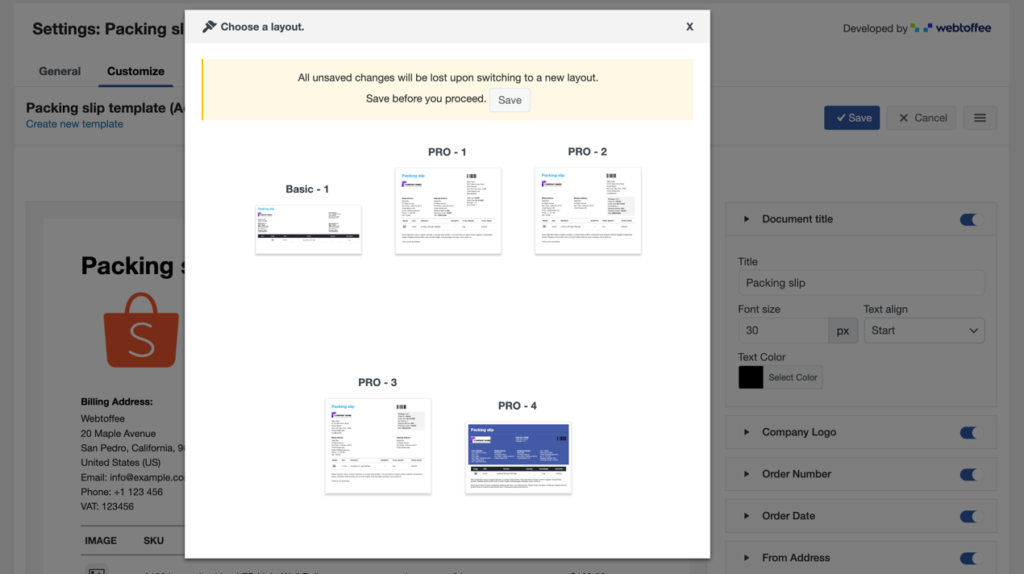
Use the customizable elements on the right-hand side of the page to enable/disable, or customize each block in the packing slip template.
You can even switch to the code editor to make modifications beyond those included in the visual editor. Refer to the Filters provided under Invoice/Packing > General Settings > Help Guide while making changes using the code editor.
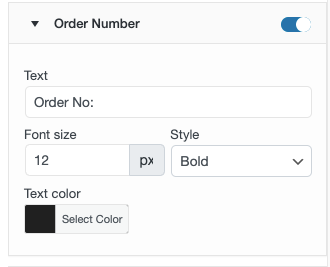
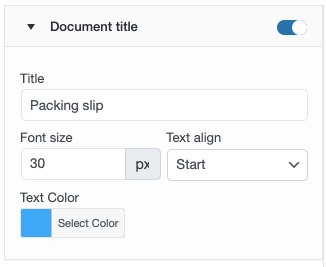
In addition, you can customize settings such as font size, style, color, and other details, to suit your needs. Let’s discuss some customization attributes. The most typical generic elements among all elements are the following:
- Text: It lets you enter a unique text for the corresponding attribute.
- Font Size: You can specify the font size for the attribute using this option. Enter a number specified in pixels.
- Style: Gives you the option to choose a text style. There are two options: Normal and Bold.
- Text Color: You can choose a text color.
- Text Align: Allows you to control the alignment of text. Right and left are the available options.
- Title: Allows you to specify a unique title.
Additional customized fields include:
Company logo: To set the corporate logo exclusively for invoices, use this option. If you have already uploaded the logo in the general settings, it will be automatically filled in here.
- Display: Let you add your company’s name or logo on the invoice.
- Logo Width and Height: You can change the logo’s width and height in pixels.
- Extra Details: Allows you to enter more text below the logo or name of the company. To omit any additional text, enter “none.”
- Extra Font Size: You can specify the font size here; this option is solely applicable to the company name.
- Header Color: You can choose the company name header color
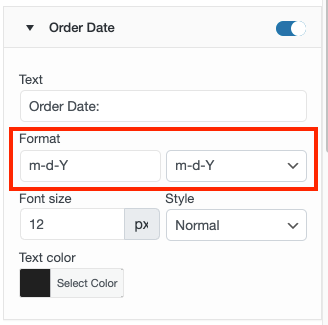
Order Date:
- Format: Allows you to choose a date format.
Product Table: This table will provide details on products, including the product’s SKU, name, quantity, and total cost. The text alignment, color, and font size are all customizable.
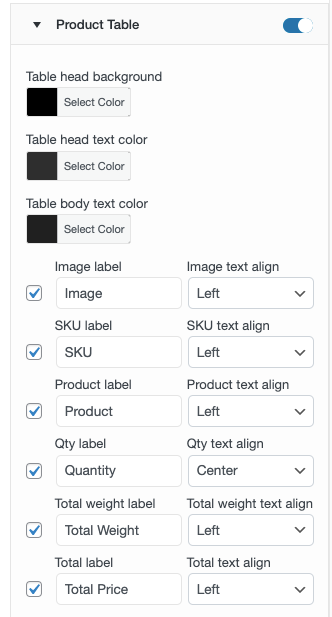
The following components are included in this field to allow for product table customization:
- Head Background: Allows you to customize the color of the product table’s header.
- Table Head Text Color: You can choose the color of the text in the header part of the product table.
- Table Body Text Color: Enables you to choose the color of the product table’s body text.
- Image: This feature enables you to add product images to your packing slips.
- SKU Align: Provides you to specify the SKU’s alignment in the product table. There are three options available: Right, Left, and Center.
- Product Align: Lets you choose the product’s alignment in the product table. There are three options: Right, Left, and Center.
- Quantity Align: You can establish alignment for the quantity label in the product table. Right, Left, and Center alternatives are also available.
- Total Price Align: Allows you to specify the alignment of the product table’s total price.
- SKU: Enables you to specify unique text for the table column containing SKU details.
- Product: Let you provide personalized content in the table column that lists the product name.
Once you made all the changes, click on Save and save them as a template.
The template will be activated automatically if your store doesn’t have any other active packing slip templates. But if you do, click on the menu icon and tap on My templates to find and activate the template that you require.
Step 4: Advanced packing slip configurations
The advanced packing slip configurations offer you an opportunity to add additional fields to your packing slip document. The available options include
- Order meta fields
- Product meta fields
- Product attributes
- Custom footer for packing slip
If the fields or attributes you want are not available in the store, you can use the Add/Edit option corresponding to each option to create new ones.
When the changes are made, click on Update Settings.
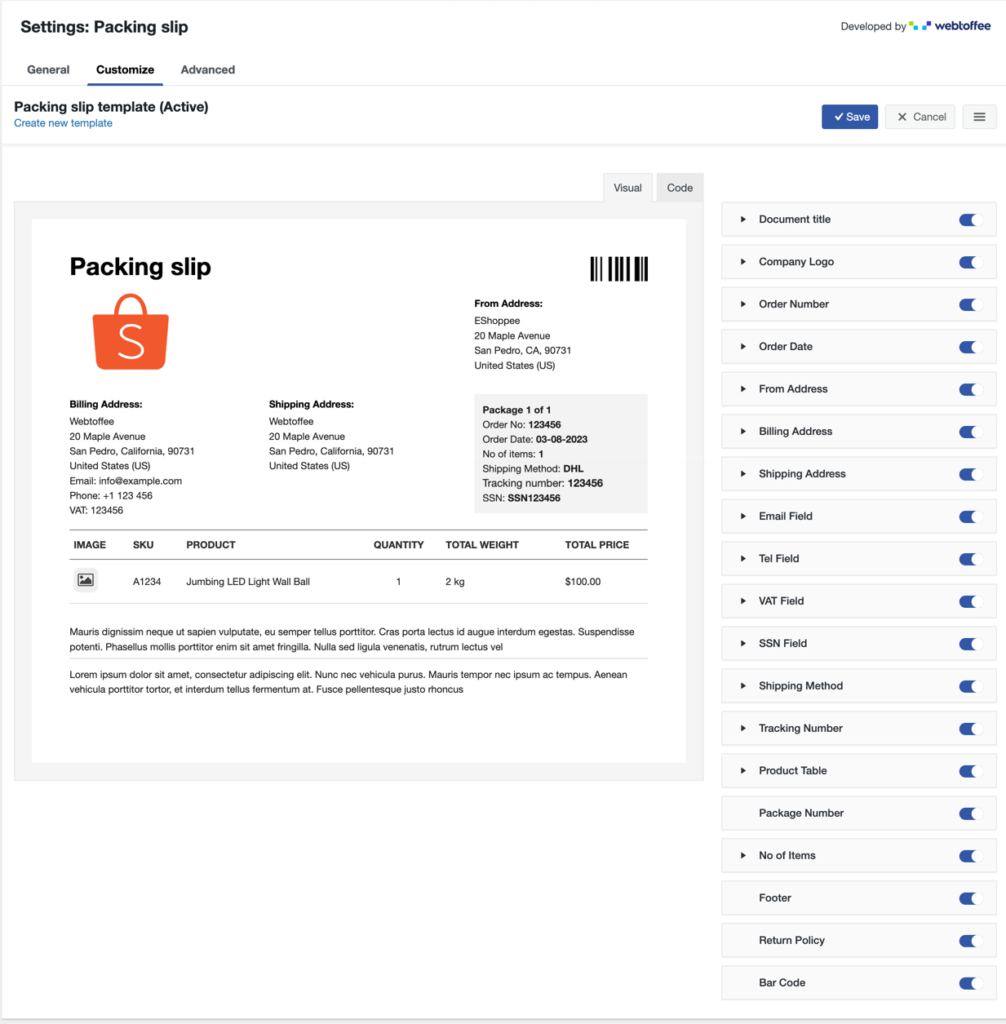
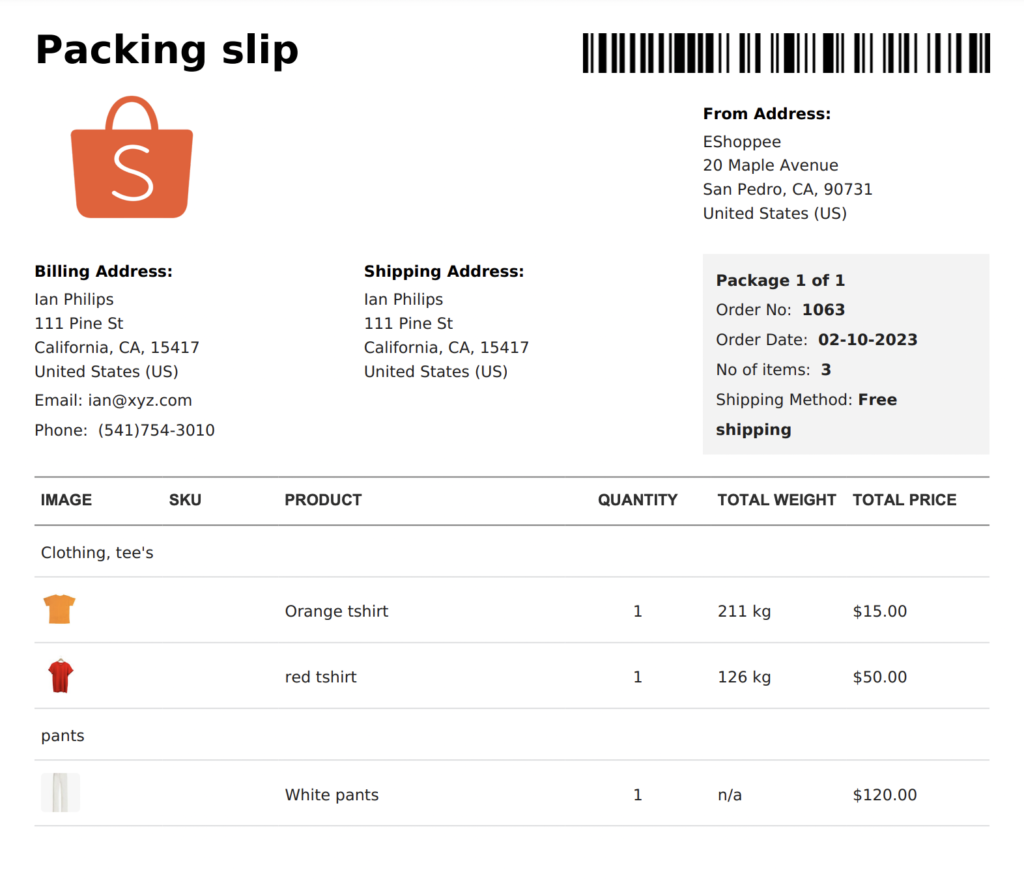
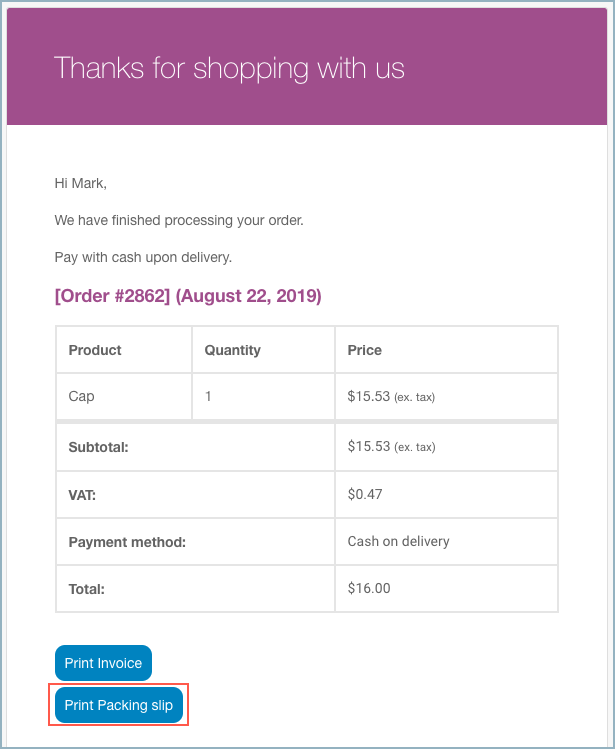
Sample Packing Slip
An example packing slip will look like this:
This is a sample order email with the print packing slip button.
Wrapping Up
Your WooCommerce store can easily create packing slips with the help of the Print WooCommerce Invoices, Packing Slips, and Credit Notes plugin.
Attaching packing slips with your orders reduces confusion and smoothens the order fulfillment process. It is therefore recommended to use packing slips along with other documents such as invoices and sent them out to customers.
Hope this article was of help to you. Do let us know your comments and queries in the comments below.


Comments (8)
Steve Morche
March 29, 2024
Hello, Our products require our customers to upload images for their orders. Is it possible to display thumbnails of these image uploads on the packing list? Maybe replace the product image on the packing list.
Thank you
Sanjai Valsan
April 4, 2024
Hi Steve,
Thank you for reaching out!
While we appreciate your inquiry, the provided information doesn’t fully clarify the requirements regarding displaying thumbnails of image uploads on the packing slip. For personalized assistance and a clearer understanding of your needs, we recommend contacting our customer support team.
Thijs
October 12, 2023
Good Afternoon,
I want to customize the packinglist template to a label format.
In this label format the product name must be written incl. note
Is there somebody who can help me in the right direction?
Best regards,
Thijs
Hema
October 17, 2023
Hello Thijis,
Thanks for reaching out. Currently, the packing slip is designed to the A4 size. To convert it into label size, you can use the code editor to customize the template. The plugin doesn’t support this customization.
Mohammad Syarief
August 16, 2023
hello I use webtoffe packing slip plugin, after doing migration from new server, the customizer feature was missing from the plugin, could you troubleshooting my plugin
Hema
August 18, 2023
Hello Mohammad,
Thanks for reaching out. We need more information regarding the version you are using. Kindly contact customer support for more information.
Fabio
March 13, 2023
I can override the template in the free version via php code
Arjun Aravind
March 16, 2023
Hi Fabio,
Thanks for reaching out.
We understand your requirement. However, template level customisation of the packing slip is only available in the premium version of the WooCommerce PDF Invoices, packing slips and credit notes plugin.