Set Up WooCommerce FedEx Shipping Plugin
This comprehensive guide provides step-by-step instructions, images, and important notes to help you easily set up the WooCommerce FedEx Shipping Plugin on your WooCommerce store. You will be able to access live FedEx rates, print shipping labels, enable FedEx tracking, and more. Whether you’re a beginner or looking for specific instructions, you can follow the complete setup tutorial or select a section from the index that meets your needs. If you’re new here, we recommend starting from the beginning.
In this Guide
- Download, Install and Activate the Plugin
- Navigate to FedEx Plugin Settings
- Activate the Plugin License
- Add FedEx Account Details
- Verify your Product Settings
- Add Shipper Address Details
- Enable FedEx Real-Time Shipping Rates
- Enable Real Time Shipping Rates on Cart/Checkout
- Add Shipping Method Title
- Add Shipping Methods to Specific Countries
- Obtain FedEx One Rate on Cart/Checkout
- Add FedEx Insurance Value
- Select the Rate Type
- Enable Shipping Taxes on the Cart/Checkout Page
- Configure Return Rate Type (Offer Rates)
- Add Currency and Conversion Rate options
- Add Fallback Rate
- Set Minimum Order Value
- Add Minimum Shipping and Maximum Shipping Cost
- Set Skip products
- Setting up FedEx Shipping Methods
- How to Set Up FedEx Package Settings
- Print FedEx Shipping Labels
- How to Request FedEx PickUp?
- Setting up FedEx Shipment Tracking
- Setting up FedEx International Shipping?
- How to Set up FedEx Freight Settings?
- Setting up FedEx Special Services
1. Download, Install and Activate the Plugin
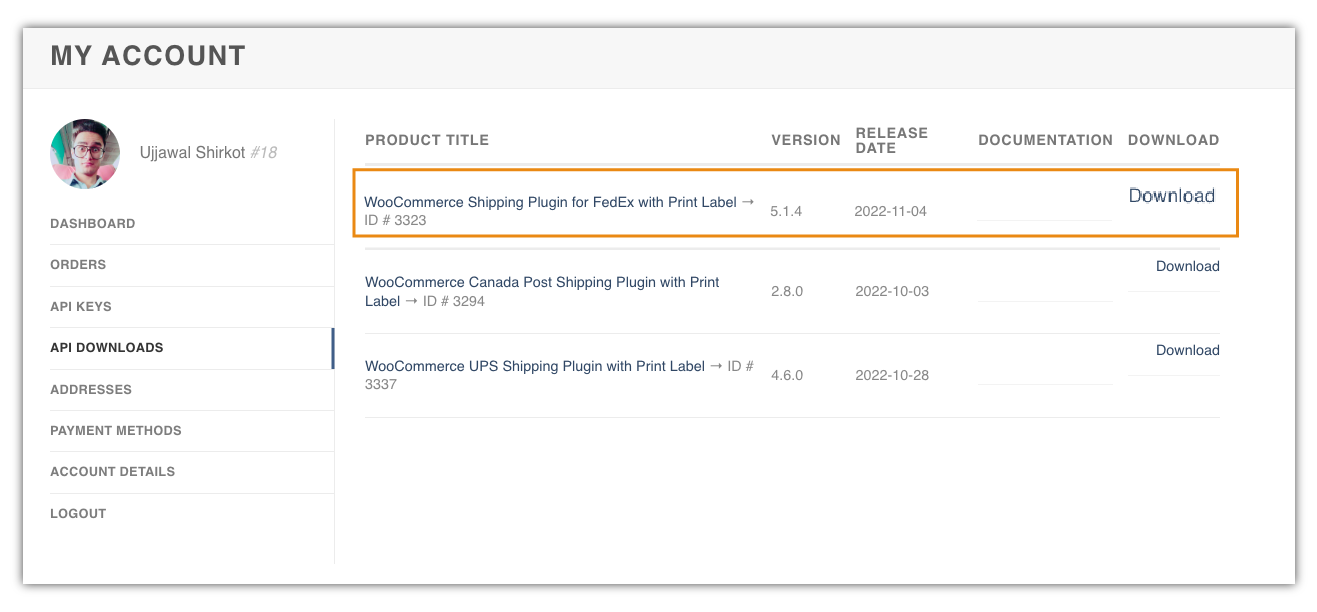
After purchasing the Woocommerce FedEx shipping plugin with Print label plugin, log onto your PluginHive account and download the plugin Zip via My Accounts -> API DOWNLOADS.
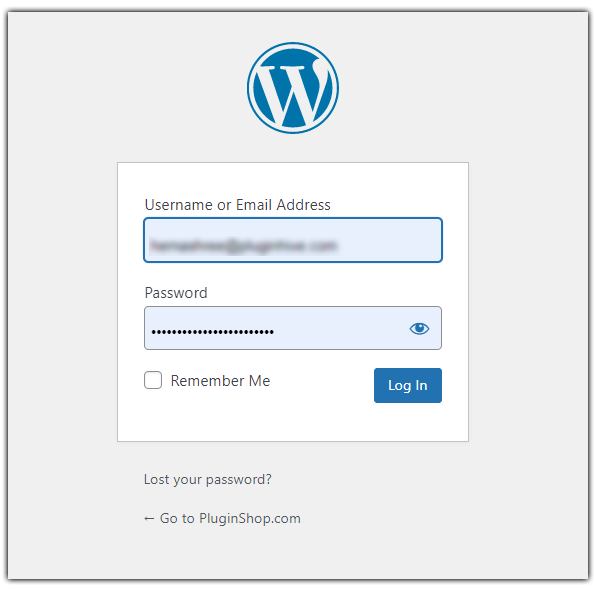
Log in as the WordPress Admin of your online store
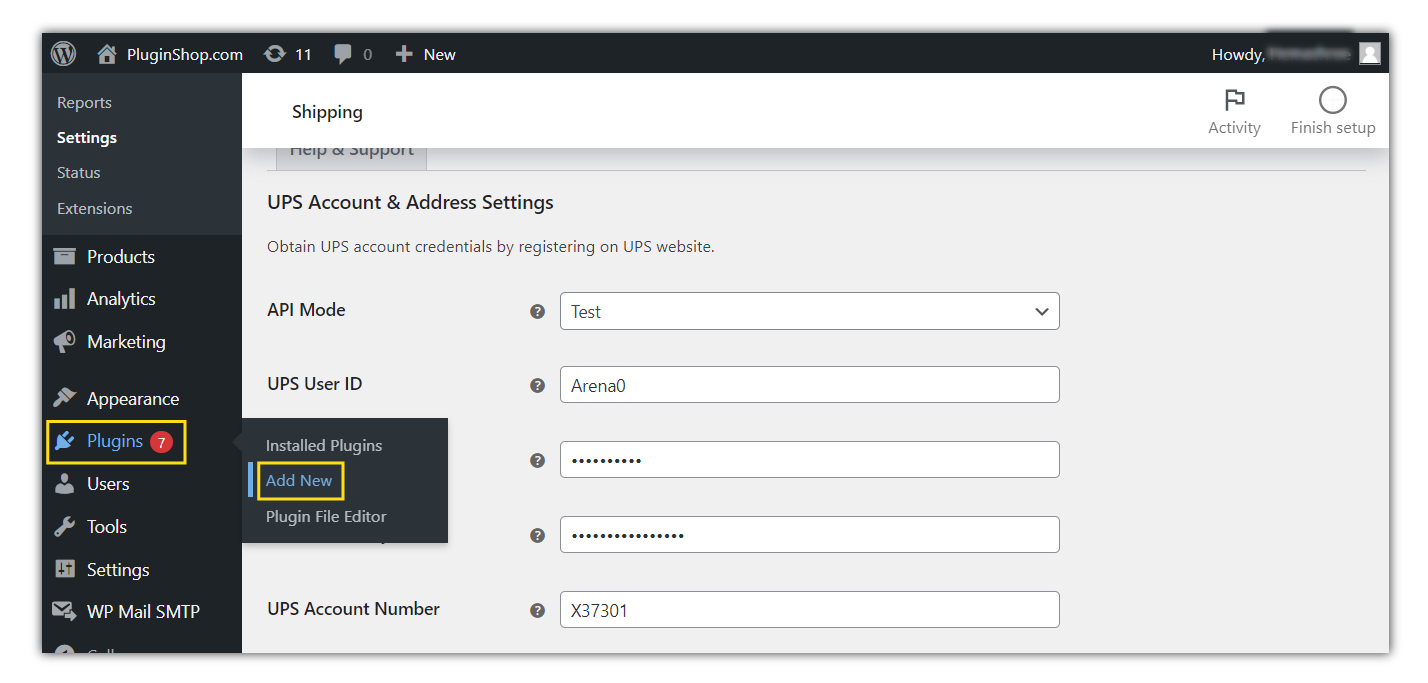
Navigate to Plugins -> Add New to upload the downloaded WooCommerce Shipping Plugin for FedEx
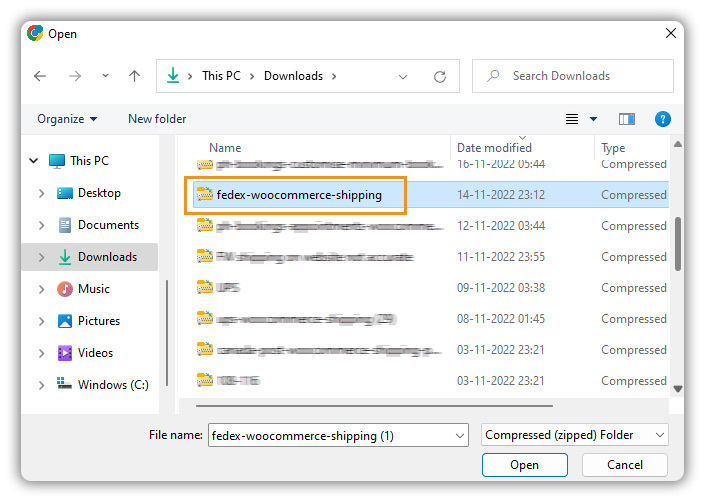
Click on Upload Plugin -> Choose File and open the plugin zip file, as shown below.
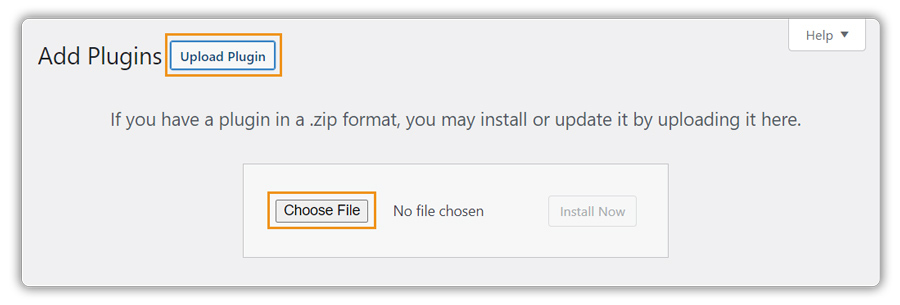
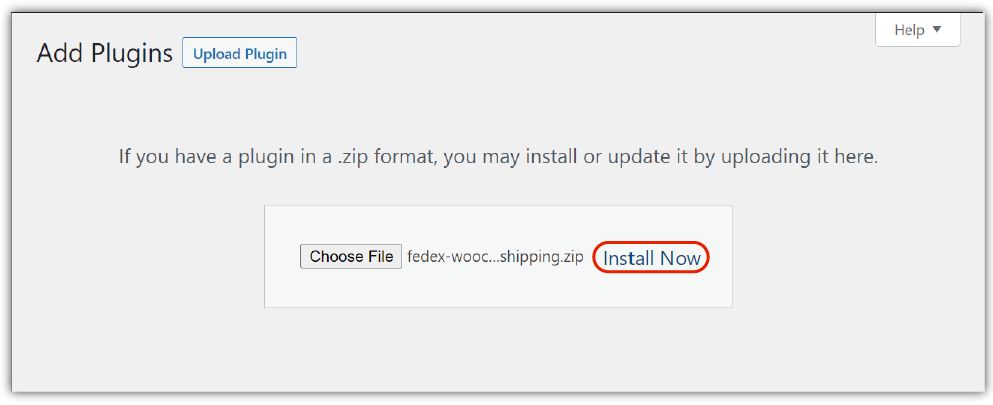
After uploading the plugin file, click on Install Now.
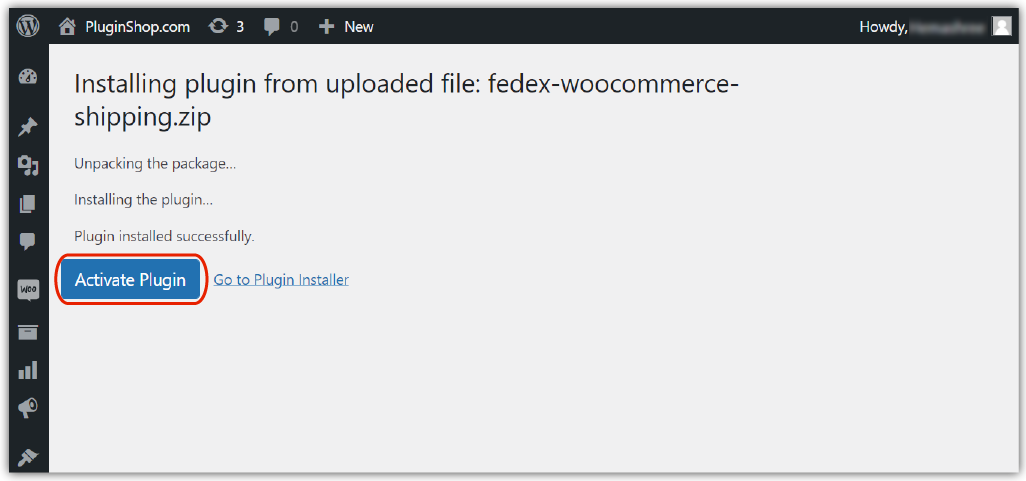
Click on Activate Plugin to activate the plugin on your WooCommerce store.
Click on FedEx Settings to visit the plugin settings page and continue integrating your FedEx account to WooCommerce.
To know more about how to update the WooCommerce Shipping plugin for FedEx with Print Label, visit – How to Download, Install, Activate and Update PluginHive WooCommerce Plugins
How to get FedEx Production Credentials
These credentials will allow you to use the FedEx real-time rates and shipping label functionality for your business needs.
Read More – How to Get FedEx Production Credentials and Enable FedEx Label Generation for Your Account?
* Test Credentials are usually not recommended, but while using live credentials it’s better to cancel the label immediately if you are not shipping the order.
* Also, please note, till the package is not handed over to the end customer, the FedEx label won’t be charged.
2. Navigate to the WooCommerce FedEx Plugin settings
Once you have installed the WooCommerce FedEx Shipping plugin, a new shipping method called ‘FedEx’ will be added to your WooCommerce store. You can customize this shipping method based on your preferences. There are two ways to access the settings, as outlined below:
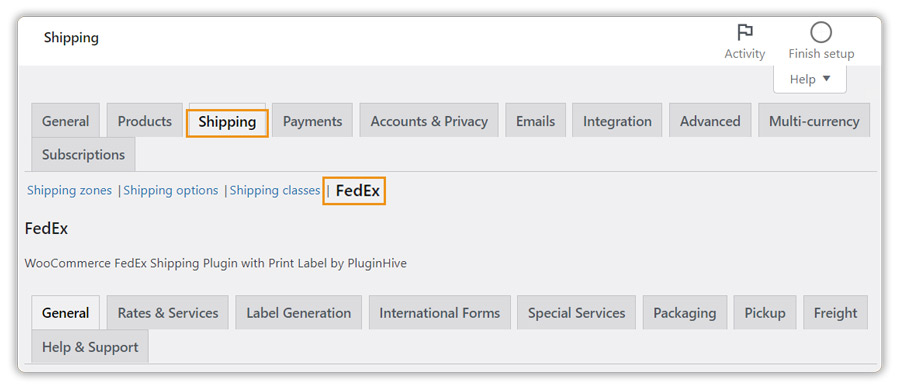
Navigate to WooCommerce -> Settings -> Shipping -> FedEx
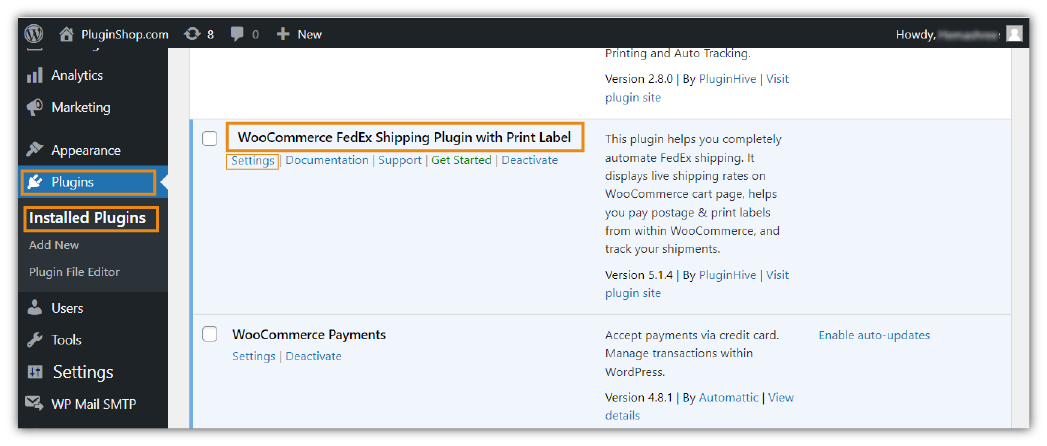
Or, you can also visit the plugin settings page via Plugins -> Installed Plugins -> WooCommerce FedEx Shipping Plugin with Print Label -> Settings
You will be able to see the following settings under Shipping Tab
- General
- Rates & Services
- Label Generation
- International Forums
- Special Services
- Packaging Services
- Pickup
- Freight
3. Activate the Plugin’s License
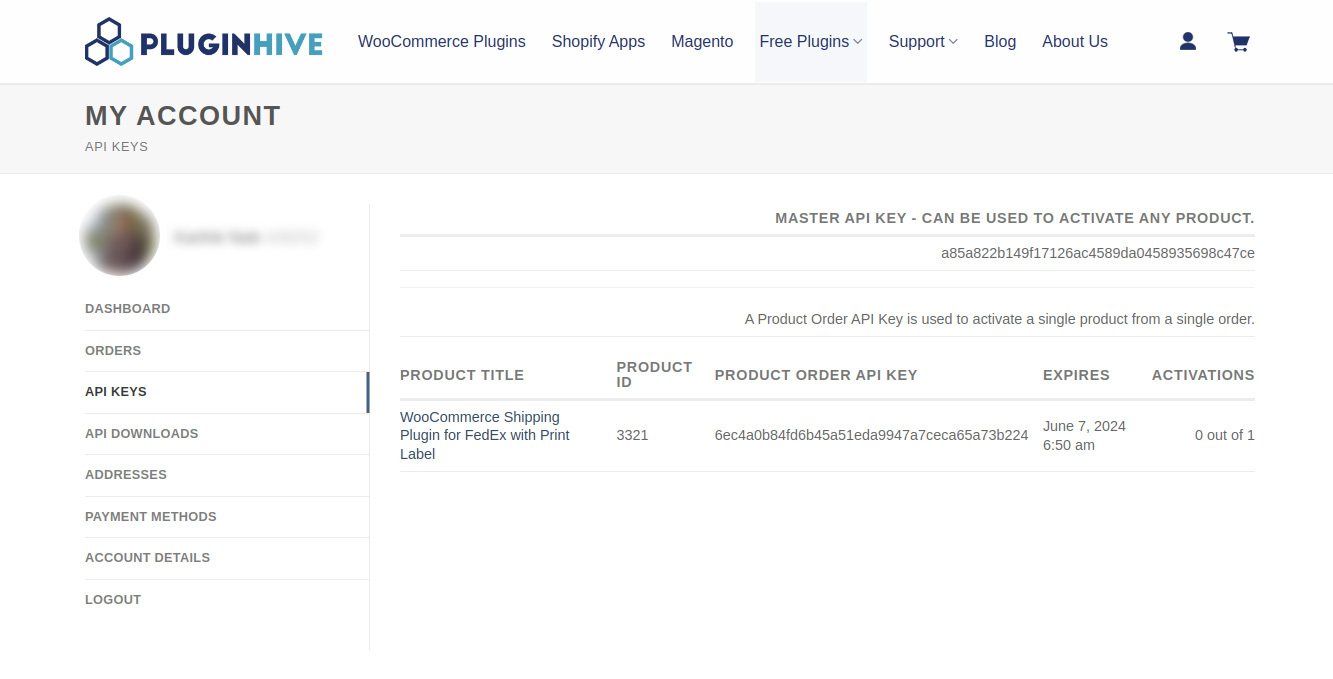
To activate the license key, you need to enter the Product Order API Key and the Product ID that you received upon purchase. To obtain the API Key and Product ID, go to the My Account section of PluginHive and navigate to the API KEYS section as shown below:
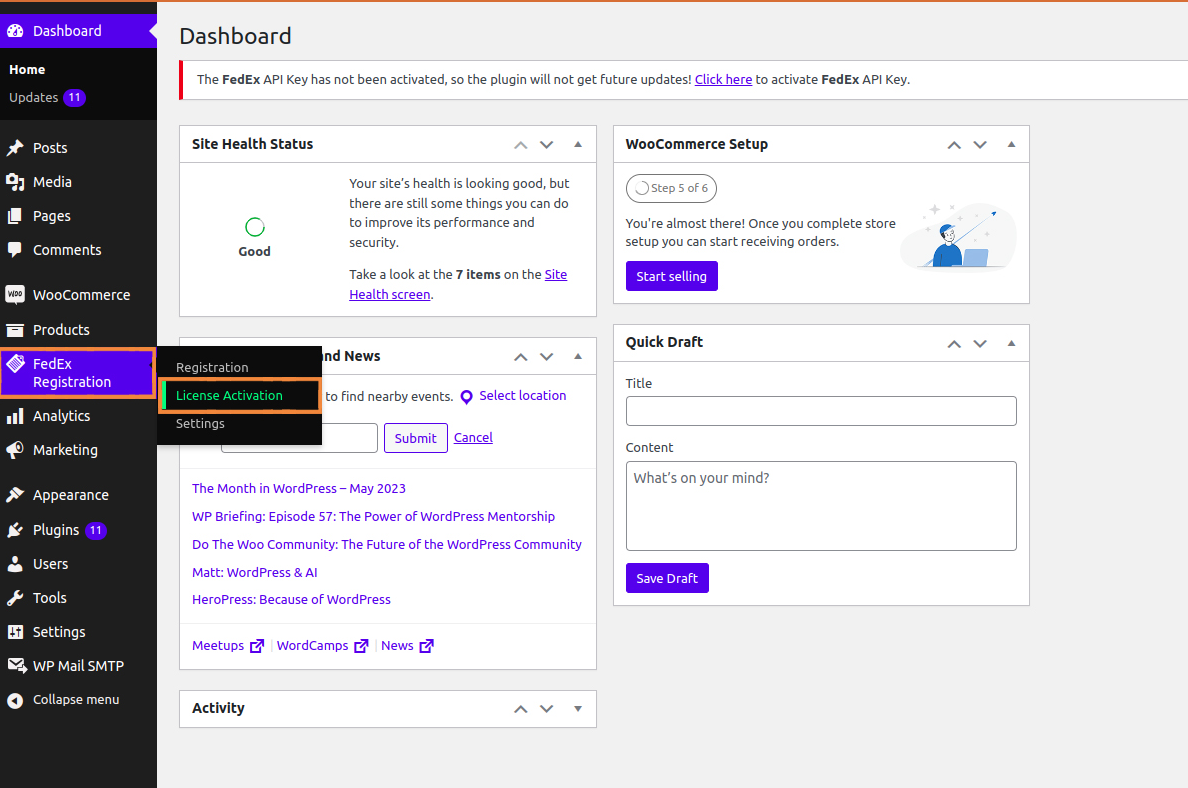
Now navigate to License Activation under the FedEx Registration option:
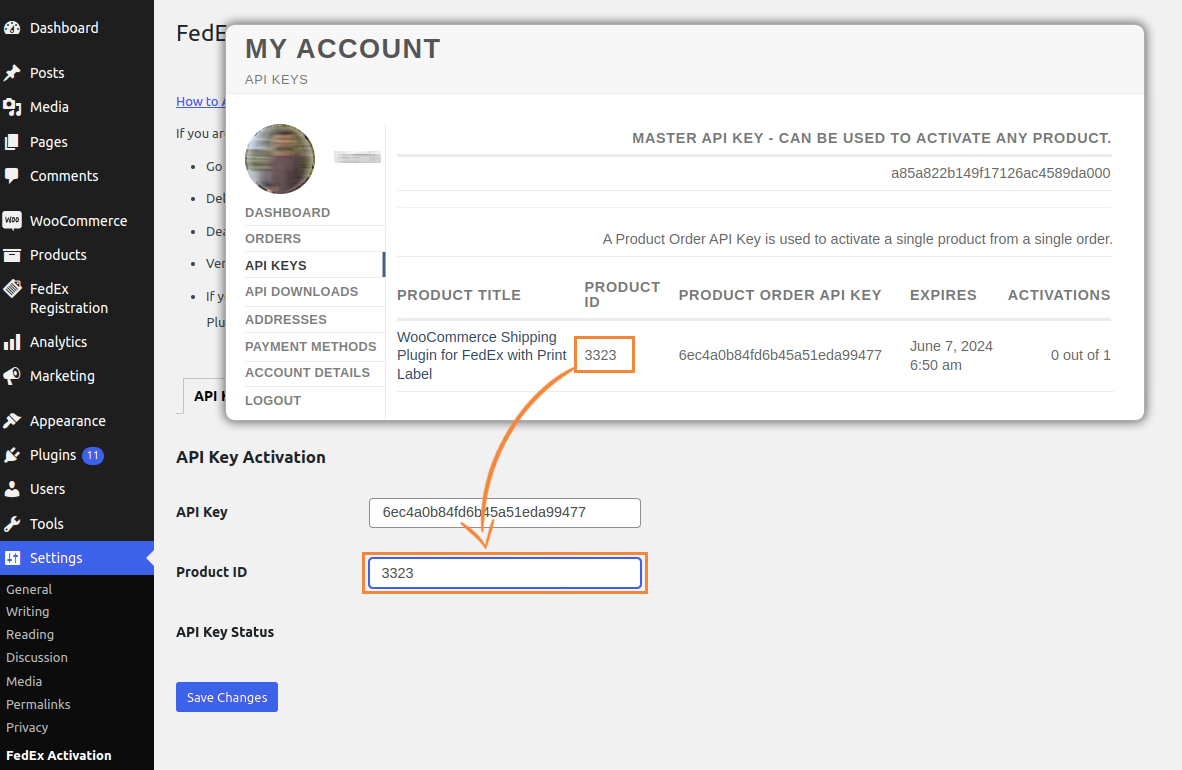
Next, enter your API Key and Product ID Credentials, click Save Changes, and your API Key Status will be activated.

Note: To register the FedEx, active users of the WooCommerce FedEx Shipping Plugin with Print Label are advised to deactivate and reactivate the plugin’s license key.
4. Add FedEx Account details
Already have FedEx Meter Number
To get real-time shipping rates and the functionalities like Shipping Labels and Tracking, you need to enter the FedEx Production Credentials (Account Number, Meter Number, Web Service Key, and Web Service Password) in the plugin settings as shown below.
If you already have these credentials visit WooCommerce -> Settings -> Shipping -> FedEx -> General Tab and enter the FedEx account credentials as shown below:

- FedEx Account Number: Your customer number with FedEx consists of a nine-digit account number that registers your information. Please enter this shipping account number in the designated field.
- FedEx Meter Number: To access your negotiated shipping rates and tracking requests with FedEx, you will need to provide your FedEx Meter Number. This unique identifier is used by FedEx for this purpose. Please refer to the image and enter the assigned FedEx Meter Number for your shipping account.
- Web Services Key: Web Services Key integrates different shipping services and functionalities offered by FedEx to your WooCommerce Store. To know where to access the web services key, refer to FedEx Web Services Key
- Web Services Password: A web service Password is also required to proceed with WooCommerce FedEx account Integration, this also helps you to place orders, print labels, and verify all features of our plugin on a test mode. To know where you can access Web Service Password, refer to FedEx Web Services Password
- Production Key: By Enabling the Production Key, you can process your shipment orders in real time. If you wish to create test orders only, do not enable the option.
To avoid mistakes while entering the FedEx credentials and make sure the credentials are entered correctly click on “Validate Credentials”. Our WooCommerce FedEx plugin will then authenticate your account by thoroughly checking all of the details provided. To ensure successful verification, please check that all of the details entered are accurate and valid.
Do not have FedEx Meter Number
If you don’t have the credentials then follow these steps to add your FedEx account:
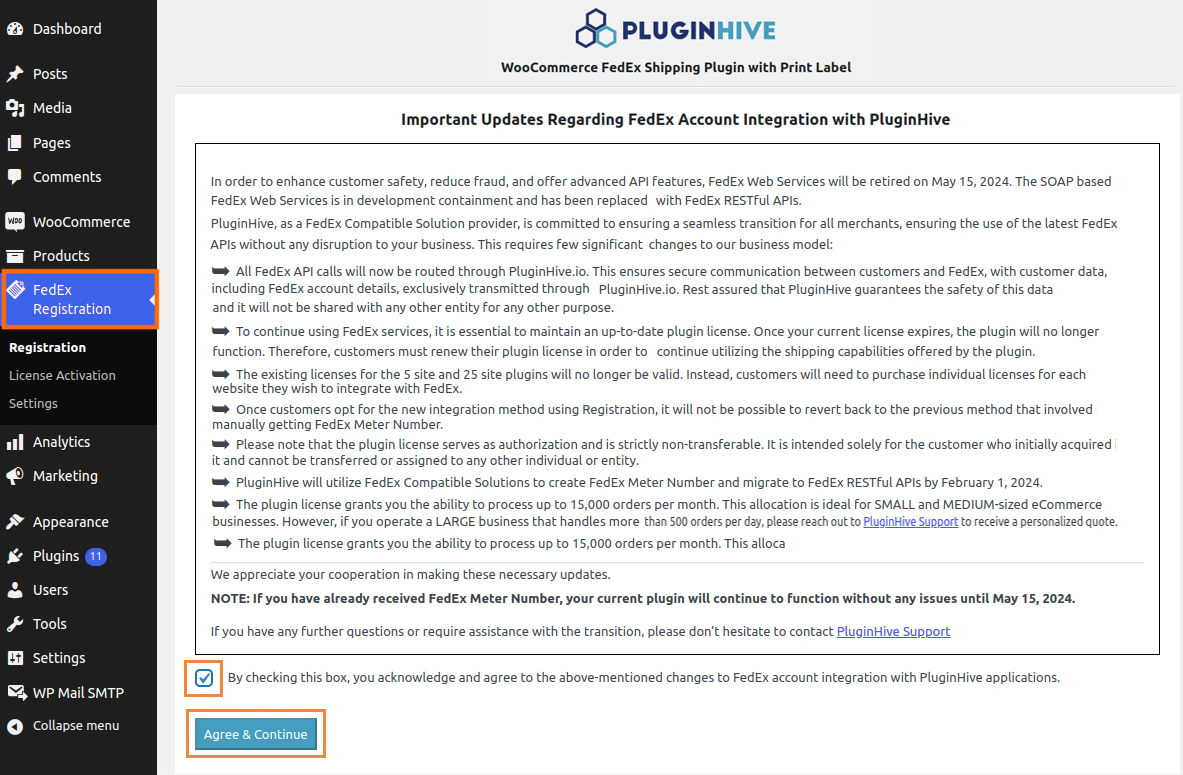
Navigate to the FedEx registration page, acknowledge and agree to the mentioned changes, and click on the Agree and Continue button:
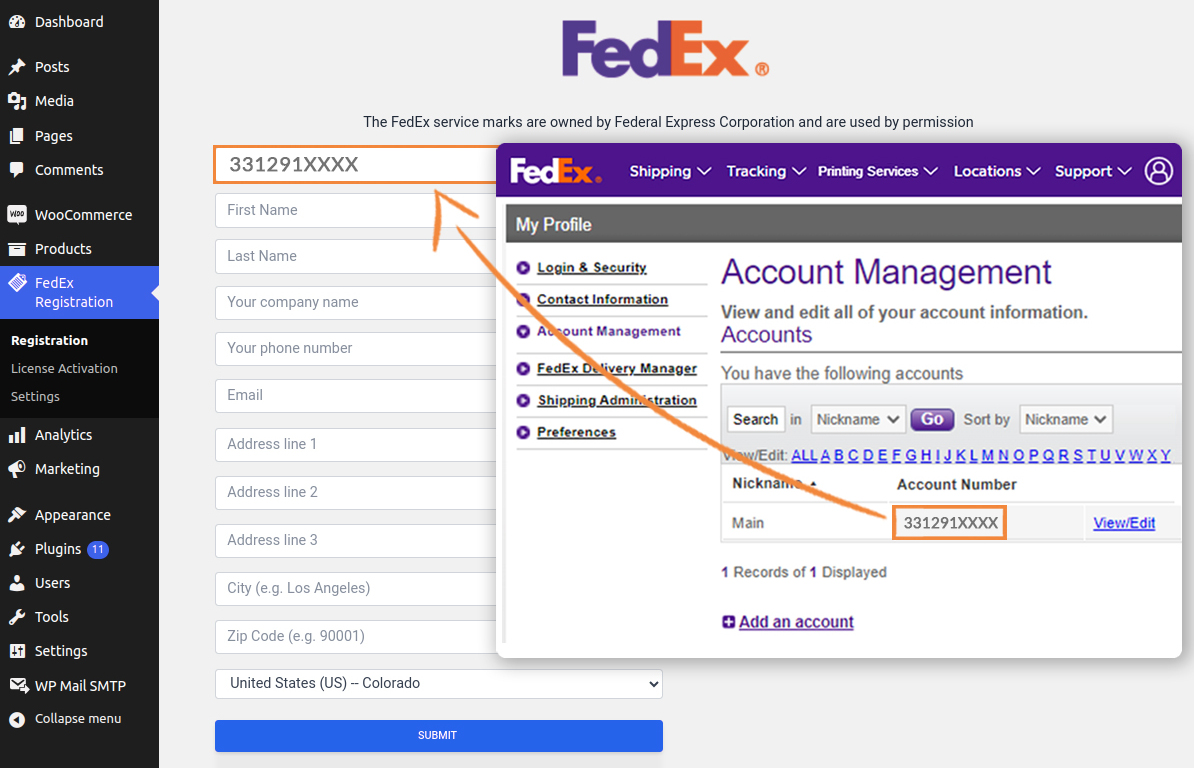
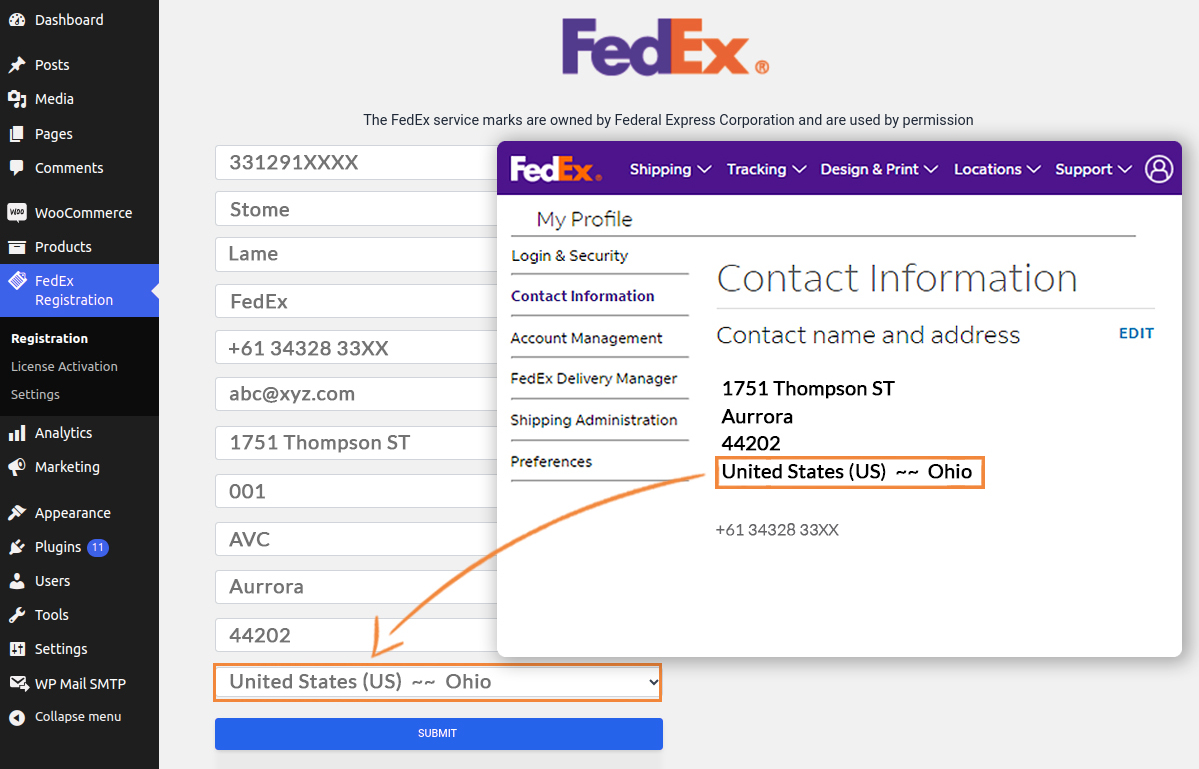
Enter the FedEx Account Name, FedEx Account Number, and the Shipper Address associated with your account, as shown below:
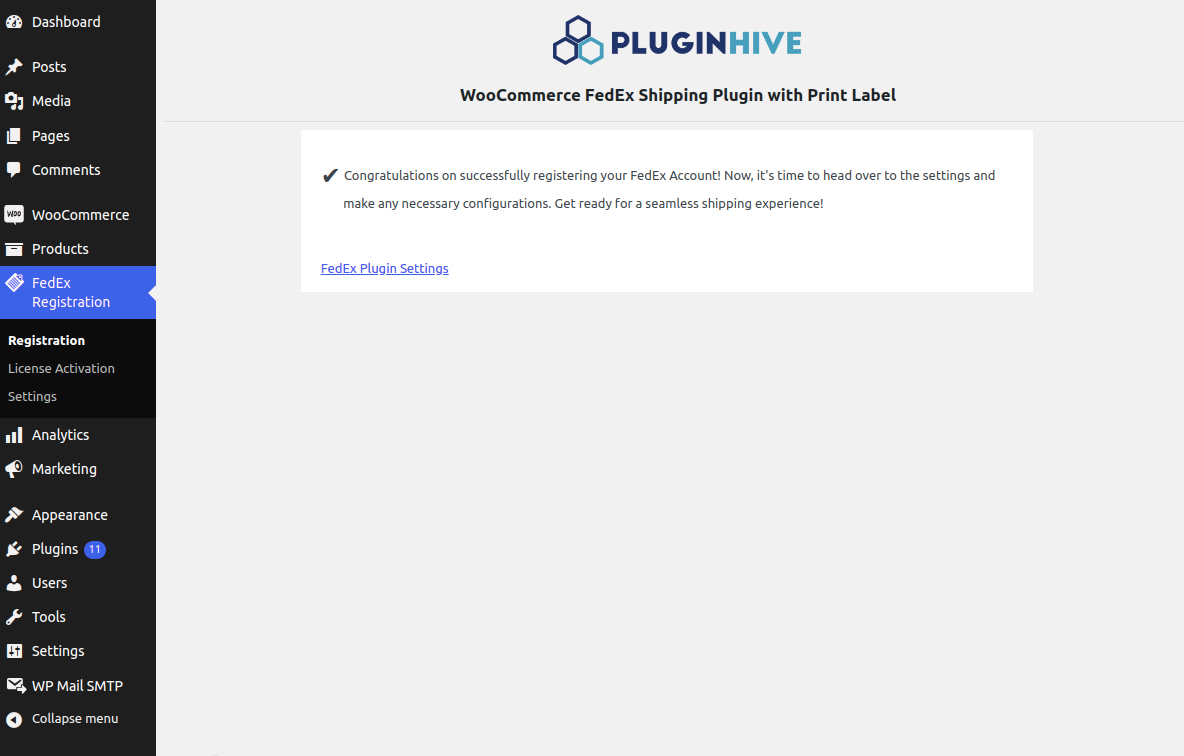
After successful registration, you will be directed to a page where the Secret Key, Client ID, and License Key ID will be displayed. It is crucial to make a copy of these credentials as they will be shown only once:

Now you use the WooCommerce FedEx Shipping Plugin:
5. Verify your Product Settings
Set Product weight and dimensions of the unit
To calculate shipping costs, FedEx requires the weight and dimensions of the product. Our WooCommerce FedEx Shipping plugin offers two unit standards for inputting this information: Pounds and Inches, as well as Kilograms and Centimeters. Once you select your preferred unit standard, the weight and dimensions will be passed to FedEx accordingly. Please refer to the settings shown below to choose your preferred unit standard.
Accessing Weight/Dimensions Units:
- Navigate to WooCommerce -> Settings -> Shipping -> FedEx
- Visit the General Tab -> Weight / Dimensions Units and set the weight and dimension units as per your country or business requirements
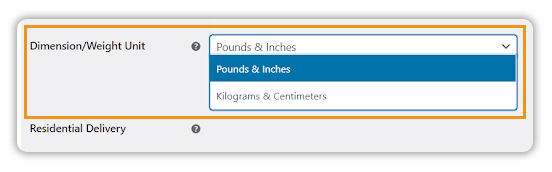
Please note that it is mandatory to assign the unit to get accurate rates.
Add Product Weight and Dimensions
Every product added within your WooCommerce store must be assigned with corresponding weight and dimensions. The values entered are important for multiple functions, such as allocating suitable boxes for shipping, displaying real-time rates on cart/checkout, etc.
Accessing Product Weight and Dimensions
- Navigate to WooCommerce Dashboard -> Products
- Select the Product of your choice
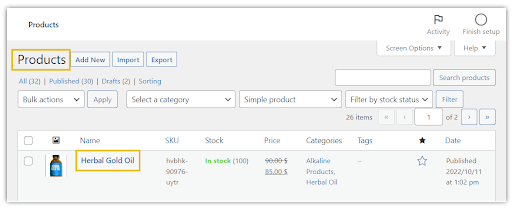
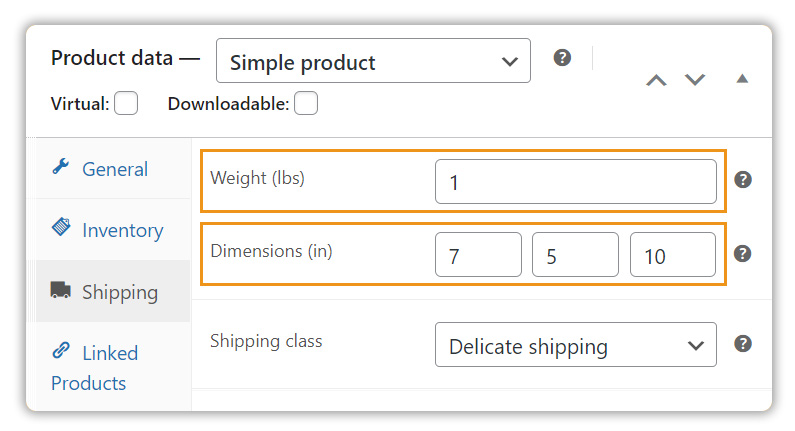
- Click on the Edit Product option and visit Product Data -> Shipping Tab
- Enter the Product Weight and Dimensions as shown in the image
Here you can configure other essential details such as:
- HS Tariff Number
- Delivery Signature
- Custom Declared Value
- Country of Manufacture
- Commodity Description
- Pre-Packed Product
You can also provide information on what type of product it is and if special shipping services are applicable for the product such as
- Products containing Alcohol – like perfumes, wine, etc.
- Products categorized as HazMat/Dangerous Goods – like chemicals, gas, etc.
- Products containing Batteries – like electronic items, etc.
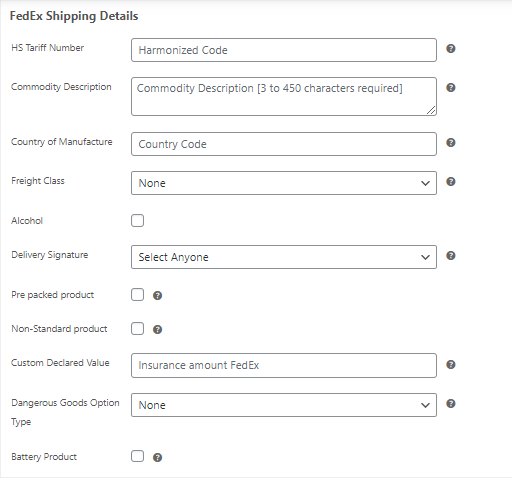
Please enter valid Country Code of Manufacture under FedEx Shipping Details
6. Add Shipper Address Details
Add Ship From Address Details
- Visit WooCommerce -> Settings -> Shipping -> FedEx -> General Tab
- Select the shipment address type from the Ship From Address Preference dropdown
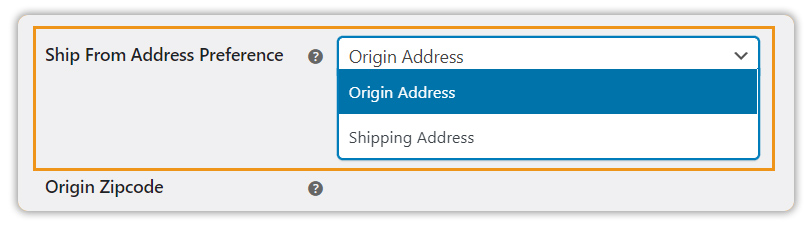
This setting allows you to reverse the origin address and shipping address so that the customer can parcel the required item(s) to the online store owner(the purpose can be sample testing, repairing goods, etc). The options available are as given below:
1. Origin Address: Here the origin and shipping address should be entered inside the From and To addresses respectively. This is for normal shipping cases, from the store owner to the customer.
FedEx does not recognise characters other than english. Always confirm that non english characters are not used in From Address.
2. Shipping Address: Origin and shipping address are To and From addresses respectively. It facilitates Admin to print a reverse label so that the customer can easily ship the item(s) with the reverse label that Admin would send to the customer (through Email).
After configuring the address type, it is required to provide the following address details:
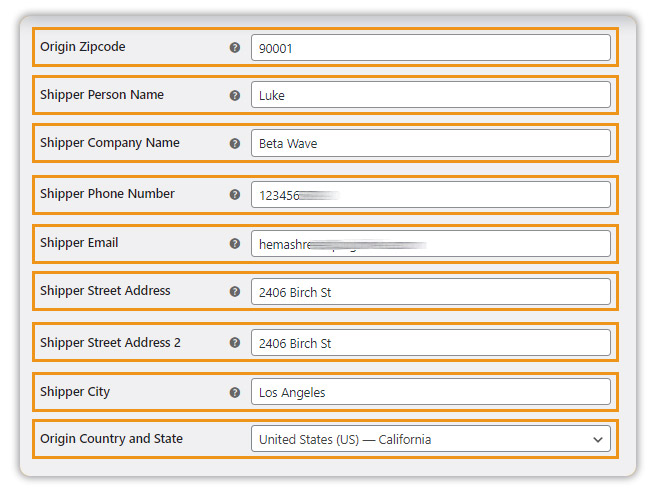
- Origin Postcode: It is the postcode of the place from where you are shipping items.
- Shipper Person Name: Enter the name of the WooCommerce shop owner.
- Shipper Company Name: Enter the name of the WooCommerce shop.
- Shipper Phone Number: Enter the phone number of the shipper.
- Shipper Street Address: Enter the first line of the Address.
- Shipper Street Address 2: Enter the Second line of the Address.
- Shipper City: Enter the city of the shipper.
- Origin State and Country: Select the applicable origin state and country name from the dropdown
Add Residential Address
FedEx levies a residential surcharge to shipments addressed to a home or private residence. These also include locations where business is conducted from home or a shipment in which the shipper designates the delivery address as residential.
Shipper Address is Residential: If you want to assign your Ship From Address where your products are shipped from as Residential, enable the Shipper Address is Residential checkbox

Residential Delivery: FedEx API automatically classifies an address as “Commercial” or “Residential” based on the street address provided by the customer. Enable Residential Delivery to fetch FedEx rates concerning Residential addresses.

Allocate Shipping Charges Payment Type
Shipping Charges: With this field, you can set the required payer for shipping charges. The available options are as given below:
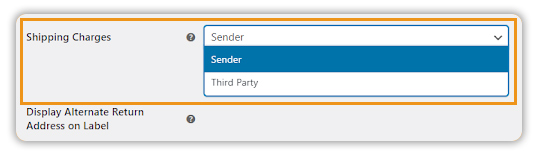
Sender: With this option, charges will be billed to the sender.
Third Party: With this option, the specified charges will be billed to a third-party contact other than the sender. To choose this billing option, the third party’s valid FedEx account number must be entered in the Third Party Account Number text box.
Set Third Party Shipping Address
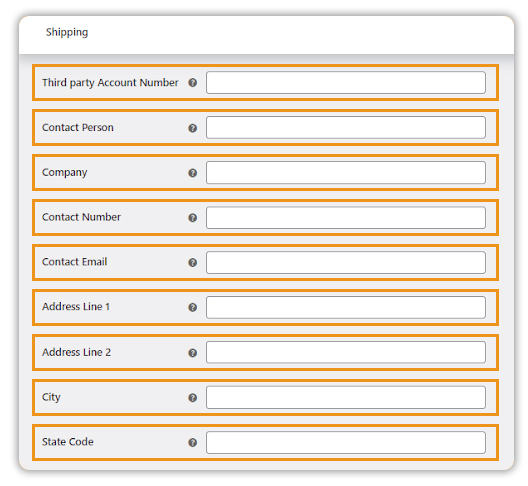
Third-Party Account Number: Third Party Account Number is required if third-party payment is selected.
Contact Person: Provide the name of Third Party Payer Contact
Company: Provide the name of Third Party Payer Company
Contact Number: Provide the number of Third Party Payer’s Contact
Contact Email: Provide the email address of Third Party Payer Contact
Address Line 1: Enter the first line of the Third Party Payer Address.
Address Line 2: An additional line for Third Party Payer Addresses.
City: Provide the city name corresponding to Third Party Payer Contact.
State Code: Provide the state code corresponding to Third Party Payer Contact.
7. Enable Real-Time Shipping Rates
Get real-time shipping rates directly on your WooCommerce cart page, checkout page, and individual orders page based on product weight, box dimensions, shipping destination, and more. Let’s dive in!
Enable Real-Time Rates at Cart/Checkout
Configure the following settings to get WooCommerce FedEx live rates on your cart and checkout page.
- Navigate to WooCommerce -> Settings -> Shipping -> FedEx -> Rates & Services tab
- Enable RealTime Rates Option
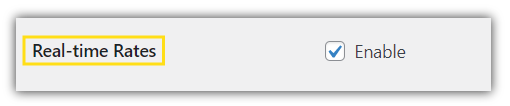
Now, let’s configure shipping options to specific locations in Method Title and Method Available sections.
Unchecking Real-Time Rates option will only disable rates in the cart/checkout page.
You will still be able to Print FedEx Label and get a shipment tracking functionality are still available to you.
Add Shipping Method Title
Method title returns the name of the shipping method you want to display when you select the cheapest rate for your order shipments.
Accessing Method Title option:
- Go to WooCommerce Settings> Shipping> FedEx
- Select Rates and Services
- Configure Method Title and Method Available to options

For e.g: Let’s say, you have a product for which you want to display the cheapest shipping rate. Using the FedEx method title, you can define the shipping method name for the service which provides the cheapest shipping rate and display it over the cart/checkout
Assign Shipping Methods to Specific Countries
WooCommerce FedEx Shipping plugin allows you to restrict shipping methods to certain locations.
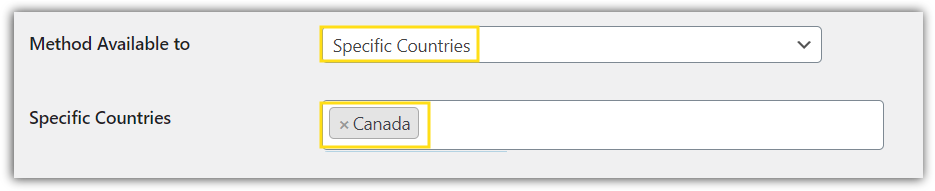
Method Availability: This field allows you to make the FedEx shipping method available for selected countries. The available options are as given below:
- All Countries: This makes FedEx shipping options available to customers in all countries. It is set as a default option.
- Specific Countries: This allows you to specify the list of countries for which you want to provide FedEx shipping. FedEx Shipping Method would be available only in the listed countries.

For eg: You want to enable the FedEx service rates for product shipments specifically to Canada. You can proceed in the following way:
- Go to WooCommerce Settings > Shipping > FedEx
- Select Rates & Services
- Select Method Available to Specific Countries
- Select Canada in the Specific Countries Tab
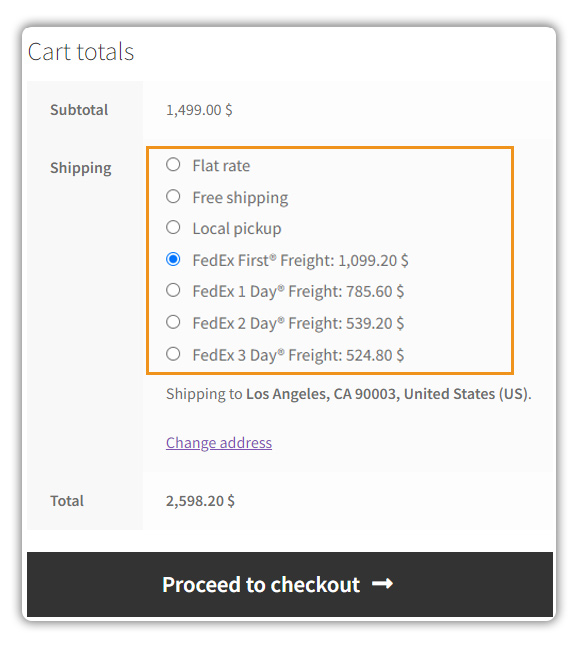
Once this is done, we can now check the FedEx rates in the cart and checkout pages:
Cart Page:

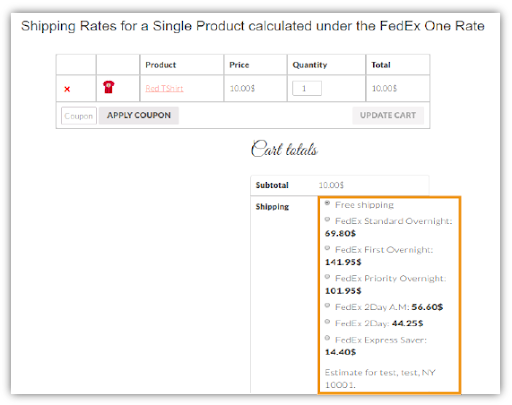
Obtain FedEx One Rate on Cart/Checkout
FedEx One Rate is flat rate shipping that does not require you to weigh or measure shipments under 50 lbs. With FedEx One Rate you can add to the box without adding to the price.
FedEx One Rates will be offered if the items are packed into a valid FedEx One box. The origin and destination should be within the US. For other countries, this option enables FedEx packing.

Select FedEx One checkbox to enable FedEx One Rates. Once you enable this option, the customer can see the services which are related to FedEx One Rate only. The list of packing types for FedEx Express Saver is given below:
- FedEx Envelope
- FedEx Pak
- FedEx Small Box
- FedEx Medium Box
- FedEx Large Box
- FedEx Extra Large Box
- FedEx Tube
To get more information about FedEx One Rate Service and corresponding rates, See the FedEx One Rate site. After going to the website click the Get Rates button to rates for various services.
All FedEx boxes are not available for all countries, disable this option or disable different boxes if you are not receiving any shipping services.
Add FedEx Insurance Value
Every Shipment is transported on a limited liability basis as provided by FedEx. If Shipper requires greater protection, then insurance may be arranged at an additional cost by FedEx. The setting is as shown below:
Accessing Insurance Option:
- Select WooCommerce < Settings < Shipping < FedEx
- Select General
- Enable Insurance Option, Select the checkbox to set Insurance for your package.

Selecting the Rate type
FedEx provides different rates which depend on whether the customer is an account holder or not. The rate-Type setting is as given below:

The available options are as given below:
- List Rate: FedEx provides standard shipping rates for the public. Select this option if you want to offer only standard rates.
- Account Rate: FedEx provides a discounted rate to FedEx Account holders. Select this option if you want to facilitate the customer at a discounted rate.
Enable Shipping Taxes on Cart/Checkout
Shipment may incur fees in addition to the base shipping rate depending on the service options you choose. Using the Quote type setting we can include and exclude fees along with the base shipping rate:
The quote type options supported are listed below:
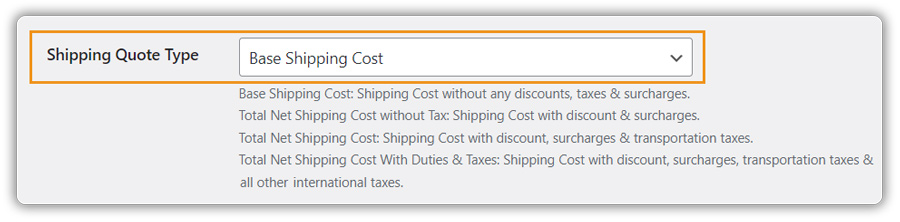
- Base Shipping Cost: Shipping without any discounts, taxes, and Surcharges. When this feature is enabled, the rates fetched from the FedEx API are shown without any addition of taxes.
- Total net shipping cost without Tax: Shipping Cost with discount and surcharges. When this feature is enabled, the prices will be discounted and extra surcharges will be added to the rates displayed for the shipment services
- Total Net Shipping Cost: Shipping Cost with discount, surcharges & transportation taxes. When this feature is enabled in the rates and services tab, the shipment cost is discounted and extra surcharges and transportation taxes are added.
- Total Net Shipping Cost with Duties & Taxes: Cost with discount surcharges, transportation taxes & all other international taxes. When this service is enabled in the rates and services section shipment services costs are discounted and extra surcharges are added and transportation charges and other international taxes are added.
Choosing the Offer Rates
Once you get the quotes from FedEx, you can choose which quotes to show to the Customer. The setting is as shown below:
You can select the required option from the Offer Rates drop-down list and the options available are as given below:
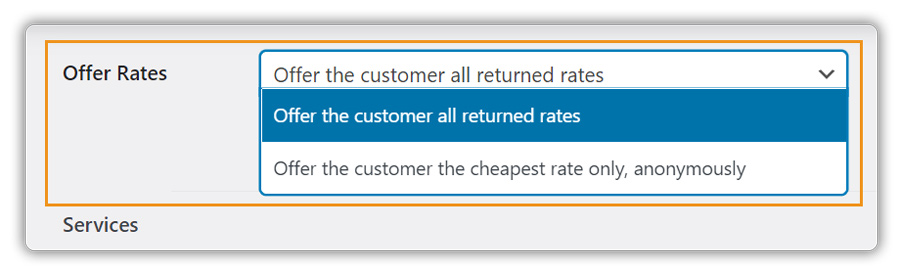
- Offer the Customer all the returned rates: This option shows quotes for all the available services which are returned by FedEx and also selected by you in step 2.
- Offer the Customer the cheapest rate only, anonymously: This option shows the only service with the cheapest quote from the available services.
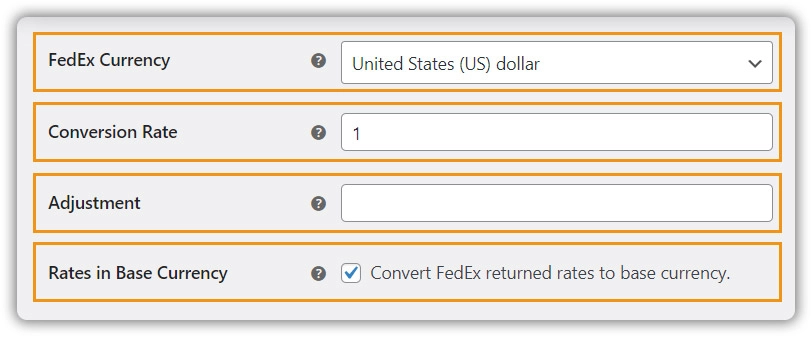
Add Currency and Conversion rate options
- FedEx Currency: Specify which currency is being used for your FedEx Account Charges. If the currency used for your store orders is different from FedEx Currency, provide the conversion rate.
- Conversion Rate: Enter the conversion amount if you are using a currency different from the one that you set up in the WooCommerce base location. This amount gets multiplied by the shipping rates.
- Adjustment: Enter the conversion amount in case you have a different currency setup than the origin location currency. This amount will be multiplied by shipping rates. Leave it empty if no conversion is required.
- Rates in Base Currency: Select the checkbox for converting FedEx returned rates to the base currency of your store. For example, FedEx returned rates are in USD. With this option, you can get the rates in the base currency EUR.
*Note: Conversion happens only if FedEx API provides the exchange rate.
Conversion happens only if FedEx API provides the exchange rate.
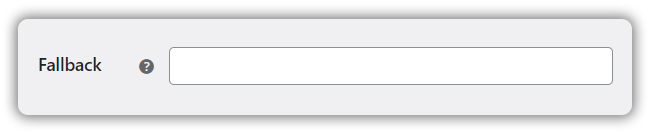
Add FallBack Rate
Fallback: If FedEx returns no matching rates, offer this amount for shipping so that the user can still checkout. Leave blank to disable.
Set Minimum Order Value

- Minimum order amount: This option allows you to set a minimum order amount which will trigger Real-Time FedEx shipping rates. Any order below this amount will not have FedEx Shipping rates on the cart page.
Add Minimum Shipping and Maximum Shipping Cost
Minimum Shipping Cost: If rates returned by FedEx is less than the Minimum Shipping Cost, then the customer will be charged Minimum Shipping Cost.

Maximum Shipping Cost: If rates returned by FedEx is greater than the Maximum Shipping Cost, then the customer will be charged Maximum Shipping Cost.

Set Skip Products
Skip products: You can Skip all or selected products belonging to a particular shipping class while fetching rates and creating labels. This is achieved by the Skip Products function.
- You can find Skip Products under General Tab
- Provide the name of products you wish to skip within this field
- The rates of the skipped product/s will not be included and the label for the same won’t be generated.

8. Setting up FedEx Shipping Methods
FedEx Domestic Services
The WooCommerce FedEx shipping plugin supports these services domestically and internationally.
FedEx services supported by WooCommerce Shipping Plugin for FedEx are listed below:
- First Overnight
- Priority Overnight
- Standard Overnight
- FedEx 2 Day AM
- FedEx 2 Day
- FedEx Express Saver
- FedEx Home Delivery
- FedEx Ground
- FedEx First Freight
- International Economy
- International First
- Europe First International Priority etc.
FedEx International Services
WooCommerce FedEx plugin supports the following Domestic and International Services such as:
- FedEx Distance Deferred
- FedEx Next Day Early Morning
- FedEx Next Day Mid Morning
- FedEx Next Day Afternoon
- FedEx Next Day End Of Day
- FedEx Next Day Freight
- FedEx International Connect Plus
- FedEx First Overnight Extra Hours
- FedEx Priority Overnight Extra Hours
- FedEx Standard Overnight Extra Hours
- FedEx International Priority
- FedEx International Priority Express
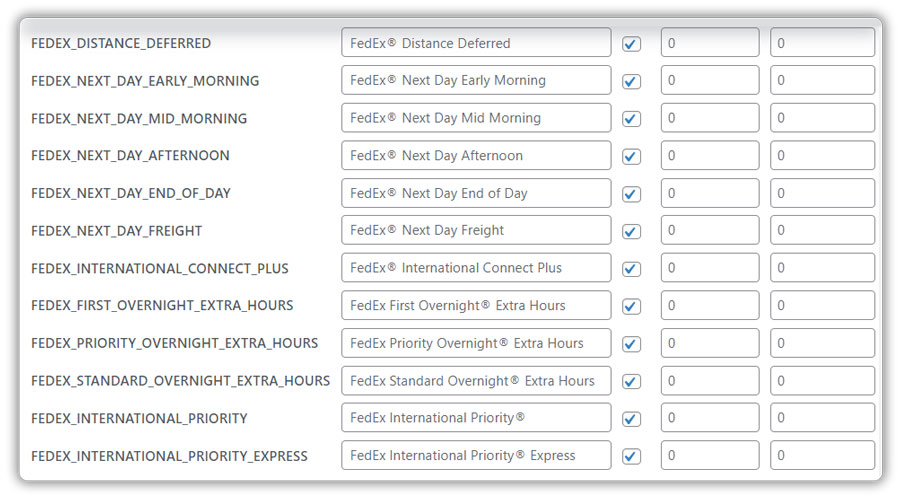
You can enable the desired services. For more details on the services provided by FedEx, contact the FedEx team.
Non-selected services are not shown to the customer even if they are available services from FedEx.
Learn more about FedEx Shipping services here.
FedEx Freight Services
FedEx Freight provides Air and Ocean Cargo apart from LTL (Less than Truckload) Freight services. Some of the services provided by FedEx Freight are listed below.
- FedEx 1 Day Freight
- FedEx 2 Day Freight
- FedEx 3 Day Freight
- International FedEx Economy Freight
- International FedEx Priority Freight
- FedEx First Freight
- FedEx Freight Economy
- FedEx Freight Priority
- FedEx Next Day Freight
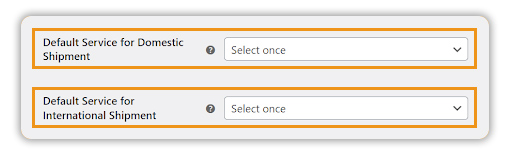
Assign Default Shipping Service
Default Service for Domestic Shipment: FedEx label will be generated for this domestic service, if no FedEx shipping Method is selected on the cart page and the shipping address is a domestic address.
Default Service for International Shipment: FedEx label will be generated for this international service, if no FedEx shipping Method is selected on the cart page and the shipping address is an international address.
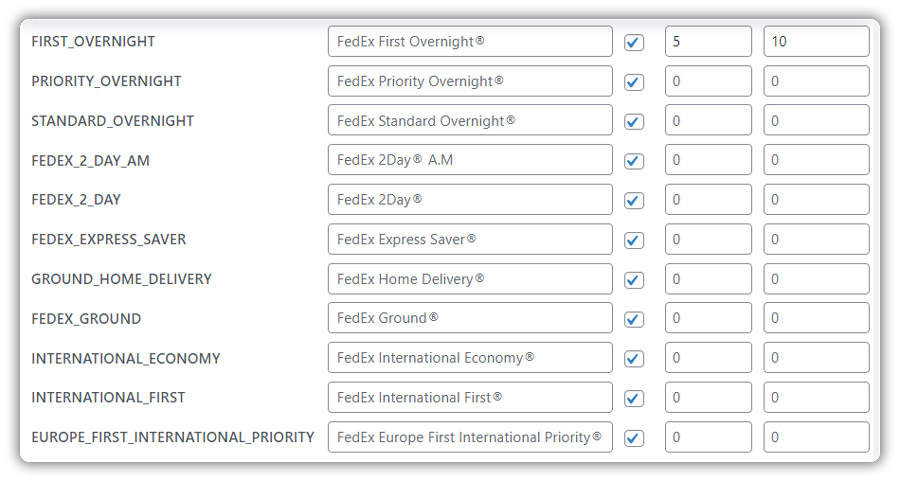
Adjust Shipping Rates
You can adjust the shipping price by adding or subtracting the required amount to or from the actual shipping cost. Use the minus sign (-) for subtracting the amount. You can mention the amount in (%) and ($) for each service.
For example, consider the shipping cost of FIRST_OVERNIGHT returned by FedEx is $5
Price Adjustment for FIRST_OVERNIGHT – $5 as shown below:
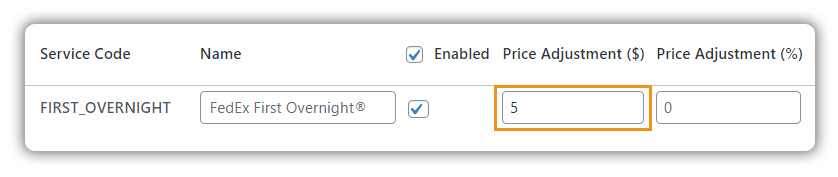
Total Cost Displayed for FIRST_OVERNIGHT – $10 (5+5)
Price Adjustment for FIRST_OVERNIGHT – 10 % as shown below:
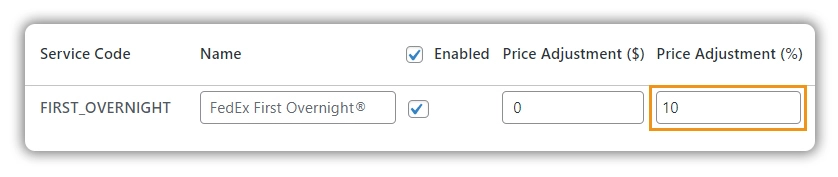
Total Cost Displayed for FIRST_OVERNIGHT – $5.5 (The 10% of 5 is added to 5 to get the actual shipping cost)
Price Adjustment for FIRST_OVERNIGHT – $5 and 10% as shown below:
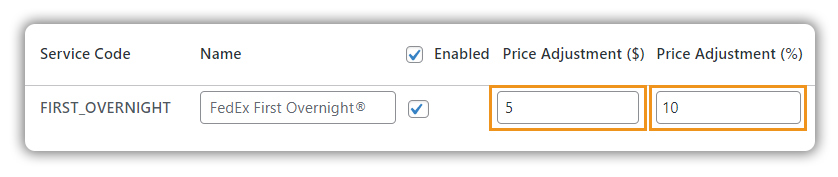
Total Cost Displayed for FIRST_OVERNIGHT – $10.5 (The 10% of 5 is added to 5 + 5 to get actual)
10. How to Set Up FedEx Package Settings
You can get the real-time rate for a particular item by using FedEx API. With a price calculator, you get real-time postage rates very easily and quickly for domestic as well as international shipping. Real-time rates are calculated according to the product dimension and weight. And the best-fitted box rates are returned from FedEx. This rate depends on the method used for Packing the parcel.
The plugin provides you with three options to pack a parcel(s) as given below:
- Pack Items Individually
- Packing with Box Weight & Dimensions
- Weight based packing
Pack Products Individually
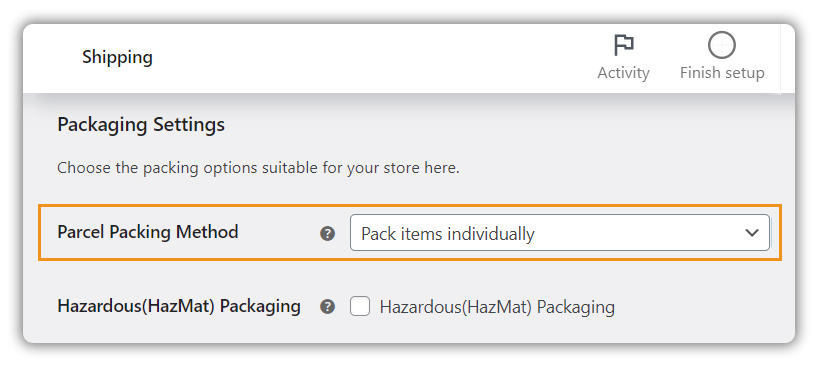
In this option, each item in the cart is packed separately. The total Shipping cost is calculated by adding the shipping cost for each item.
For example, the shipping cost of Item X is $10. If the customer adds two quantities of Item X to the cart, then the total shipping cost is $10 x 2, which is $20.
Pack products using FedEx Boxes
If packing items individually do not suit your business, then you can define the required box sizes under Box Sizes. All the cart items are packed into custom boxes defined in Box Sizes settings. The best-fit box is auto-chosen from the defined boxes. By selecting this option, the Box Size settings appear as shown below:
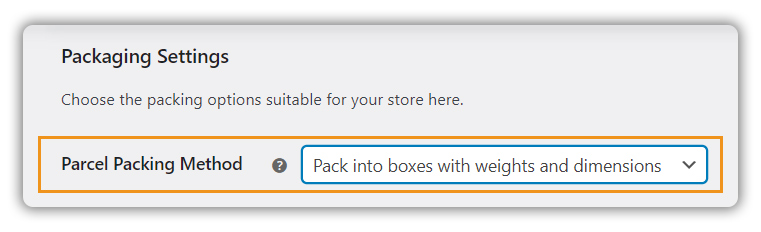
This box dimension and weight settings are applicable only when packed into boxes with weight and dimension selected. Here, you can define the dimensions of the boxes. For heavy packing boxes, enter the weight of the box so that it gets added to the product weight to calculate the shipping rates. According to the requirement, you can add or remove the box dimensions. You can also enable or disable a particular box by selecting or deselecting the checkbox under Enabled.
Likewise, you need to define sizes for each logical box according to the packing style being followed for different products with different quantities. For more information, see Configure FedEx Box Dimensions.
Note: This is the recommended option.
Pack Products purely based on Weight
In some business cases, you may wish to pack items according to their weight. If you are using this option, make sure that you have set accurate weights for your products. If you need to do this now, go to your Products page and click on each product in turn to set the weight.
If you select the weight-based option, then the settings appear as shown below:
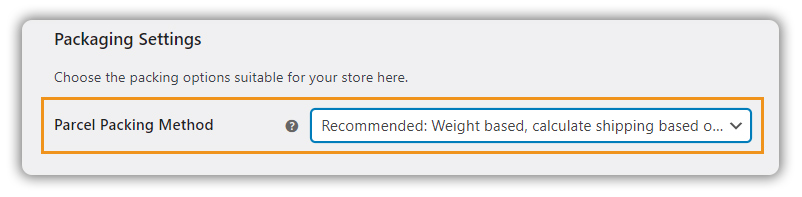

- Maximum Package Weight: Enter the highest limit of the weight of the single box.
- Packing Process: You can pack the items based on their weight in three ways as given below:
-Pack heavier items first
-Pack Lighter items first
-Pack purely divided by the weight
For more information about weight-based packing, See How to pack items based on Weight?
Note: This is the default option.
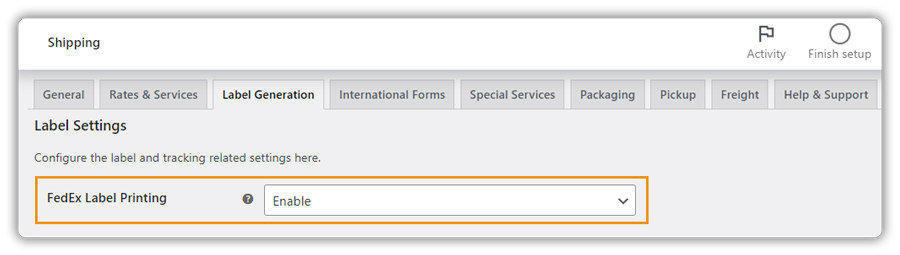
12. Print FedEx Shipping Labels
All the settings regarding the FedEx Shipping label printing are available in this section.
- Select WooCommerce > Settings > Shipping > FedEx
- Select Shipping Labels (Under FedExMenu)
- Enable Label Printing Option.
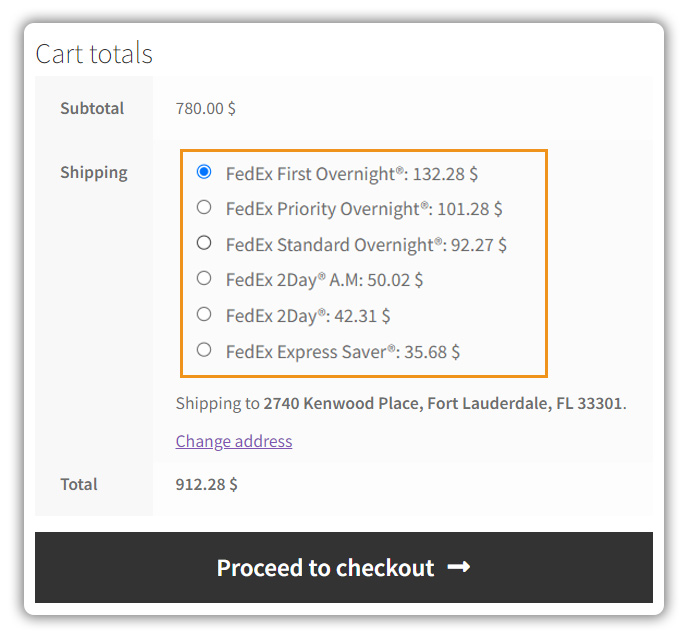
Printing your first FedEx Shipping Label
After setting up the FedEx Configuration Settings, your customers can see all available FedEx services listed on the Cart page which is shown in the below screenshot. The customer can select the required option and proceed to checkout.
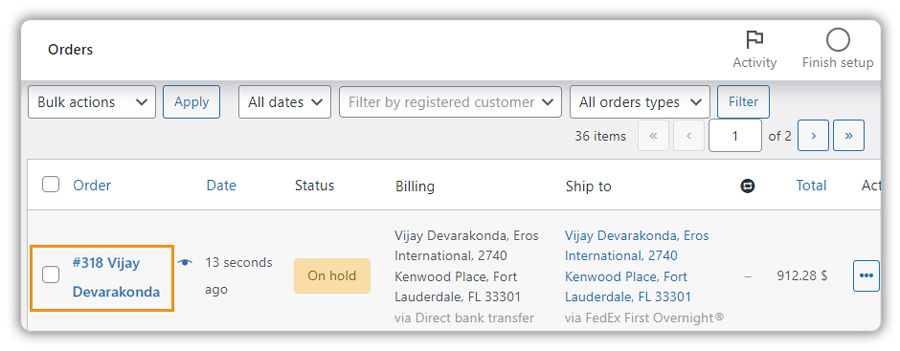
- Navigate to Dashboard > WooCommerce > Orders.
- On the order page, click #OrderNumber for which you want to create and print the label.
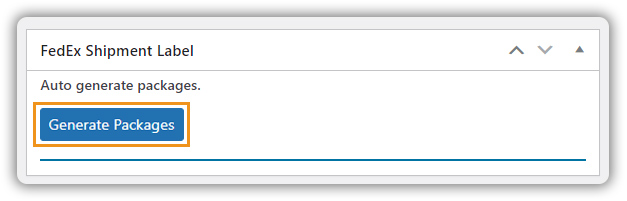
- Click on Generate Packages. It will generate a package based on the Parcel Packing Method that you have set up in the plugin settings.

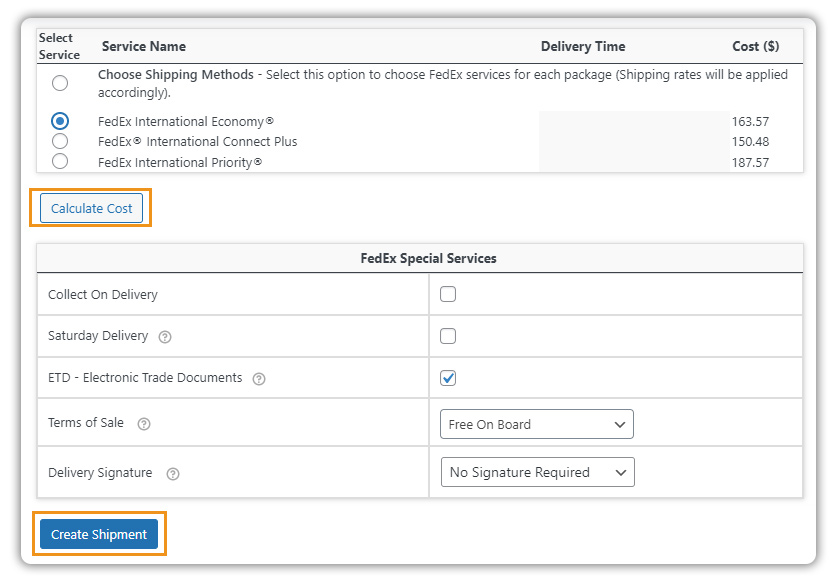
- Once the package is successfully created, the following options will be available to you.
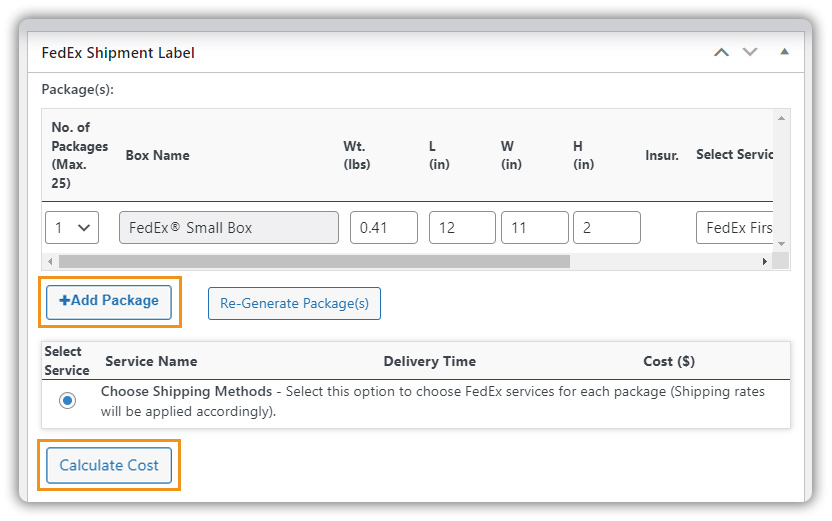
- Add Package: Suppose you want to ship your product where you require multiple packages/ boxes, the following option allows you to manually add custom box packages to your order. You can also provide package weight and dimensions and assign the Insurance value and FedEx shipping service for your packages accordingly.
- Calculate Cost: It allows you to calculate real-time shipping rates on the order page in order to compare different FedEx shipping rates and assign the cheapest or fastest FedEx shipping services to the packages. This way you can compare shipping rates and generate WooCommerce FedEx shipping labels of any available shipping service for the destination address.
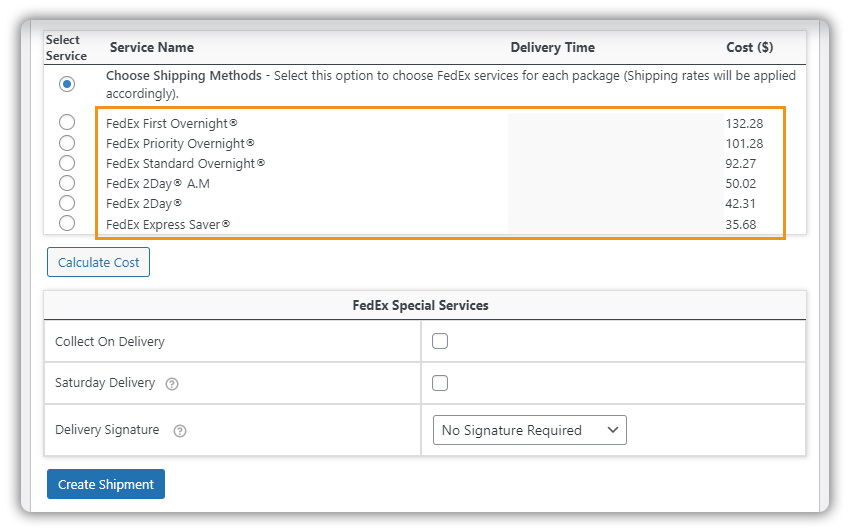
Here is the list of services available by FedEx based on your shipping requirements.
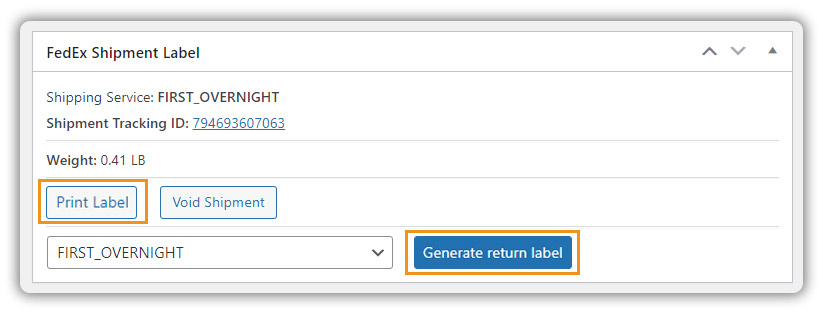
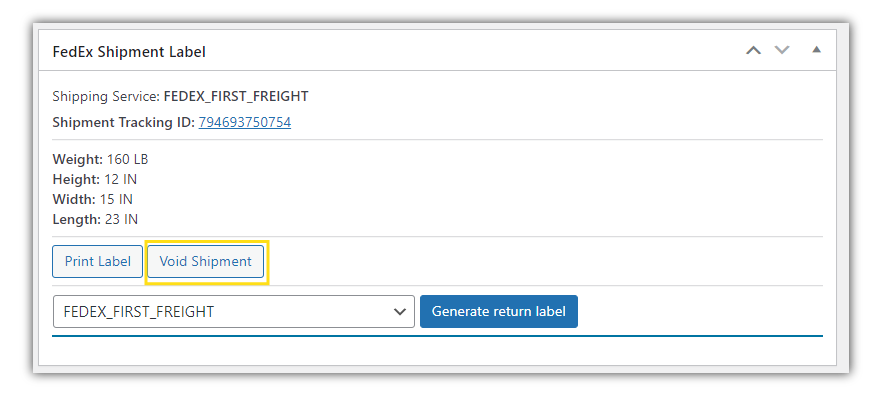
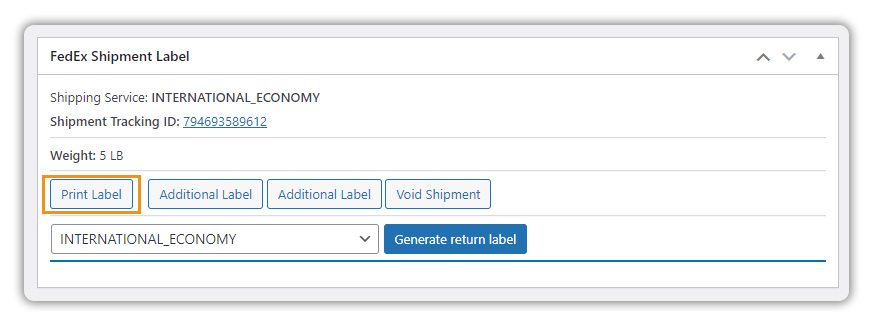
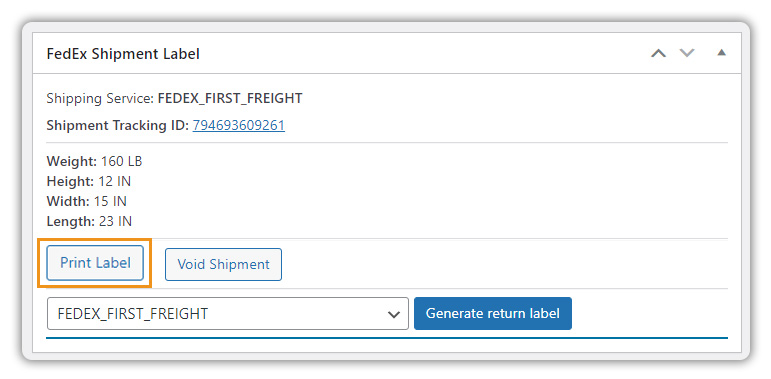
- Print Label: Click Print Label to print the label for the order.
- Void Shipment: In case the order gets canceled, you can click on the Void Shipment option.
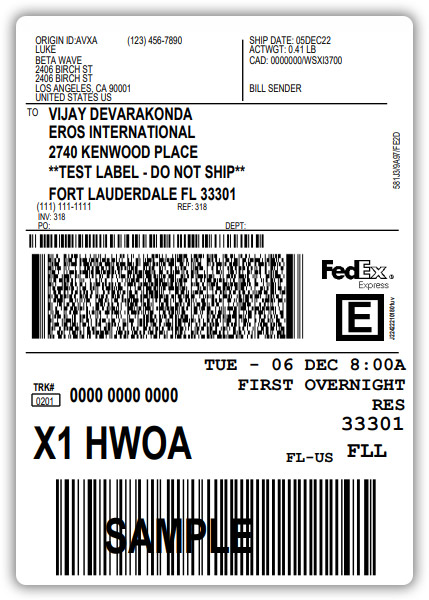
Click on the Print Label button for printing the WooCommerce FedEx shipping labels. You can also see your FedEx Tracking Details and Tracking ID.
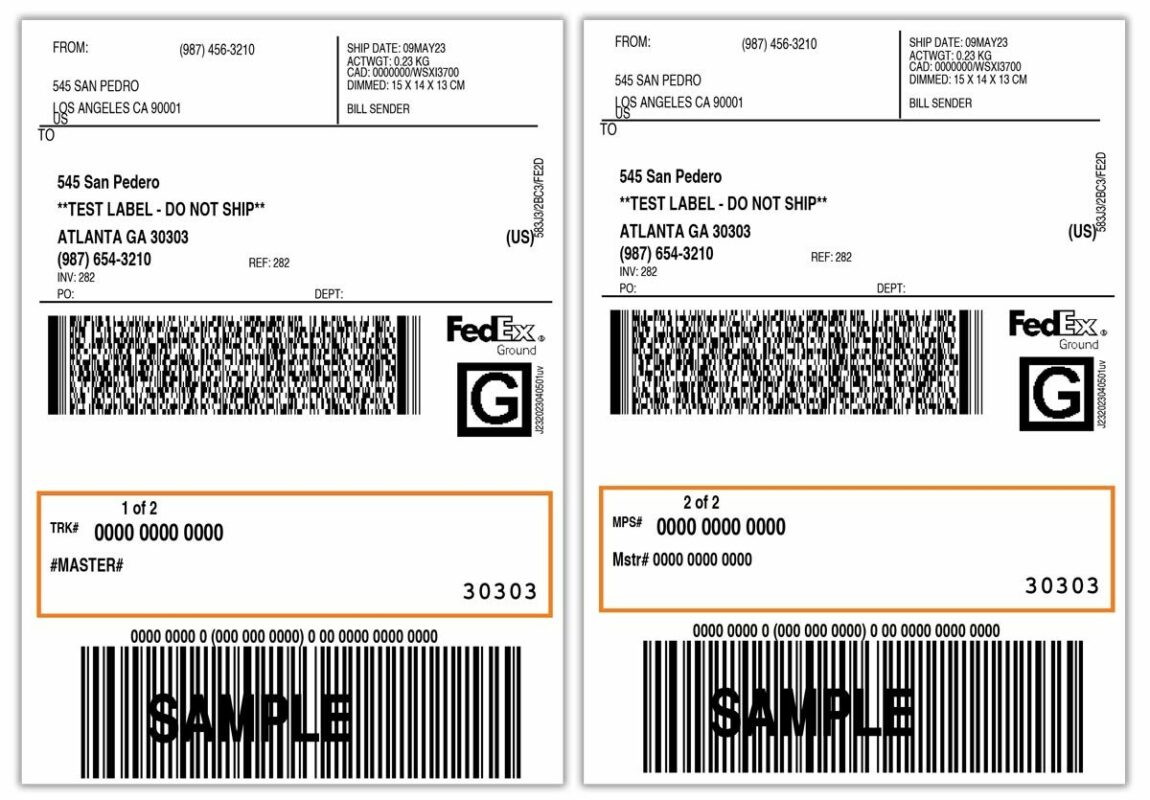
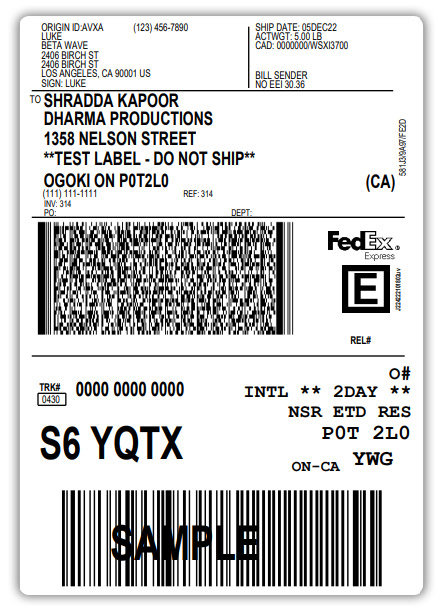
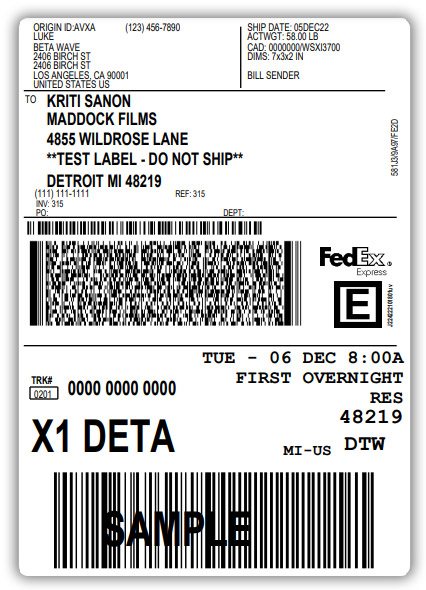
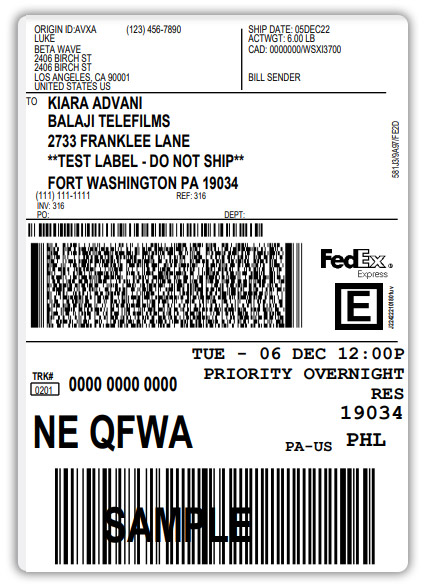
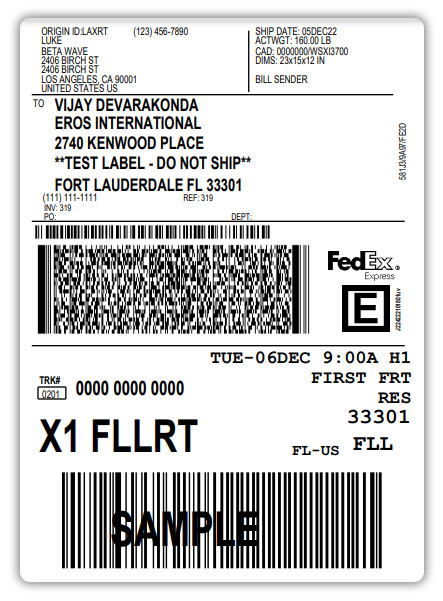
All created shipment labels get stored in your host site database. All these labels are auto-downloaded in a file and can be printed multiple times. If you are using Test API mode, you will get the Sample Domestic Shipment Label as shown below. For real label printing, select the Live API mode in the plugin Admin Settings.
If you’re sending out a large number of orders, use the plugin to print WooCommerce FedEx shipping labels, along with other shipping documents, and track your orders directly on the WooCommerce Orders page.
Print FedEx Return Labels
Once you generate and print the FedEx shipping labels, click Generate Return Label to generate the label with the destination address as the address of the shop owner and the origin address as the address of the customer.
You can also print the label, by clicking the Print Return Label Option
Print WooCommerce FedEx Shipping Labels Automatically
With these settings, you can automate the generation of packages and shipping labels once an order is received. These settings are as described below:
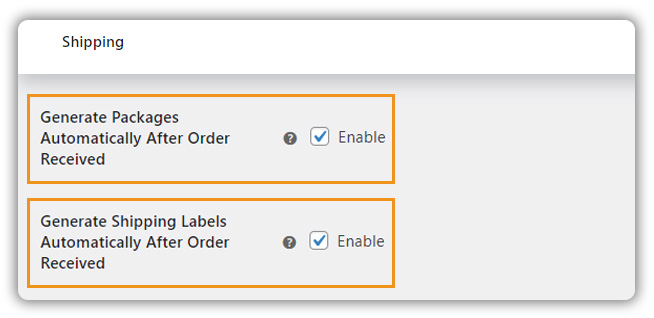
- Generate Packages Automatically After Order Received: You can check this option to automate package generation when an order is received and the payment is successful.
- Generate Shipping Labels Automatically After Order Received: Check this option to automate label generation when an order is received and the payment is successful.
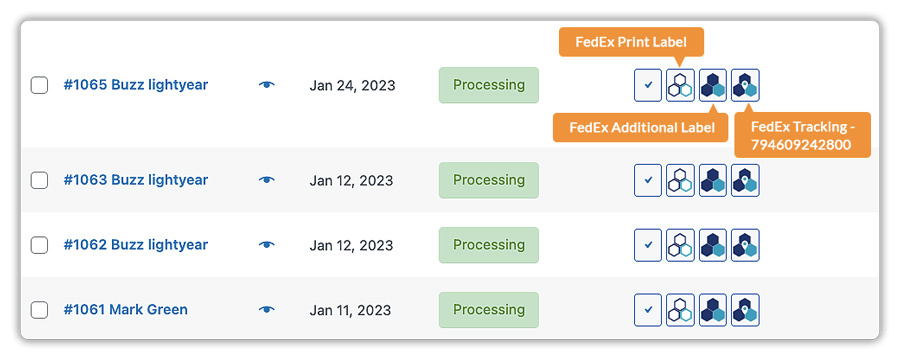
Once the order is placed, the WooCommerce FedEx shipping labels are automatically generated and can be downloaded from the Edit Orders page. You can also share the shipping labels with your customers via email or let them print the labels from the My Accounts page.
Please ensure that the orders are in the processing state.
Print FedEx Shipping Labels for Multiple Packages
Sometimes you might have to use multiple boxes/packages to pack your products. In such cases, we recommend you use our WooCommerce FedEx plugin in printing multiple shipping labels for your orders.
Once the order is placed, go to the Orders Page and select your order
Click on Generate Package
After you have generated packages, check your product weight, dimensions and services then click on Create Shipment:
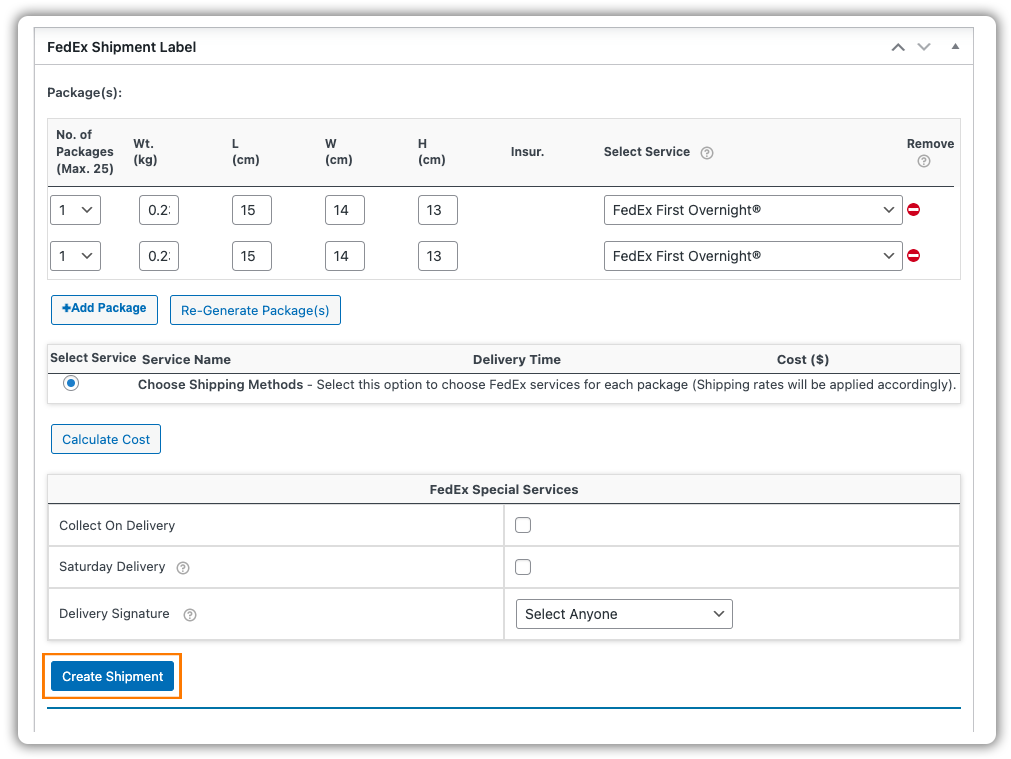
Now print your shipping labels for each product by clicking on Print Label:

Here have a look at the labels:
Print WooCommerce FedEx Shipping Labels for Multiple Orders in Bulk
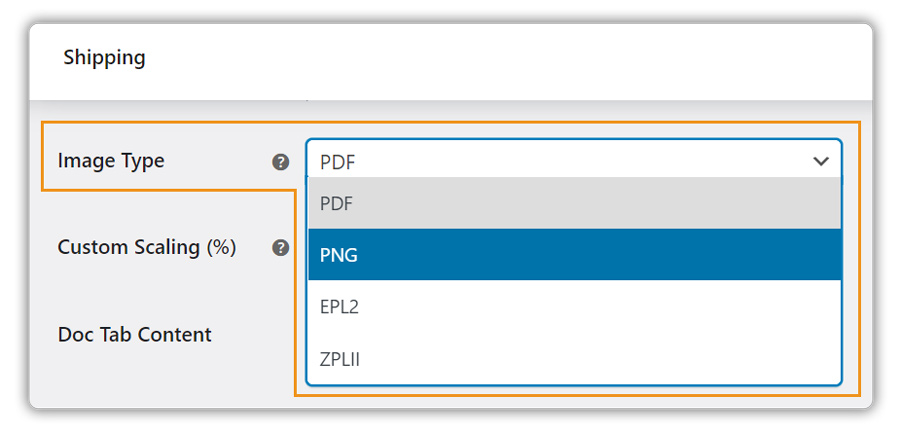
Once the WooCommerce FedEx plugin is installed and activated, all you have to do is change the image type of the shipping label to png. This is because the plugin only supports bulk label generation in the png file format. You can find the option to change the image type in the plugin settings under the Label Generation tab. The image below shows the option under the Label Generation tab.
Once you change the image type and save the settings, all you have to do is wait for the customers to place orders. The following image shows the orders placed on the orders page.
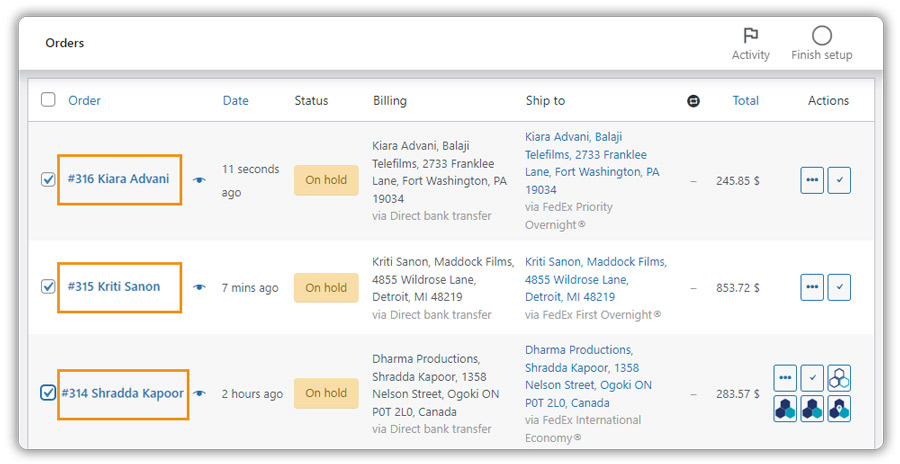
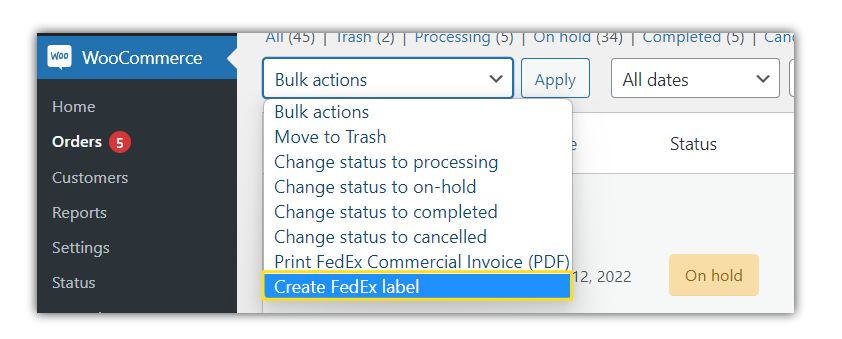
Select the orders you want to print labels on bulk and select Create FedEx Label under Bulk Actions. Click on Apply and the plugin will generate official FedEx shipping labels for all the orders you have selected.
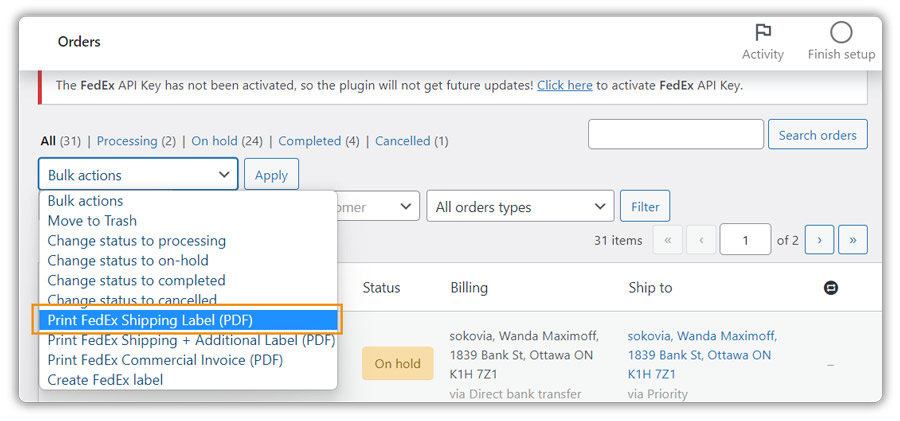
Once you have successfully generated the shipping label, you need to select the order you want to get the shipping label and click on the option to print it. The image below shows the option to print the shipping label.
Cancel FedEx Shipping Label
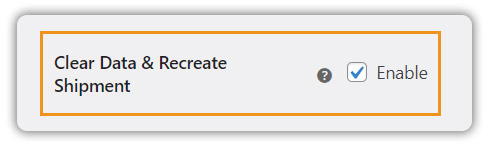
The WooCommerce FedEx Shipping plugin provides the functionality wherein you can cancel out the shipment generated and nullify the order. By enabling this option you can delete the shipment from the order page and thereby recreate the shipping labels,
Go to the Orders page, select an order where the shipment is confirmed and the label is generated

Now, click on Void Shipment.
Now, Click on Clear Data

Click on Ok
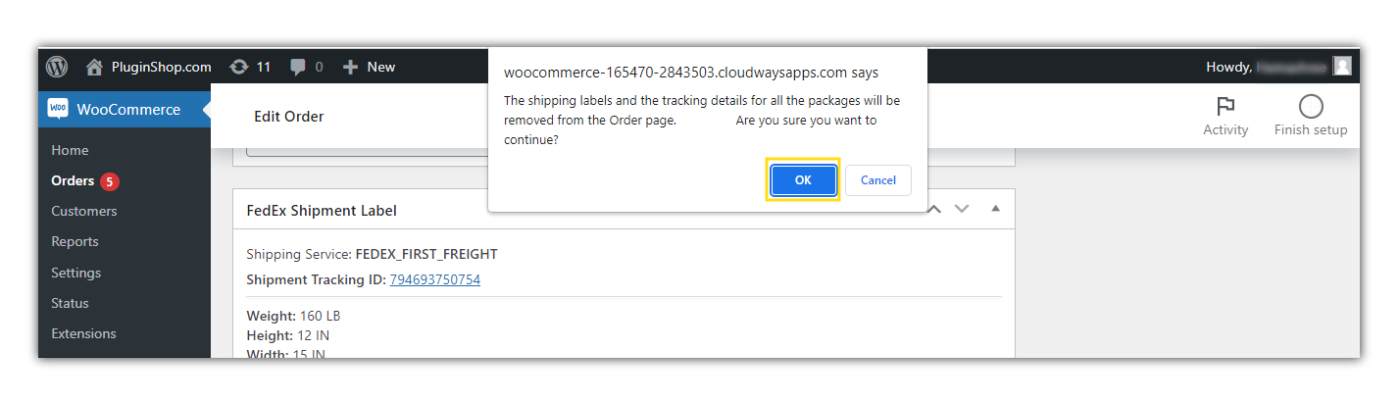
The shipment will be terminated.
Additional options for International Shipments
Assign Purpose of Shipment
With this setting, you can specify the purpose of the Shipment. The Shipment purpose setting is as shown below:
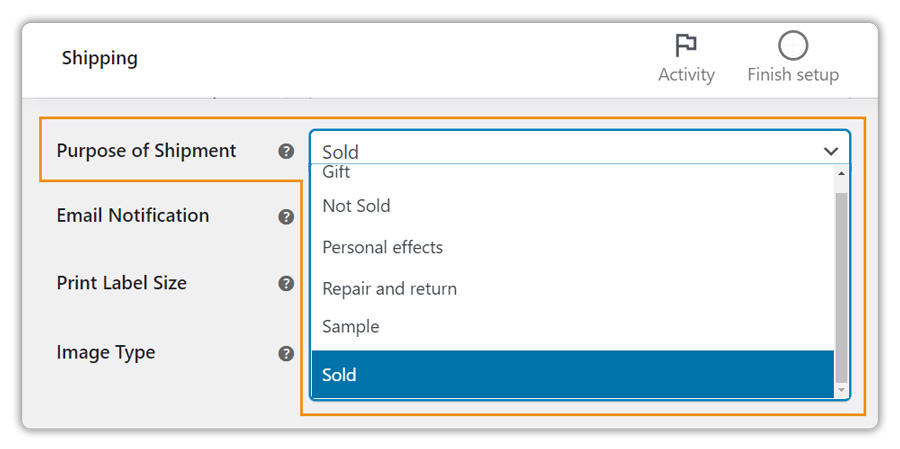
You can select the required option from the Purpose Of Shipment drop-down list and the options available are as given below:
- Gift: Any shipment containing articles to be given as an unsolicited gift, from one private individual to another private individual, which is not being shipped by a business nor consigned to a business.
- Not Sold: Any shipment containing an unsold article(s).
- Personal effect: Any shipment containing used personal articles such as unaccompanied baggage and household goods being shipped for relocation.
- Repair and Return: Articles being shipped for repair or articles previously exported for repairs that are being returned following the repair.
- Sample: Any shipment containing articles that are sent free of charge that has been marked or mutilated or otherwise made unsuitable for sale or use except as commercial samples, being shipped with the view of soliciting an order or as a mock-up to further an existing order from the foreign entity.
- Sold: Any shipment containing articles that are sold by the shipper.
Enable Email Notification
With this setting, you can choose to get a notification email directly from FedEx about the shipment. The setting is as shown below:
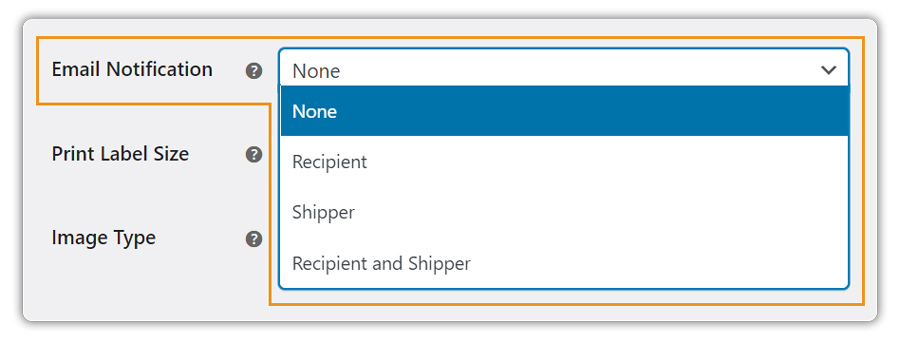
- None: There will be no notification regarding the shipment status.
- Customer: The customer will be notified regarding the FedEx Shipment Status.
- Shipper: The shipper will be notified regarding the FedEx Shipment Status.
- Customer and Shipper: Both the customer and shipper will be notified regarding the FedEx Shipment Status.
Set Label Print Size
In this field, you can set the size for Print Label. The available options are as given below:
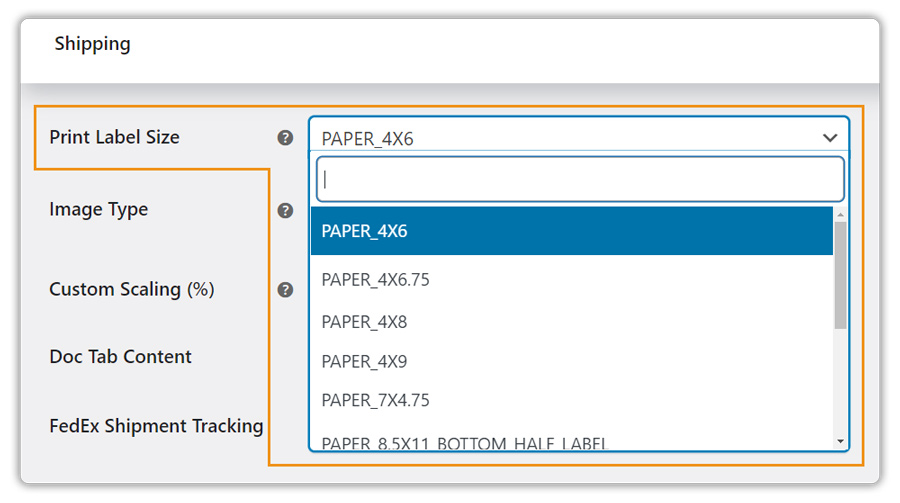
- PAPER_4X6: This option generates labels with a size of 4 x 6 inches.
- PAPER_4X8: This option generates labels with a size of 4 x 8 inches.
- PAPER_4X9: This option generates labels with a size of 4 x 9 inches.
- PAPER_7X4.75: This option generates labels with a size of 7 x 4.75 inches.
- PAPER_8.5X11_BOTTOM_HALF_LABEL: This option generates labels with a size of 8.5 x 11 inches at the bottom half of the paper.
- PAPER_8.5X11_TOP_HALF_LABEL: This option generates labels with a size of 8.5 x 11 inches at the top half of the paper.
- PAPER_Letter: This option generates labels with a size of 8.5 x 11 inches.
Note: To print labels that are similar to FedEx.com, you can select the option PAPER_7X4.75, PAPER_8.5X11_BOTTOM_HALF_LABEL, or PAPER_8.5X11_TOP_HALF_LABEL.
Set Label File Format
Image Type: With this field, you can set a required file format for printing the labels. The available options are as given below:

- PDF: This option prints the label in Portable Document Format which is used to present the document in an independent manner of application, software, hardware, and operating systems.
- PNG: This option prints the label in Portable Network Graphics (PNG) which is a raster graphics file format that supports lossless data compression.
Note: PNG format is well suited for the PAPER_4X6 option.
Enable the FedEx Return label on my account page

This setting allows you to enable or disable customers to get the shipping labels on their My Accounts page.
Show All Services In Order Edit Page
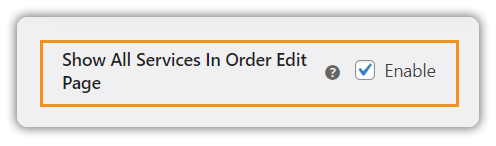
This setting allows you to get the list of all the FedEx shipping services during the time of printing the FedEx shipping labels on the Orders page.
Set up FedEx Estimated Delivery Date
You can provide customers with an estimated delivery date for their orders directly on your cart and checkout page. You can also modify the delivery dates based on your preferences and stock availability.
Accessing Estimated Delivery Date Settings:
- Select WooCommerce < Settings < Shipping < FedEx
- Select Rates & Services (Under FedEx Tab)
- Under FedEx Estimated Delivery Date, enable the Display Delivery Date option
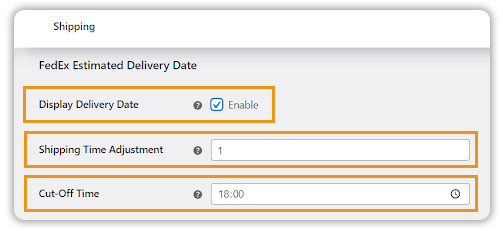
Display Delivery Date: The delivery date of the package is displayed on the cart/checkout. This depends on the service chosen for shipping.
Shipping Time Adjustment: The number of days can be adjusted for the estimated delivery. This field takes numeric values. Suppose you enter 1, and your delivery date is extended one day from the initial date of delivery.
Cut-off time: Cut-off Time adjusts the delivery date to the next day if an order is placed/received post the cut-off time given.
Eg: Suppose the cut-off time is given as 18:00. When a customer places an order post this cut-off time, the estimated delivery date of the order placed will be extended to the next day.
12. How to Request FedEx PickUp?
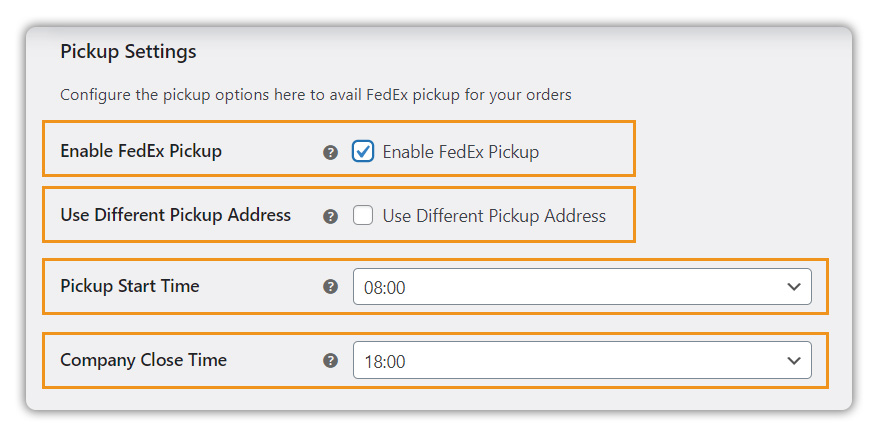
- Enable Pickup: If you wish to use the pick-up service from FedEx, tick this checkbox. Further settings appear as shown below:
- Use Different Pickup Address: Tick this option to choose a different address for pickup. Further text fields appear where you can enter the alternate pickup address.
- Pickup Start Time: Allows you to set a time by which items will be ready for pickup from the shop.
- Company Close Time: This allows you to set your store closing time. Remember to set after the time period of the pickup start time.
13. Setting up FedEx Shipment Tracking
FedEx Shipment Tracking: Enable the FedEx Shipment Tracking option as it allows the plugin to add Tracking Details to the Order. Apart from this, the Order confirmation email will contain the Tracking Information embedded in it. The tracking numbers work in a Live environment and will not function within a Test environment.
Disable Tracking for Customers: Disable the tracking message sent to the customers via Email and on the My Account Page
Custom Shipment Message: Provide the custom message to be displayed via tracking details mail.
14. How to Set up FedEx International Shipping?
FedEx International shipping is part of FedEx Cooperation which only deals with international shipments. Both normal (less than 150 Lbs) and freight shipping services fall under this category. Moreover, their services are designed to help you complete important documents, navigate through customs, and safely export your products to other countries.
Print Commercial Invoice Along with Shipping Labels
Accessing FedEx International Shipping Settings:
- Select WooCommerce > Settings > Shipping > FedEx
- Select International Forms (Under FedEx Menu)
Enable Commercial Invoices:
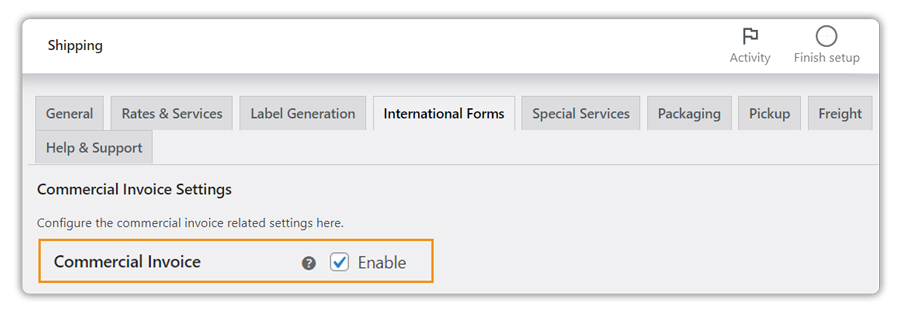
The FedEx Commercial Invoice is needed for all parcels being shipped internationally with FedEx.
Enabling the Commercial Invoice option will help you in getting invoices along with your shipment labels.
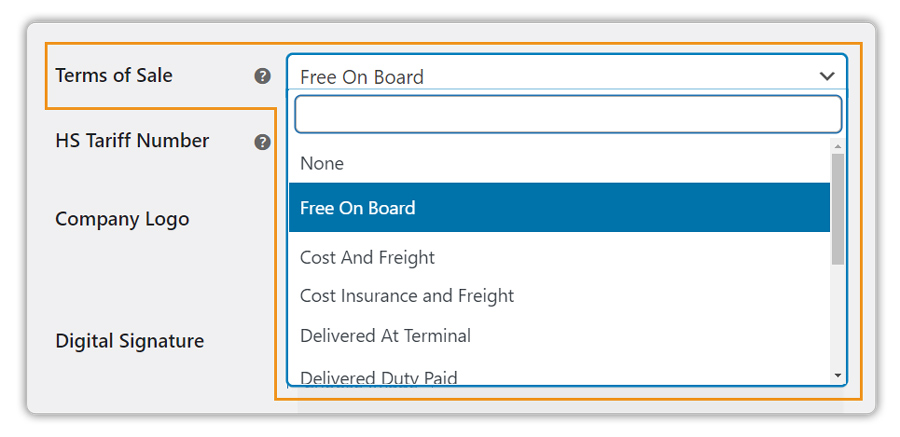
Set Terms of Sale Type
Terms of Sale are defined as The point at which sellers have fulfilled their obligations so the goods in a legal sense could be said to have been delivered to the buyer. They are shorthand expressions that set out the rights and obligations of each party when it comes to transporting the goods.
Print Pro Forma Invoice along with Shipping Labels
A Pro Forma invoice from FedEx is essentially an estimate of a FedEx commercial invoice that would be used for the international shipping of goods other than documents. It may look almost identical to the final commercial invoice but will include clear labeling that it is the proforma invoice

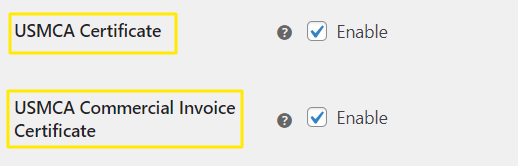
Print USMCA Certificate along with the Invoice
The USMCA Certification of Origin is a set of 9 mandatory data elements and a statement. This information may be provided on any existing shipping document (e.g., commercial invoice) or on a separate stand-alone document, not in any particular order.
Enable the USMCA Commercial Invoice Certificate option in order to print the copy of the commercial invoice validated by USMCA certification
Print labels for your International Shipments
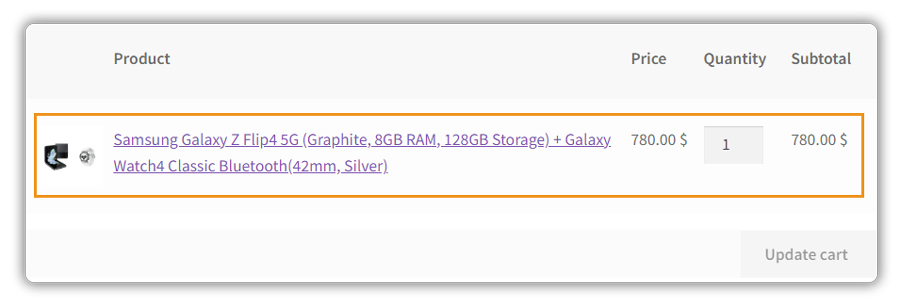
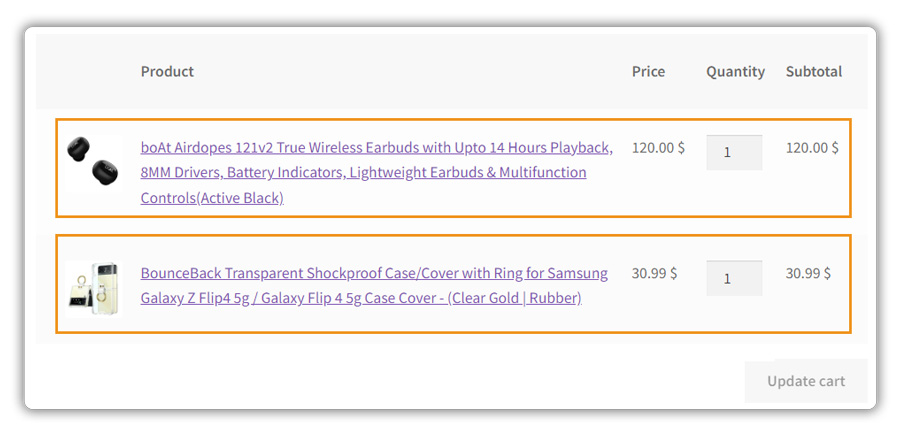
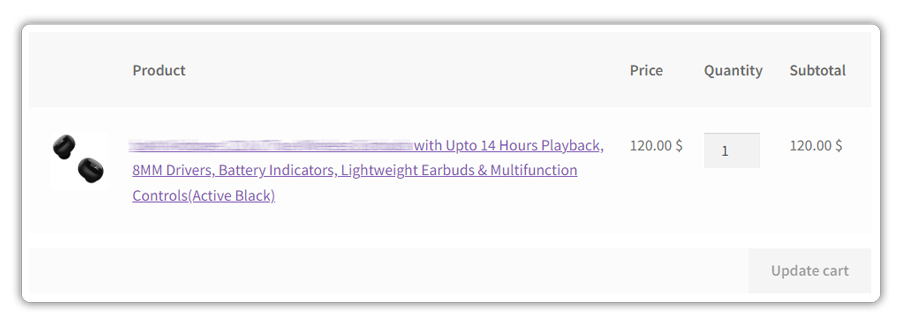
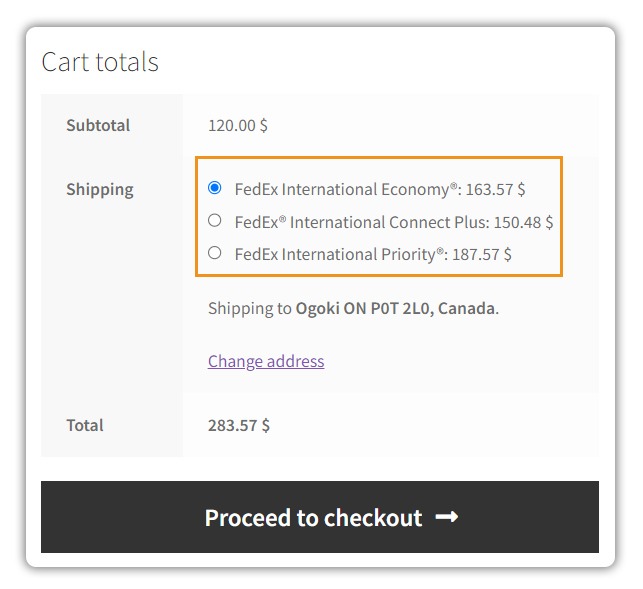
Add a product to your WooCommerce Cart and provide the shipping and billing addresses accordingly, as shown in the image:
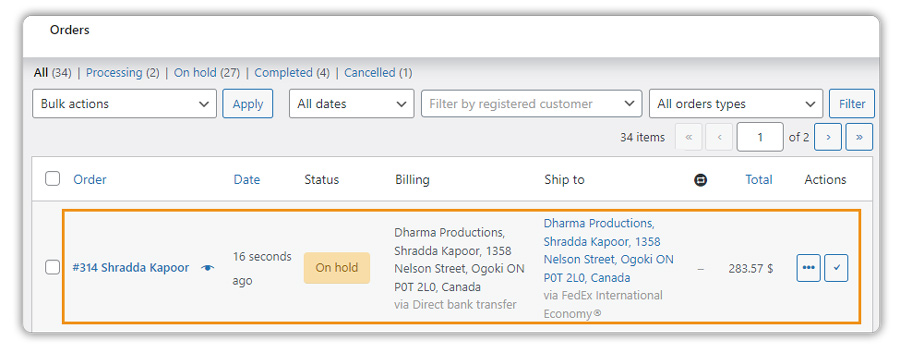
After placing the order, Go to the Orders section:
Click on the order you want to print the label
Click on Generate Package:

Click on Calculate Cost and Create Shipment:
Shipment Label along with other International Documents is printed as shown in the image:

15. How to Set up FedEx Freight Settings?
Freight is the service of transporting goods in large quantities via land, air, or sea. FedEx Freight is an easy-to-ship economical freight all included in one streamlined LTL network. This shipment method saves both cost and space, which is in accordance with the principles of small businesses.
Enable FedEx Freight Services
- Select WooCommerce < Settings < Shipping < FedEx
- Select Freight (Under FedEx Menu)
- Enable the Freight Services option
In order for your shipment to be eligible for FedEx Freight, the package needs to be heavier than 150 lbs. This shipping method can be used when the overall orders weigh between 150 and 15,000 pounds.
The FedEx LTL Freight Setting fields are as shown below:
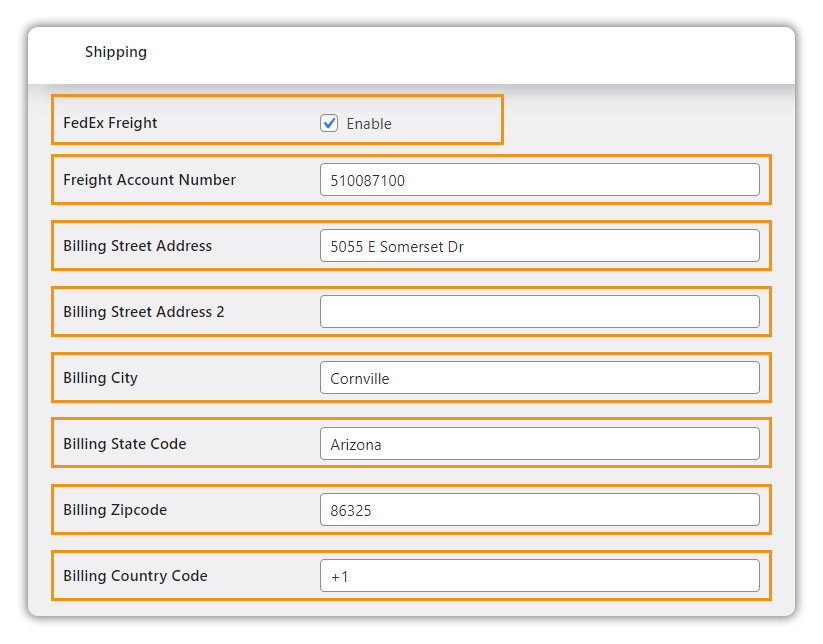
- FedEx Freight Account Number: Enter the FedEx Freight Account Number of the shop owner.
- Billing Street Address: Enter the first line of the Address.
- Billing Street Address 2: Enter the Second line of Address.
- Billing City: Enter Billing City.
- Billing State Code: Enter the specific state code which is the length of two text fields.
- Billing ZIP/Postcode: It’s the postcode of the place from where you are billing items.
- Billing Country Code: Enter the Country Code from where you are Billing.
The Freight address is case-sensitive. So make sure you enter the Account Number as well as the Address properly.
Default Freight Class:
Freight Classes have been created to provide users with a common standardized freight pricing. They are based on weight, height, and length. The list of available Freight classes is listed below. You can select the required option from the Default Freight Class drop-down list.
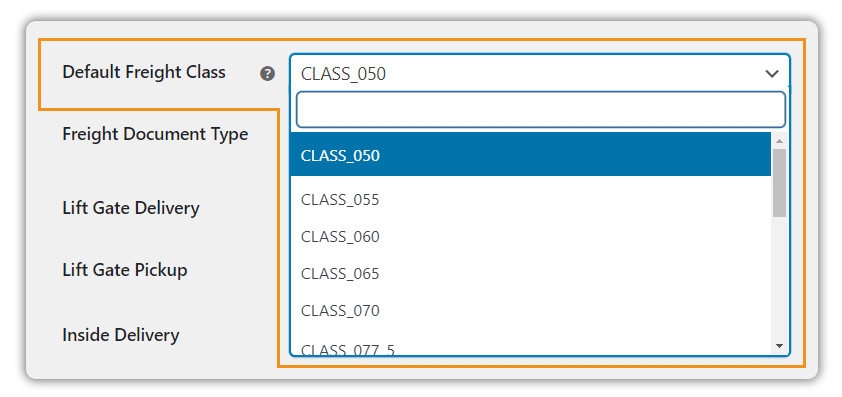
- CLASS_050: This option shows the lowest shipping cost for the item which is more than 50 lbs per cubic foot.
- CLASS_055: This option is used for an item that weighs 30-50 pounds per cubic foot. For example, Bricks, cement, mortar, hardwood flooring, etc.
- CLASS_060: This option is used for an item that weighs 30-35 pounds per cubic foot. For example, Car accessories and car parts
- CLASS_065: This option is used for an item that weighs 22.5-30 pounds per cubic foot. For example, Car accessories and car parts, bottled beverages, books in boxes, etc.
- CLASS_070: This option is used for an item that weighs 15-22.5 pounds per cubic foot. For example, Car accessories & car parts, food items, automobile engines, etc.
- CLASS_077_5: This option is used for an item that weighs 13.5 to 15 pounds per cubic foot. For example, Tires, bathroom fixtures, etc.
- CLASS_085: This option is used for an item that weighs 12-13.5 pounds per cubic foot. For example, Crated machinery, cast iron stoves, etc.
- CLASS_092_5: This option is used for an item that weighs 10.5-12 pounds per cubic foot. For example, Computers, monitors, refrigerators, etc.
- CLASS_100: This option is used for an item that weighs 9-10.5 pounds per cubic foot. For example, boat covers, car covers, canvas, wine cases, caskets, etc.
- CLASS_110: This option is used for an item that weighs 8-9 pounds per cubic foot. For example, cabinets, framed artwork, table saw, etc.
- CLASS_125: This option is used for an item that weighs 7-8 pounds per cubic foot. For example, Small Household appliances, etc.
- CLASS_150: This option is used for an item that weighs 6-7 pounds per cubic foot. For example, Auto sheet metal parts, bookcases, etc.
- CLASS_175: This option is used for an item that weighs 5-6 pounds per cubic foot. For example, Clothing, couches stuffed furniture, etc.
- CLASS_200: This option is used for an item that weighs 4-5 pounds per cubic foot. For example, Auto sheet metal parts, aircraft parts, aluminum tables, packaged mattresses, etc.
- CLASS_250: This option is used for an item that weighs 3-4 pounds per cubic foot. For example, Bamboo furniture, mattresses and box spring, plasma TV, etc.
- CLASS_300: This option is used for an item that weighs 2-3 pounds per cubic foot. For example, wood cabinets, tables, chair setups, model boats, etc.
- CLASS_400: This option is used for an item that weighs 1-2 pounds per cubic foot. For example, Deer antlers, etc.
- CLASS_500: This option shows the highest shipping cost for the item which weighs Less than 1 lb per cubic foot. For example, Bags of gold dust, ping pong balls, etc.
Click Save Changes to set/update configuration settings.
Freight Document Type:
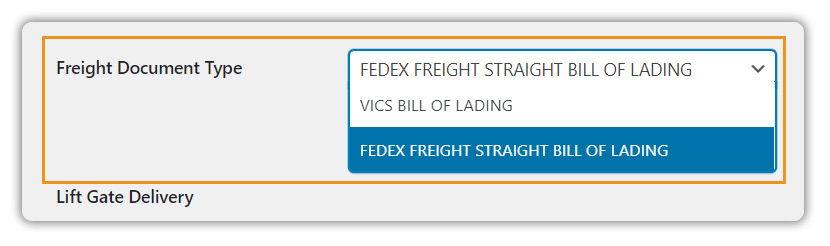
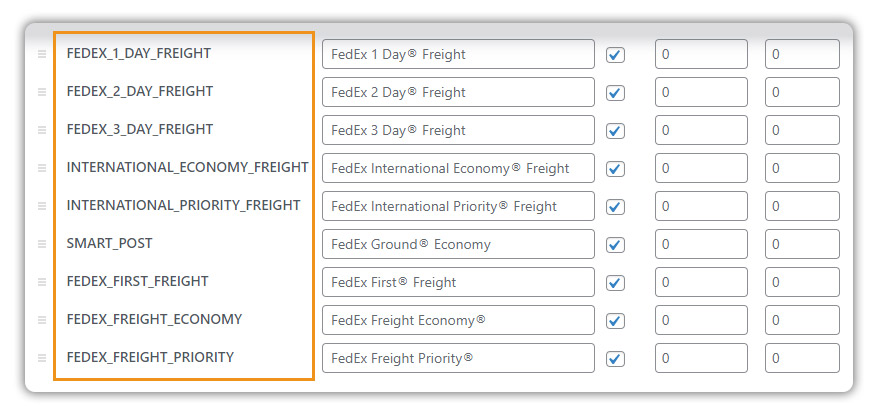
FedEx Freight provides Air and Ocean Cargo apart from LTL (Less than Truckload) Freight services. Some of the services provided by FedEx Freight are listed below. Once you have enabled this option and saved the settings, the following FedEx Freight shipping services will be automatically enabled.
- FedEx 1-Day Freight
- FedEx 2-Day Freight
- FedEx 3-Day Freight
- International FedEx Economy Freight
- International FedEx Priority Freight
- FedEx First Freight
- FedEx Freight Economy
- FedEx Freight Priority
- FedEx Next Day Freight
Print the FedEx Freight Shipment label
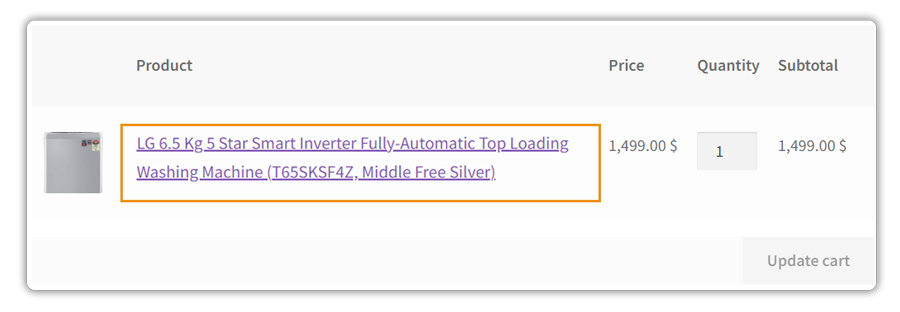
Once you’re done with the setup, you should be able to see the shipping rates on the Cart/checkout page. Here’s what the cart page looks like.
You can select the services for your shipment on the orders page:
Your Freight Shipment label is generated as follows
16. Enabling FedEx Special Services
FedEx Delivery Signature
FedEx allows multiple options when you need a signature upon delivery. Based on the type and kind of shipment, FedEx will ask the receiver to sign in to the final document. Failing to do so may even void the shipment which will be returned back to the origin address, i.e, your warehouse.
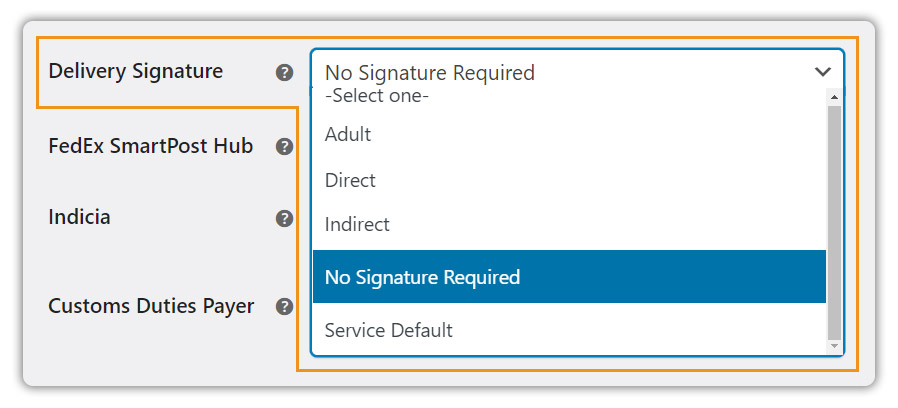
To avoid such a scenario from ever happening, FedEx allows three types of signatures:
- Indirect Signature Required
- Direct Signature Required
- Adult Signature Required (required in the U.S. and Canada)
Read more about FedEx Delivery Signature.
Accessing FedEx Delivery Signature:
- Select WooCommerce < Settings < Shipping < FedEx
- Select Special Services (Under FedEx Menu)
- Select Delivery Signature to choose the signature type from the dropdown list.
FedEx Freight Services are not eligible for Signature Service. Hence Signature option will be ignored for Freight Shipments.
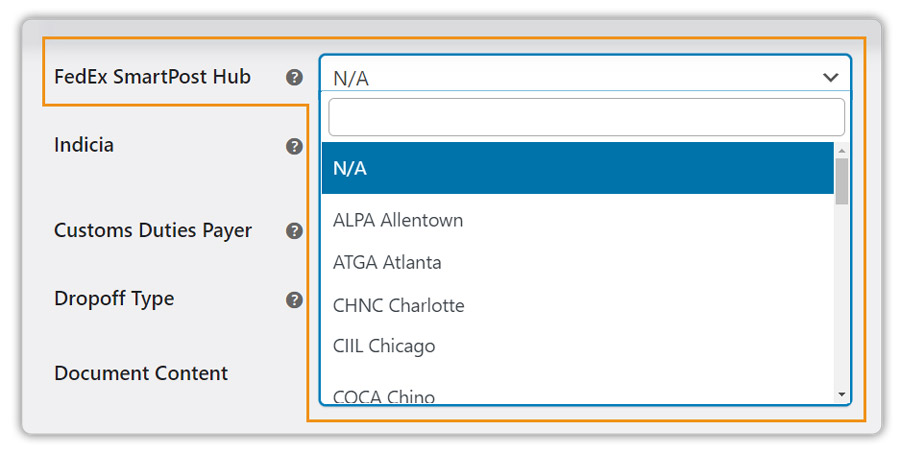
FedEx SmartPost Hub
By utilizing the U.S. Postal Service® for final delivery, FedEx SmartPost reaches every U.S. address, including P.O. boxes and military APO, FPO, and DPO destinations.
The account you are shipping with must be enabled for SmartPost in order to select SmartPost as a Service on the Shipment tab. When the SmartPost-enabled account is specified as the default account (in FedEx Setup), or you associated the currently selected Address ID (on the Sender tab) with a FedEx SmartPost-enabled account, SmartPost will be available as a Service.
The SmartPost Hub Settings are as shown below:
- Select WooCommerce < Settings < Shipping < FedEx
- Select Special Services (Under FedEx Menu)
Select FedEx SmartPost Hub to choose the service from the dropdown list
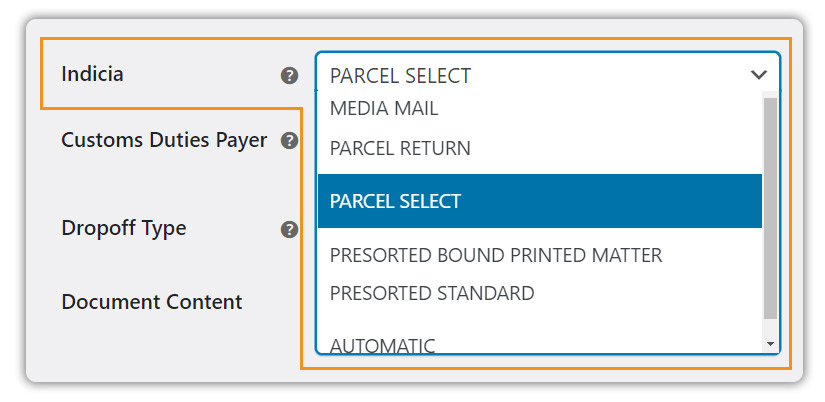
Indicia
Every mail item must be stamped with a postal imprint or “postal indicia.” The indicia tells the receiving postal administration that proper postage and/or a postal permit exists to allow the items to enter the domestic mail delivery network. FedEx International MailService works with the Swedish Post (Posten AB) to provide the highest-quality international mail service. Select the required service option from Indicia drop-down list. The options are detailed in a tabular format below:
- Select WooCommerce < Settings < Shipping < FedEx
- Select Special Services (Under FedEx Menu)
Select Indicia to choose the postage imprint type from the dropdown list.
| Service type | Minimum Weight | Maximum Weight | Dimensions |
| Media Mail | 0.01 pounds | 70 pounds | Sum of length plus girth cannot exceed 84′Minimum: 6″(L) x 4″(W) x 1″(H) |
| Parcel return | 0.01 pounds | 70 pounds | Sum of length plus girth cannot exceed 130′Minimum: 6″(L) x 4″(W) x 1″(H) |
| Parcel Select | 1 pound | 70 pounds | Sum of length plus girth cannot exceed 130′Minimum: 6″(L) x 4″(W) x 1″(H) |
| Presorted Bound Printed Matter | 0.01 pounds | 15 pounds | Sum of length plus girth cannot exceed 84′Minimum: 6″(L) x 4″(W) x 1″(H) |
| Presorted Standard | 0.01 pounds | < 1 pound | Sum of length plus girth cannot exceed 84′Minimum: 6″(L) x 4″(W) x 1″(H) |
For example, the Parcel Select option requires a weight of at least 1lbs. Automatic will choose PRESORTED STANDARD if the weight is less than 1lb and PARCEL SELECT if the weight is more than 1 lb.
Indicia is applicable only for SmartPost Service only.
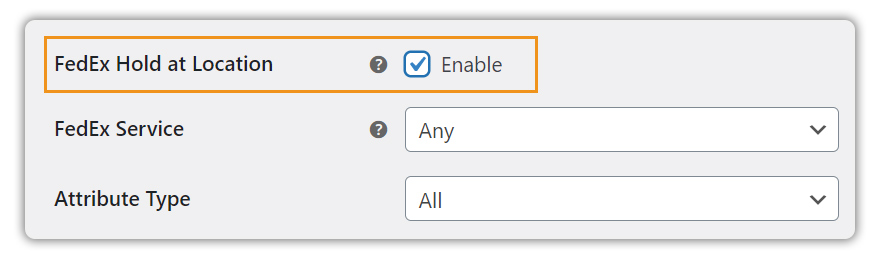
FedEx Hold at Location
FedEx Hold for Pickup allows you to request packages to be held at a FedEx location. Once redirected, you can pick up packages on your schedule at locations that are convenient to where you work or live.
If it is enabled, customers can select any hold at the location while checkout. FedEx will then hold the shipment at the selected location, and the customers will have to pick up their shipments from that location
FedEx offers a special delivery service that allows you to hold package(s) at a FedEx location upon further information. If you have enabled the Hold at Location option for your shipments then you can have your eligible FedEx Express or Ground shipments held for pickup.
You can select this option when you prepare your shipment once it’s on its way. To find the relevant FedEx locations and where this option’s available, you can enter an address and then select ‘Hold at location‘
Select the FedEx Service based on which, the Hold at Location will be displayed on the cart/checkout page.
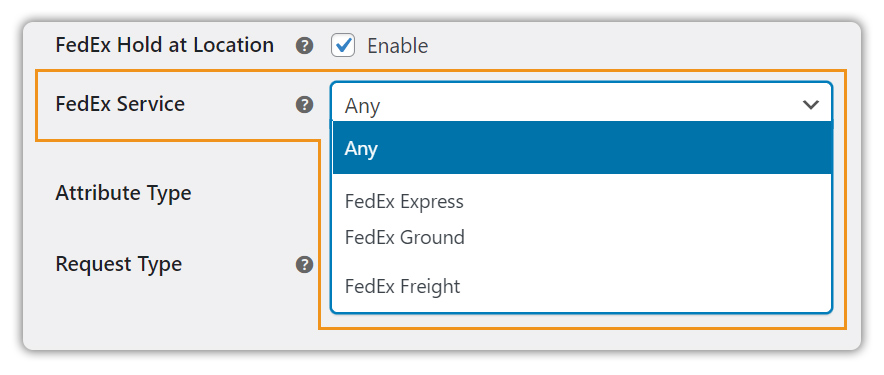
You can also assign the other attributes for your FedEx Hold at Location as follows:
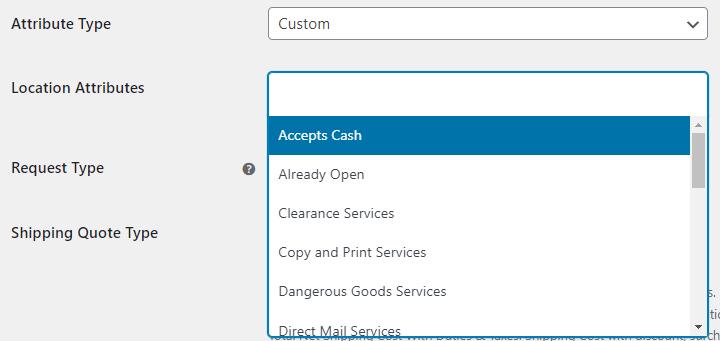
- All: The Hold At location accepts and facilitates all attributes assigned
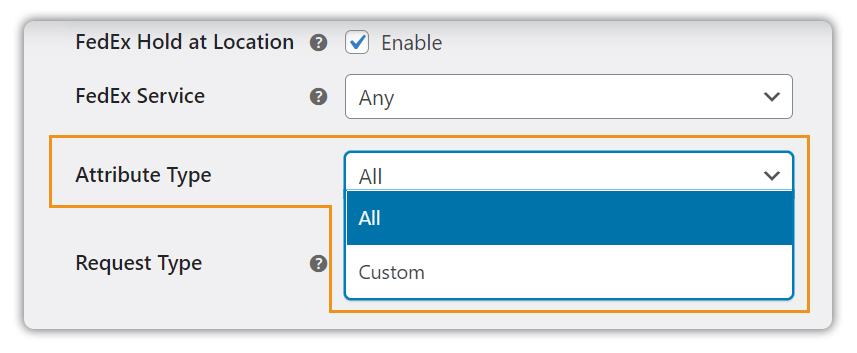
2. Custom: Selected Attributes will be applied to the FedEx Hold At Location
FedEx Customs Duty Payer
When transporting goods across international borders, shipments are subject to duties and taxes as determined by customs in the destination country. The duty tax payment settings are as shown below:
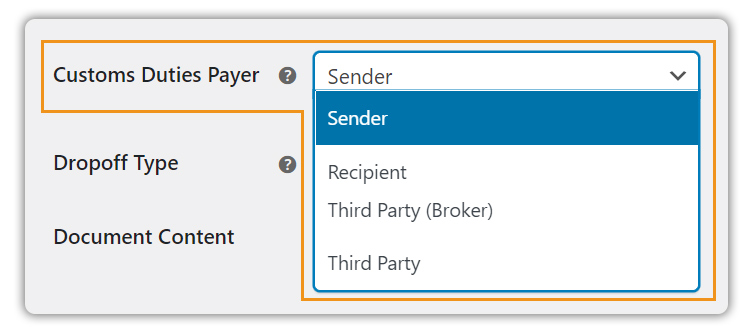
Duty tax payment can be done by the shipper or recipient. Select a required option from the drop-down list. The available options are as given below:
- Shipper: Select this option if a shipper is paying duty tax.
- Recipient: Select this option if a recipient of the shipment is going to pay duty tax.
- Third Party: Select this option if a third party (broker) is going to pay the duty tax. Moreover, for this to work, you need to fill in the following details in the plugin settings.
- Third-Party Account Number: Enter the Third Party Account Number.
- Payer Contact Person: Enter the name of the contact person of your third-party account.
- Payer Company: Enter the name of the company of the third party.
- Payer Contact Phone Number: Enter the Phone number of the third party.
- Payer Contact Email: Enter the Email of the third party.
- Payer Address Line 1: Enter the first line of the address of the third party.
- Payer Address Line 2: Enter the second line of the address of the third party.
- Payer City: Enter the City name of the third party.
- Payer State Code: Enter the State Code of the third party.
- Payer Postal Code: Enter the Postal Code of the third party
- Payer Country: Select the country of the third party from the Payer Country drop-down list.
Learn more about FedEx Customs and International Shipping.
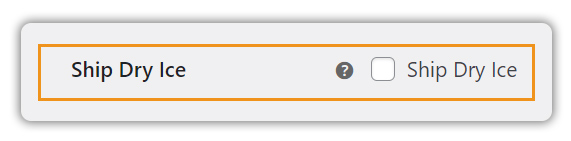
Ship With Dry Ice
Tick this option to enable shipping dry ice option to the product level. You can learn more about FedEx Dry Ice here.
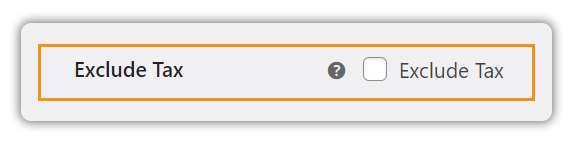
Exclude Tax
Tick this check box to exclude tax from the product price while generating the shipping label.
Collection on Delivery (C.O.D) Type
The Collection on Delivery (C.O.D) option allows you to designate the amount of money that the FedEx courier collects from your recipient when the package is delivered. Your recipient can pay by personal check, money order, cashier’s check, company check, official check, or certified check. FedEx returns the payment to you the next business day by FedEx Standard Overnight (where available: otherwise, FedEx 2 Day). An additional surcharge applies to C.O.D. shipments.
The setting is as given below:
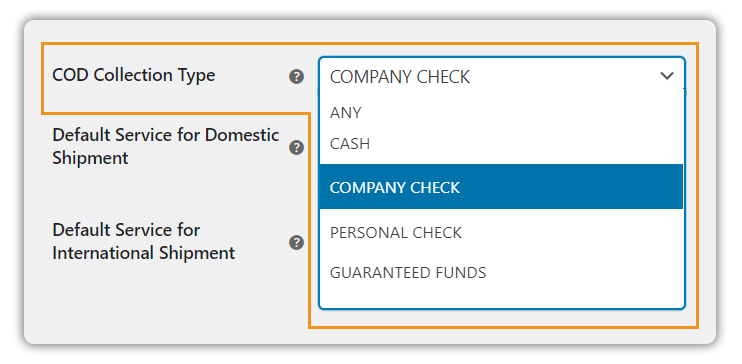
You can select the required option from the C.O.D Collection Type drop-down list and the options available are as given below:
- ANY: This option allows any type of payment like cash, personal check, money order, cashier’s check, company check, official check, or certified check.
- CASH: This option allows only cash payment.
- GUARANTEED_FUNDS: This option allows only secured payment like a certified check, money order, or cashier’s check.
- COMPANY CHECK: This option allows payment via check provided by the company/organization.
- PERSONAL CHECK: This option allows payment via check initiated by an individual’s deposit account.
Item Description and TIN Number
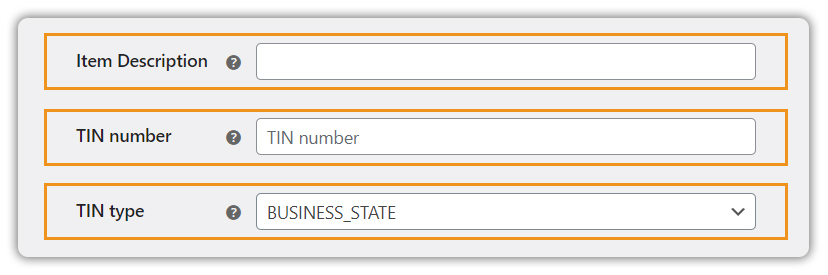
- Item Description: This is required to describe the content of the package for customs clearance purposes. This applies to intra-UAE, intra-Columbia, and intra-Brazil shipments.
- TIN Number: The plugin also allows you to enter your TIN or VAT number, with the provision of allocating the category of taxpayer Identification under TIN TYPE
Hi, I’m using the basic fedex plugin right now on a site for a client. I suspect they’ll probably want the pro version with labels, etc. (and maybe UPS too) but for now I’m just trying to get the fedex services/rates to show up in checkout and nothing shows up. I’m testing with a test product that has weight and dimensions (other products don’t have weights yet) and no rates show up. I used debug mode and copied this code:
stdClass Object
(
[HighestSeverity] => ERROR
[Notifications] => stdClass Object
(
[Severity] => ERROR
[Source] => prof
[Code] => 1000
[Message] => Authentication Failed
)
[TransactionDetail] => stdClass Object
(
[CustomerTransactionId] => *** WooCommerce Rate Request ***
)
[Version] => stdClass Object
(
[ServiceId] => crs
[Major] => 22
[Intermediate] => 0
[Minor] => 0
)
)
———
I just want to get this working at least before moving forward. Thanks for any help.
Hi,
You are getting Authentication Failed error .
[Severity] => ERROR
[Source] => prof
[Code] => 1000
[Message] => Authentication Failed
This error comes when you have incorrectly filled in the FedEx credentials.
Kindly fill these fields with correct values and you will not face the problem of rates again :
“FedEx Account Number”
“Fedex Meter Number”
“Web Services Key”
“Web Services Password”.
Also make sure that the checkbox “Production Key” is only checked when you are using live credentials and not test credentials.
Regards,
Just purchased the plug in and was hoping to utilize this feature only for our wholesale clients, is this possible? Retail clients pay a flat rate (free shipping over $50), so we only need this for the rates for wholesale clients, which is currently setup as a user role. Please advise if this is possible.
Thank you!
Hi Dexter,
Unfortunately, you cannot limit the FedEx services for particular users. However, if the products sold by each user is different, then you can assign a shipping class to those products and hide the FedEx services for Retail user products with the help of our Hide shipping methods addon.
Also can you please raise a ticket via PluginHive Support Portal and let us know your exact business scenario.
So that our team can analyze and help.
Regards,
Hi,
I have everything set up – test credentials validated, etc.
For some reason, when I try to “Create Shipment” on the orders page, I get the follow error:
Fedex Create Shipment Error:Severity: ERROR
Source: prof
Code: 1000
Message: Authentication Failed
Actually when I go into the order details page, without clicking anything in the page this error is at the top of the screen. Not sure what I’m doing wrong?
I’m wondering is you can force a freight price to show based on cart’s total weight, not by item’s total weight. For instance, we ship salon chairs. If a client orders 2 salon chairs, it is more economical to go ground. For 3 or more, freight– I’m getting ground to provide rates but not freight.
Please advise.
Hi Paula,
Ideally, freight should be charged if the sum total of weight is more than 150 lbs. If that is not happening, can you please approach our support team so that we can help you? Here is a link to raise an issue with support.
Hello,
I am looking to have the plugin autogenerate shipping labels and email them to our vendors. Is that possible with your plugin?
Hi Chris,
You can definitely auto-generate labels using the plugin. The settings to achieve this are present under Advanced label generation settings in the plugin settings page. However, we do have a feature to send the generated labels automatically to the customers. Unfortunately, there is no mechanism to send them to the individual vendors.
However, this seems to be an interesting case which we have kept for the future.
I’m new to this plugin. Can I be able to set shipping method for each product in a cart for the same order?
It’s because there’re many products in my online store but some of them can’t be shipped by FedEx, some of them must be shipped by FedEx Overnight. Therefore, if customer add to cart 1 of each, will your plugin works?
Your response is appreciated.
Hello it4craiglist,
Thank you for reaching to us.
It is possible to set up shipping methods for each product in your cart with the help of our premium version plugin and some code snippets.
One code snippet to assign a particular shipping method based on your product IDs: https://gist.github.com/PluginHive/2b1814a49763026f9067e57de6e22cdd
and another snippet to split the cart when both shipping class of products exist in the cart: https://gist.github.com/PluginHive/10f4cf617fdfb170c0b1c0f39b27d8e6
Hope this helps you.
Regards,
Veeresh
Team PluginHive
I found the rates quoted from this add-on are quite different than the rates that I quoted from the FedEx website using my company FedEx account. The only difference here is that I have to indicate that the value of the shipment is below $100 to get an automatic quote number, however, the FedEx PluginHive add-on does not ask me the value of the package and it may directly know that from my product price. Do you think that is the reason that the quoted prices are different?
Hello, I bought both the ups and fedex plugin. They are configurated and on real time with key activated, I selected the option for them to provide with my account negotiated rate (I am based in Europe) but they keep providing other rates, how can it be fixed?
Hi Nadia,
The plugin functions according to the rates fetched from FedEx/UPS APIs.
At first, you just need to go to the UPS/FedEx price calculators to check the rates. You can go to the UPS calculator from the below link – https://wwwapps.ups.com/ctc/request
Once you get the rates from the calculator, these rates should match with those from the plugin. If they are not matching, then kindly raise a ticket to support. They will immediately respond to your problem.
Hi Folks, I don’t know why the FedEx shipping method is not listed as an option in my cart page. I’ve tried almost everything and had not got it to work yet. Maybe is something I’m doing wrong but there’s no way to find out.
H Isaac,
The rates may not be coming because of several reasons.
To understand the reason, you would need to debug.
Don’t worry. It is simple.
– Enable debug option in plugin settings page and then place an order from the cart page. You will see a request and response info. Copy this in a text file and send it to us.
You would ideally understand the problem from the response.
If this, did not help you, kindly approach our support team.
They will guide you.